Wëllkomm op Shandong Qilu Industrial Co., Ltd

 Luxembourgish
 English
 Arabic
 Bulgarian
 Bengali
 Czech
Czech
 Danish
 German
 Greek
Greek
 Spanish
 Finnish
 French
 Hindi
Hindi
 Croatian
 Hungarian
 Indonesian
 Italian
 Japanese
 Korean
 Lithuanian
 Dutch
Dutch
 Norwegian
 Polish
 Portuguese
 Romanian
 Russian
 Slovak
 Slovenian
 Swedish
 Thai
Thai
 Turkish
 Ukrainian
 Vietnamese
 Tagalog
 Malay
Malay
 Estonian
 Catalan
 Latvian
 Urdu
Urdu
 Serbian
 Persian
 Swahili
 Albanian
 Armenian
 Icelandic
 Bosnian
 Afrikaans
Luxembourgish English
Arabic
Bulgarian
Bengali
Czech
Danish
German
Greek
Spanish
Finnish
French
Hindi
Croatian
Hungarian
Indonesian
Italian
Japanese
Korean
Lithuanian
Dutch
Norwegian
Polish
Portuguese
Romanian
Russian
Slovak
Slovenian
Swedish
Thai
Turkish
Ukrainian
Vietnamese
Tagalog
Malay
Estonian
Catalan
Latvian
Urdu
Serbian
Persian
Swahili
Albanian
Armenian
Icelandic
Bosnian
Afrikaans
Afrikaans
Luxembourgish English
Arabic
Bulgarian
Bengali
Czech
Danish
German
Greek
Spanish
Finnish
French
Hindi
Croatian
Hungarian
Indonesian
Italian
Japanese
Korean
Lithuanian
Dutch
Norwegian
Polish
Portuguese
Romanian
Russian
Slovak
Slovenian
Swedish
Thai
Turkish
Ukrainian
Vietnamese
Tagalog
Malay
Estonian
Catalan
Latvian
Urdu
Serbian
Persian
Swahili
Albanian
Armenian
Icelandic
Bosnian
Afrikaans
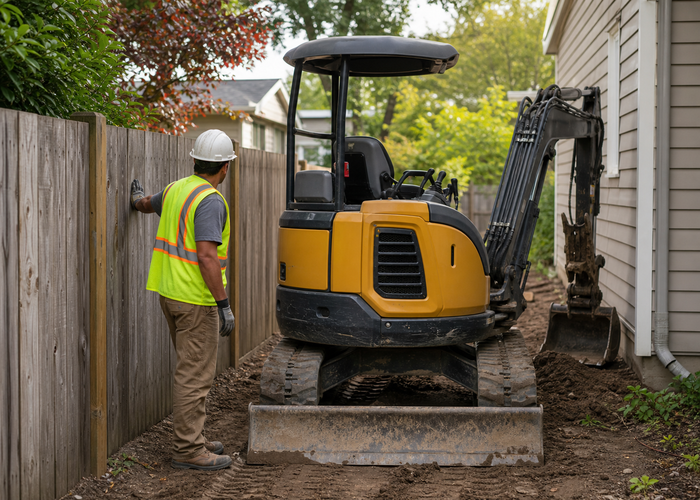
Mini Excavator Wéi Dir gemeinsame Digging Probleemer léist
Mini Excavator machines deliver impressive power and efficiency for challenging jobs. You may still encounter common digging problems, such as unpredictable soil conditions, water table complications, weather issues, or site access constraints. Spotting these challenges quickly lets you keep your project on track. Whether you use a rental or own your equipment, practical troubleshooting works across all models. Targeted fixes help you maintain reliable performance and minimize downtime.
Schlëssel Takeaways
- Identify signs of poor performance early, such as slow digging or overheating, to prevent costly repairs.
- Adjust bucket angle and power mode based on soil conditions to enhance digging efficiency.
- Choose the right bucket type for the job; toothed buckets excel in hard soil while standard buckets suit softer conditions.
- Maintain proper track and blade alignment to achieve straight, level trenches and reduce safety risks.
- Regularly inspect hydraulic fluid levels and hoses to avoid power loss and overheating during operation.
- Follow a daily maintenance checklist to catch small issues before they escalate into major problems.
- Calibrate control sensitivity and response time for precise digging and to minimize errors.
- Practice safe trenching techniques, including maintaining a safe distance from trench walls to prevent collapses.
Mini Excavator Problem Diagnosis
You rely on your Mini Excavator to deliver consistent results, but even the best machines can show signs of poor performance. These diagnostic steps apply to all major brands and rental models, so you can use them no matter which equipment you operate. Quick diagnosis helps you maximize uptime and keep your project moving.
Signs of Poor Performance
Recognizing early warning signs lets you address issues before they become costly. Common symptoms include:
- Struggles with normal soil, indicating a power shortage.
- Slower hydraulic function response when you move the joystick.
- Inability to multi-task hydraulic functions, causing the machine to slow down.
- Burning more fuel than usual, which signals underpowered operation.
- Overheating during normal work, showing the machine is pushed too hard.
Tip: Power deficiencies can reduce productivity by 30-40%. Inability to multi-task can lower efficiency by up to 45%. Underpowered excavators may increase fuel costs by 15-25%.
Slow Digging
If your Mini Excavator digs slowly, check for hydraulic delays or engine power loss. You may notice the bucket hesitating or failing to penetrate soil efficiently.
Jerky Movements
Jerky or uneven movements often point to hydraulic issues or control calibration problems. Watch for sudden stops or erratic bucket motion.
Finding the Cause
You can identify root causes by combining visual checks and attentive listening. Follow these steps for effective troubleshooting:
Visuell Kontrollen
- Inspect hydraulic oil level and quality.
- Look for leaks in oil pipes and hoses.
- Examine the bucket, tracks, and blade for wear or damage.
- Clean critical components to maintain functionality.
Listening for Noises
Unusual sounds, such as grinding or hissing, often signal mechanical or hydraulic problems. Listen during operation and idle periods.
| Problem Typ | Troubleshooting Schrëtt |
|---|---|
| Hydraulic system sluggish/inactive | 1. Check hydraulic oil level and quality. 2. Measure pump outlet pressure. 3. Inspect and clean hydraulic valve. 4. Check for oil pipe leaks. |
Real-World Case Studie
A contractor noticed his Mini Excavator struggled to dig and overheated during routine trenching. He followed these steps:
- Collected operator feedback about symptoms.
- Checked error codes using onboard diagnostics.
- Inspected hydraulic oil and found it low and dirty.
- Cleaned the hydraulic valve and replaced the oil.
- Scheduled regular maintenance and trained operators on best practices.
After these actions, the machine returned to normal performance, fuel costs dropped, and downtime decreased.
Note: Quick diagnosis leads to predictive maintenance, reducing unexpected failures and boosting productivity. For more tips, visit Equipment World or join discussions on Reddit’s Heavy Equipment forum.
Hard or Rocky Soil Solutions
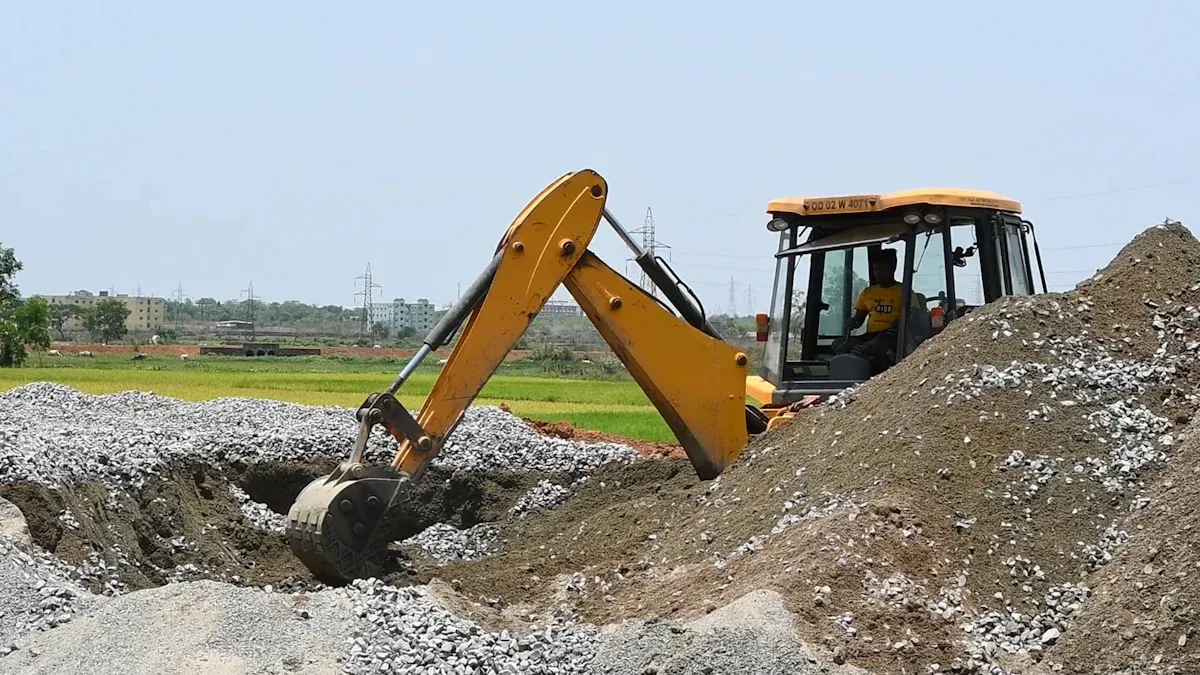
Digging in hard or rocky soil presents unique challenges. You need to adjust your Mini Excavator settings and choose the right attachments to maximize efficiency. These strategies help you tackle tough ground and keep your project moving.
Adjusting Settings
Eemer Wénkel
You can improve digging performance by adjusting the bucket angle. Start with a shallow angle to make light penetrations. This technique lets you test soil stability and reduces resistance. As you progress, increase the angle to lift and break up compacted material. Operators often find that changing the bucket stance during different digging stages helps manage resistance. When the bucket reaches its deepest point, resistance peaks. Adjusting the angle at this stage can make a significant difference.
Tip: Always keep the bucket teeth sharp. Dull teeth increase resistance and slow down your work.
Power Mode
Switching to a higher power mode boosts hydraulic force. You should use this setting when you encounter dense or rocky soil. Begin with standard power for initial penetration. If the Mini Excavator struggles, shift to maximum power. This adjustment helps the machine break through tough layers. Monitor engine temperature and fuel consumption during high-power operation. Overuse of maximum power can lead to overheating or increased fuel costs.
Wiel vun Uschlëss
Eemer Zorte
Selecting the right bucket is crucial for hard soil. Toothed buckets work best for compacted, rocky ground. Their design allows them to cut through dense material efficiently. Trenching buckets, which are long and narrow with sharp teeth, excel in gravel and compacted soil. Rock buckets offer heavy-duty performance for abrasive materials. They handle large rocks and dense earth, making them ideal for quarry or demolition work. Standard buckets suit softer soils but struggle in hard conditions.
| Uschloss Typ | Beschte Gebrauch Fall | Performance in Hard Soil | Haltbarkeet | Typical Projects |
|---|---|---|---|---|
| Toothed Bucket | Compacted, rocky soil | Héich | Mëttel | Allgemeng Ausgruewung |
| Trenching Eemer | Gravel, compacted soil | Héich | Mëttel | Utility Trenching |
| Rock Eemer | Large rocks, abrasive soil | Aussergewéinlech | Héich | Quarry, demolition |
| Standard Eemer | Soft soil | Niddereg | Niddereg | Landschaftsbau |
Note: Operator experience plays a major role in digging effectiveness. Skilled operators adjust bucket stance and technique to overcome resistance.
Using a Ripper
Ripper attachments break up compacted soil and hard surfaces. You should use a ripper before switching to a bucket in extremely tough conditions. The ripper loosens the ground, making it easier for the Mini Excavator to dig. This method reduces wear on buckets and improves overall efficiency. Rippers are especially useful in clay, rocky terrain, or when you need to break up old concrete.
Praktesch Fallstudie
A site manager faced a challenge with hard clay and scattered rocks during a utility trenching project. The Mini Excavator struggled with a standard bucket, causing delays and excessive fuel use. The manager took these steps:
- Stabilized the excavator and assessed soil conditions with light bucket penetrations.
- Switched to a toothed trenching bucket for improved cutting power.
- Increased power mode during dense sections, monitoring engine temperature.
- Used a ripper attachment to break up the hardest areas before digging.
- Smoothed trench edges and bottom with careful bucket angle adjustments.
The project finished ahead of schedule. Fuel costs dropped by 20%. Equipment wear decreased. The team shared their experience on Reddit’s Heavy Equipment forum and referenced best practices from Equipment World.
Callout: Matching the right attachment and settings to soil conditions saves time and money.
Fixing Uneven Trenches
Uneven trenches can slow your project and create safety risks. You can solve these problems by focusing on track and blade alignment, as well as refining your operator technique. These steps help you achieve straight, level trenches and reduce costly rework.
Track and Blade Alignment
Proper alignment keeps your Mini Excavator on the correct path. You should always check offset marks before starting. This habit ensures your machine follows the planned trench line. Adjusting the blade angle based on soil and terrain improves digging efficiency. You can avoid drifting off course and maintain trench quality.
Ausgläich
You need to level your tracks before each pass. Place the machine on stable ground and use the blade to create a flat surface. Lower the blade until it touches the ground, then adjust until the cab feels balanced. This step prevents the excavator from tilting, which can cause uneven trench depth.
Blade Positioun
Set the blade at the right angle for the soil type. In soft soil, keep the blade slightly raised to avoid digging too deep. For rocky or compacted ground, lower the blade for extra stability. Adjust the blade as you move along the trench to maintain a consistent depth.
Tip: Regularly check the blade for wear. A damaged blade can lead to uneven cuts and extra maintenance.
Operator Technique
Your technique plays a major role in trench quality. You should focus on bucket depth and trench wall consistency. Small adjustments make a big difference.
Bucket Depth
Maintain a steady bucket depth throughout the trench. Use the machine’s depth gauge if available. Avoid changing the bucket angle too often. A study from 2023 found that 68% of trenching accidents result from incorrect bucket angles. Each soil type requires a specific angle for safe and efficient digging. Practice keeping the bucket at the same depth for each pass.
Trench Walls
Keep a safe distance from trench walls. NIOSH recommends a distance equal to the trench depth plus two feet. This practice prevents collapses and keeps spoil piles away from the edge. OSHA standards require containment systems for spoil piles over five feet. Neglecting these rules can lead to trench failures.
Common Causes of Uneven Trenches:
- Incorrect bucket angles for soil type
- Poor track alignment
- Improper blade position
- Failing to maintain safe distance from trench walls
How Alignment Influences Trench Quality:
- Using offset marks keeps the excavator on track
- Adjusting blade angle improves efficiency and trench straightness
| Feeler Typ | Impact on Trench Quality | Léisung |
|---|---|---|
| Incorrect bucket angle | Uneven depth, accidents | Match angle to soil type |
| Poor track alignment | Crooked trench | Use offset marks, level tracks |
| Improper blade position | Inconsistent depth | Adjust blade for soil/terrain |
| Unsafe wall distance | Collapse risk | Maintain recommended spacing |
Case Study: Operator Technique and Alignment
A utility crew faced repeated issues with uneven trenches. The operator noticed the trench depth varied and the walls collapsed in some sections. The team reviewed their process:
- Checked track alignment using offset marks before each pass.
- Leveled the machine and adjusted the blade for clay soil.
- Set the bucket angle to match the soil type, reducing resistance.
- Maintained a safe distance from trench walls and managed spoil piles according to OSHA guidelines.
After these changes, trench quality improved. The crew reduced rework and avoided safety incidents. They shared their experience on Reddit’s Heavy Equipment forum and referenced best practices from OSHA’s trenching safety page.
Callout: Consistent alignment and careful technique help you create safe, straight trenches every time.
Mini Excavator Bucket Control
Modern Mini Excavator models offer advanced control features that help you achieve precise digging results. You can take advantage of these technologies to improve accuracy, reduce errors, and boost productivity on every job.
Calibrating Controls
Proper calibration of your controls ensures that your bucket responds exactly as you intend. You should focus on two main factors: sensitivity and response time.
Sensitivity
Control sensitivity determines how much movement the joystick translates into bucket action. High sensitivity allows for quick adjustments, but it can make fine movements challenging. Low sensitivity provides smoother control, which is ideal for detailed work.
| Sensitivity Level | Typesch Benotzen Fall | Bedreiwer Feedback | Error Rate (%) |
|---|---|---|---|
| Héich | Bulk excavation | Fast, less precise | 12 |
| Mëttel | General digging | Balanced | 7 |
| Niddereg | Finish grading | Smooth, precise | 3 |
Tip: Adjust sensitivity based on the task. Use lower sensitivity for finish work and higher settings for fast digging.
Äntwert Zäit
Response time measures how quickly the bucket reacts to your input. Fast response times help you work efficiently, but they can lead to overcorrection if not managed carefully. Slower response times allow for more deliberate movements.
| Response Time (ms) | Applikatioun | Operator Satisfaction (%) |
|---|---|---|
| 50 | Trenching | 82 |
| 100 | Gradéieren | 90 |
| 200 | Precision digging | 96 |
Note: Load-sensing technology and electro-hydraulic controls in modern machines enhance both sensitivity and response time, giving you smoother and more accurate operation.
Fine Movements
You need to master fine movements to achieve clean cuts and avoid mistakes. Advanced features and proven techniques make this easier.
Glat Operatioun
Smooth bucket operation depends on steady joystick input and the use of assistive technologies. Indicate systems provide real-time feedback, helping you set target depth and slope. This feedback reduces fatigue and increases accuracy. Swing Assist automates swing speed, allowing you to hit designated points consistently during repetitive tasks.
- Indicate: Real-time feedback for depth and slope.
- Swing Assist: Automated swing speed for consistent results.
Avoiding Overcorrection
Overcorrection can ruin trench walls or create uneven surfaces. E-Fence sets boundaries for your work area, preventing you from digging outside safe zones. Bucket Assist maintains the last known bucket angle, ensuring accurate cuts and a high-quality finish.
- E-Fence: Prevents over-excavation and improves safety.
- Bucket Assist: Maintains bucket angle for precise cutting.
Callout: Use these features to reduce errors and improve finish quality. Practice steady movements and rely on feedback systems for best results.
Case Study: Bucket Control Calibration and Fine Movements
A crew struggled with uneven trench bottoms and wasted time correcting mistakes. The operator recalibrated control sensitivity to a lower setting for finish grading. He used Indicate for real-time depth feedback and activated Bucket Assist to maintain a consistent angle. The team reduced error rates by 60% and completed the project ahead of schedule. For more tips, visit Equipment World or join discussions on Reddit’s Heavy Equipment forum.
Actionable Tip: Always test control settings before starting a new task. Adjust sensitivity and response time to match the job requirements.
Hydraulic and Power Issues
Hydraulic and power issues can slow down your Mini Excavator and lead to costly repairs. You need to monitor fluid levels and inspect hoses and connections regularly. These steps help you maintain strong performance and avoid unexpected breakdowns.
Flësseg Niveauen
Hydraulic fluid powers the movement of your machine. Low or contaminated fluid can cause sluggish operation, overheating, and leaks. You should check fluid levels every day before starting work.
Inspecting
Start by parking your Mini Excavator on level ground. Lower the bucket and set controls to neutral. Shut off the engine and remove the ignition key. Look at the hydraulic fluid sight gauge or dipstick. The fluid should reach the recommended mark and appear clean. Cloudy or dark fluid signals contamination. Regular checks of fluid levels support efficient operation and can extend the life of your machine by up to 25%. Daily inspections help prevent breakdowns and keep your work smooth.
Refilling
If the fluid is low, refill it with the correct hydraulic oil. Use a clean funnel and avoid introducing dirt or debris. Fill slowly and check the level often. Do not overfill, as this can cause pressure problems. After refilling, run the engine for a few minutes and recheck the level. Proper fluid levels help prevent overheating and maintain power.
Tip: Always use the manufacturer’s recommended hydraulic oil. Contaminants in the fluid can damage seals and pumps.
Hoses and Connections
Hoses and connections carry hydraulic fluid throughout your Mini Excavator. Worn or loose hoses can lead to leaks, reduced power, and overheating. You should inspect these parts regularly and address any issues right away.
Tightening
Begin by inspecting the entire machine for missing parts, loose clamps, or hoses that rub against each other. Tighten any loose connections using the correct tools. Make sure not to bend or apply pressure to pipelines. Secure clamps and supports to prevent hoses from moving during operation.
Replacing
Replace any hoses that show signs of wear, cracks, or leaks. Shut off the engine and relieve hydraulic pressure before removing old hoses. Install new hoses with proper fittings and check for leaks after starting the engine. Worn seals or cracked hoses often cause hydraulic fluid leaks and reduced power.
Common Hydraulic and Power Issues in Mini Excavators:
| Erausginn | Frequenz (%) | Typical Cause |
|---|---|---|
| Hydraulic fluid leaks | 38 | Worn seals, cracked hoses |
| Reduced power/sluggishness | 27 | Low fluid, blocked hoses, worn pump |
| Iwwerhëtzung | 22 | Heavy use, lack of oil cooler |
| Kontaminéiert Flëssegkeet | 13 | Poor maintenance, dirty environment |
Note: Blocked or restricted hoses, incorrect pressure relief valve settings, and continuous heavy use can also lead to performance problems.
Case Study: Solving Hydraulic and Power Issues
A crew noticed their Mini Excavator lost power and overheated during a long trenching job. They followed these steps:
- Parked the machine safely and checked fluid levels. The hydraulic oil was low and dark.
- Refilled with clean hydraulic oil and ran the engine to circulate the fluid.
- Inspected hoses and found a cracked line near the pump.
- Replaced the damaged hose and tightened all connections.
- Monitored the machine during operation. Power returned to normal and overheating stopped.
The team reduced downtime and improved efficiency. They shared their experience on Reddit’s Heavy Equipment forum and learned more about hydraulic maintenance from Equipment World.
Callout: Regular inspections and quick repairs keep your Mini Excavator running strong and safe.
Präventiv Ënnerhalt

You can keep your Mini Excavator running smoothly and avoid costly downtime by following a solid preventative maintenance routine. Simple daily checks and smart habits help you catch small issues before they become big problems.
Deeglech Kontrollen
Inspection List
Start each day with a thorough inspection. This routine helps you spot wear, leaks, or damage early. Use this checklist to guide your daily walk-around:
| Daily Check | Beschreiwung |
|---|---|
| Inspect the Undercarriage | Look for signs of damage or excessive wear on tracks and rollers. Clean debris to prevent buildup. |
| Kontrolléiert Flëssegkeetsniveauen | Ensure hydraulic oil, engine oil, and coolant are at appropriate levels. Top up if necessary. |
| Examine the Attachments | Kontrolléiert no Rëss, Verschleiung oder Schued op Uschlëss. Vergewëssert Iech datt se sécher befestigt sinn. |
| Test d'Kontrollen | Run d'Maschinn a kontrolléiert all Kontrollfunktiounen fir Reaktiounsfäegkeet an ongewéinlech Geräischer. |
| Iwwerwaachen d'Gauges | Vergewëssert Iech datt all Gauges a Warnluuchten richteg funktionnéieren a kucken no ongewéinleche Liesungen. |
Tipp: Eng deeglech Inspektioun dauert manner wéi 10 Minutten awer kann Stonnen Ausdauer spueren.
Service Intervalle
Dir sollt den Ënnerhaltplang an Ärem Operatiounshandbuch verfollegen. Déi meescht Experten recommandéieren dës Serviceintervaller:
| Aufgab | Intervall | Impakt op Longevity (%) |
|---|---|---|
| Motor Ueleg Ännerung | All 250 Stonnen | +20 |
| Hydraulesch Filter Ersatz | All 500 Stonnen | +18 |
| Streck Spannung Upassung | All 100 Stonnen | +15 |
| Loftfilter Botzen | All 100 Stonnen | +12 |
| Brennstoff Filter Ersatz | All 250 Stonnen | +10 |
Regelméisseg Service an dësen Intervalle kann d'Maschinneliewen bis zu 25% verlängeren. Fir méi Detailer, kuckt Equipment World’s Maintenance Guiden oder maacht mat Diskussiounen iwwer Reddit’s Heavy Equipment forum.
Beschte Praktiken
Waarm-up
Loosst Är Maschinn ëmmer virum schwéiere Gebrauch opwiermen. Start de Motor a loosst et e puer Minutten idle. Dëse Schrëtt erlaabt Ueleg zirkuléieren an Deeler fir d'Betribstemperatur z'erreechen. Kale Start kann extra Verschleiung op hydraulesch Systemer a Motore verursaachen.
Feeler vermeiden
Dir kënnt déi meescht Decompte verhënneren andeems Dir dës bescht Praktiken verfollegt:
- Maacht reegelméisseg Inspektiounen fir Verschleiung fréi z'entdecken.
- Ersetzen verschleeft Deeler prompt fir weider Schued ze vermeiden.
- Ännert Ueleg a këmmert sech ëm den hydraulesche System op Zäitplang.
- Halt Filtere propper fir optimal Leeschtung.
- Vermeit d'Maschinn iwwerlaascht fir Stress op Komponenten ze reduzéieren.
- Fettlager a Pins wéi recommandéiert.
- Drain de Waasserseparator fir Brennstoffkontaminatioun ze vermeiden.
- Erhalen adäquate Streck Spannungen.
- Dokument all Ënnerhalt Aktivitéiten Service Geschicht ze Streck.
Notiz: Konsequent Ënnerhaltroutinen hëllefen Iech onerwaart Feeler ze vermeiden an Äre Mini Excavator an Top Zoustand ze halen.
Fallstudie: Präventiv Ënnerhalt an Aktioun
Eng Konstruktioun Crew huet eng strikt alldeeglech a wëchentlech Ënnerhalt Routine ugeholl. All Moien huet de Bedreiwer eng Checklëscht ofgeschloss déi Undercarriage, Flëssegkeeten an Uschlëss deckt. D'Team huet Ueleg a Filtere mat recommandéierten Intervalle geännert an e Logbuch vun all Ënnerhalt gehal. Iwwer sechs Méint huet d'Maschinn null ongeplangten Decompte erlieft. Servicekäschte sinn ëm 30% erofgaang, an d'Produktivitéit ass eropgaang. D'Crew huet hir Routine op Industrieforen gedeelt an anerer encouragéiert ähnlech Zäitplang ze verfollegen.
Callout: Präventiv Ënnerhalt ass Äert bescht Tool fir d'Uptime ze maximéieren an Är Investitioun ze schützen.
Fir méi Tipps a Gemeinschaftsberodung, besicht Equipment World oder maacht mat beim Gespréich un Reddit’s Heavy Equipment forum.
Troubleshooting Schrëtt
Schrëtt-vun-Schrëtt Guide
Dir kënnt déi meescht Mini Baggerproblemer léisen andeems Dir e strukturéierte Problembehandlungsprozess verfollegt. Start mat enger visueller Inspektioun. Sich no Leckage, verschleeft Schlauch oder beschiedegt Uschlëss. Kontrolléiert Flëssegkeetsniveauen a iwwerwaacht Gauges fir anormal Liesungen. Lauschtert no ongewéinleche Geräischer während der Operatioun. Test all Kontrollen fir d'Reaktiounsfäegkeet ze bestätegen. Wann Dir reduzéiert Kraaft oder ruckeleg Beweegunge bemierkt, kontrolléiert den hydraulesche System a Verbindungen. Spannt d'hydraulesch Armaturen an ersetzt beschiedegt Schlauch. Propper Filteren a kontrolléiert Blockaden. Dokument all Schrëtt fir Fortschrëtter ze verfolgen an Musteren z'identifizéieren.
Schnell Referenz
Benotzt dëse schnelle Referenzguide fir gemeinsam Themen unzegoen:
- Visuell Inspektioun
- Kontrolléiert fir Leckage, Rëss a lockeren Deeler.
- Flësseg Niveauen
- Kontrolléiert hydraulesch Ueleg, Motoröl a Kältemëttel.
- Kontroll Test
- Bedreiwen all Funktiounen a lauschtert no anormalen Kläng.
- Unhang Check
- Ënnersicht Eemer, Blades a Rippers fir ze droen.
- Hydraulesch System
- Spann Verbindungen an ersetzen verschleeft Schlauch.
- Filter Ënnerhalt
- Propper oder ersetzt Filtere wéi néideg.
- Track and Blade Alignment
- Niveau Bunnen an ajustéieren Blade Positioun.
Tipp: Halt en deegleche Logbuch vun Inspektiounen a Reparaturen. Dës Gewunnecht hëlleft Iech widderhuelend Probleemer ze gesinn an Ënnerhalt ze plangen.
| Gemeinsam Ausgab | Quick Fix | Wéini rufft e Pro |
|---|---|---|
| Hydraulesch Leck | Tighten/ersetzen Schlauch | Persistent Leckage |
| Ruckbewegungen | Kalibréieren Kontrollen | Keng Verbesserung |
| Luesen Ausgruewen | Check Flëssegket/Filter | Motor/hydraulesch Echec |
| Ongläiche Trench | Upassung Ausriichtung | Strukturell Schued |
| Iwwerhëtzung | Refill Flëssegkeeten/propper | Widderholl Iwwerhëtzung |
Wéini rufft e Pro
Dir sollt professionell Hëllef sichen wann d'Basis Troubleshooting d'Thema net léist. Regelméisseg Inspektiounen hëllefen Iech siichtbar Schued fréi ze fangen. Kuckt no Unzeeche vu Verschleiung déi suggeréieren datt Reparaturen gebraucht ginn. Monitor fir operationell Ineffizienz, wéi persistent Kraaftverloscht oder widderholl Decompte. Wann Dir eng vun dëse Problemer bemierkt, kontaktéiert en zertifizéierten Techniker.
- Siichtbare Schued no Inspektioun
- Unzeeche vun exzessiv Verschleiung
- Persistent operationell Ineffizienz
- Troubleshooting klappt d'Performance net ze restauréieren
- Ongewéinlech Geräischer oder Warnluuchten bleiwen no Reparaturen
Bemierkung: Richteg Ënnerhalt verbessert d'Effizienz a verlängert d'Liewen vun Ärem Mini Bagger. Regelméisseg Kontrollen hëllefen Decompte ze vermeiden an Reparaturkäschten ze reduzéieren. E puer Themen erfuerderen Expert Reparatur, och mat Routine Ënnerhalt.
Fallstudie: Troubleshooting an Aktioun
Eng Crew huet gemierkt datt hire Mini Bagger Kraaft verluer huet a ruckeleg Beweegunge während enger Trenching Aarbecht produzéiert huet. De Bedreiwer huet eng visuell Inspektioun gemaach an e verschleeften hydraulesche Schlauch fonnt. Hien huet de Schlauch ersat an d'Flëssegkeetsniveauen iwwerpréift. De Problem huet bestoe bliwwen, sou datt hien d'Kontrollen kalibréiert an d'Filtere gebotzt huet. No dëse Schrëtt huet d'Maschinn glat operéiert. D'Team huet de Prozess dokumentéiert an hir Erfahrung gedeelt Reddit’s Heavy Equipment forum a geléiert méi aus Equipment World.
Callout: Systematesch Troubleshooting spuert Zäit a Suen. Wann d'Problemer weidergoen, rufft e Profi fir deier Reparaturen ze vermeiden.
Dir kënnt déi meescht Mini Baggergraverproblemer léisen andeems Dir e klore Prozess verfollegt. Start mat alldeeglechen Inspektiounen, kontrolléiert Flëssegkeetsniveauen, a sicht Leckage oder verschleeft Deeler. Regelméisseg Ënnerhalt, inklusiv Filterännerungen a schmieren Pivotpunkten, hält Är Maschinn méi laang. Bedreiwer Training a sécher Techniken verbesseren d'Resultater a reduzéieren Feeler. Benotzt ergonomesch Kontrollen a reagéiert séier op Themen fir méi glat Ausgruewen. Schéckt Är eege Troubleshooting Tipps oder Froen ënner der Éier Erfahrung hëlleft anerer Erfolleg.
FAQ
Wat sollt Dir maachen wann Äre Mini Bagger d'Gravenkraaft verléiert?
Kontrolléiert hydraulesch Flëssegkeetsniveauen als éischt. Kontrolléiert Schlauch fir Leckage oder Schued. Propper Filteren a suergen datt d'Eemerzänn scharf sinn. Wann de Problem weider geet, konsultéiert en Techniker.
Wéi kënnt Dir ongläiche Trenches verhënneren?
Niveau d'Gleiser virun all Pass. Upass d'Blade Positioun fir Stabilitéit. Benotzt d'Tiefemeter fir den Eemer op enger konsequenter Déift ze halen. Praxis stänneg Beweegunge fir riicht Trenchmaueren.
Firwat iwwerhëtzt Äre Mini Bagger beim Ausgruewen?
Niddereg hydraulesch Flëssegkeet oder blockéiert Filtere verursaachen dacks Iwwerhëtzung. Botzen de Killsystem a fëllen Flëssegkeeten. Vermeit d'Maschinn mat maximaler Kraaft fir laang Perioden ze lafen.
Wat ass de beschte Wee fir Fiels oder kompakt Buedem ze handhaben?
Wiesselt op en Zänn oder Fielseemer. Benotzt e Ripper-Befestigung fir haart Buedem opzebriechen. Erhéijung Kraaftmodus nëmmen wann néideg. Monitor Motortemperatur während schwéier graven.
Wéi oft sollt Dir hydraulesch Schlauch a Verbindungen iwwerpréiwen?
Kontrolléiert Schlauch a Verbindungen all Dag ier Dir mat der Aarbecht ufänkt. Kuckt no Rëss, Leckage oder lockeren Armaturen. Ersetzen beschiedegt Schlauch direkt fir Pann ze vermeiden.
Wat sinn Unzeeche vu Kontrollkalibratiounsprobleemer?
Dir kënnt ruckeleg Eemerbewegungen oder lues Äntwertzäiten bemierken. Test d'Kontrollen fir Genauegkeet. Upassung Sensibilitéit Astellunge Är Aufgab ze Match. Kalibréieren Kontrollen regelméisseg fir glat Operatioun.
Wéi behält Dir sécher Trenchmaueren?
Halt eng sécher Distanz vun Trenchkanten. Plaz Spuerstapel ewech vum Trench. Benotzt Befestigungssystemer fir déif Trenches. Follegt Sécherheetsrichtlinnen fir Zesummebroch ze vermeiden.
Wéini sollt Dir e Profi fir Reparaturen uruffen?
Rufft en Techniker wann Dir persistent Leckage, widderholl Kraaftverloscht oder ongewéinlech Geräischer no Basis Troubleshooting gesitt. Professionell Hëllef garantéiert sécher an zouverlässeg Reparaturen.