E-mail: [email protected] Whatsapp: +8618266768780

E-mail: [email protected] Whatsapp: +8618266768780

Choosing the right hydraulic thumb for your mini excavator can make landscaping and material-handling work faster, safer, and cleaner—especially when you’re setting rocks, moving logs, or pinching brush without scuffing finished surfaces. This guide gives you a proven, step-by-step workflow to size and spec a thumb, verify fit with your bucket and coupler, and plan hydraulics and hose routing so you get precise control without surprises.
A hydraulic thumb adds a controllable “clamp” that works against the bucket, letting you grip and place irregular materials with finesse. The two keys to predictable control are:
For context on the underlying mechanics, see the fundamentals of fluid power in the overview of hydraulics, the role of hydraulic cylinders in force and motion, and the general layout of an escavadora boom/stick arrangement. These references explain how pressure and flow translate to clamp force and speed.

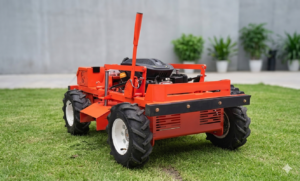
The diagram above shows five critical measurements you’ll use in the workflow below: stick pivot center, bucket main pin center, tooth-tip arc (bucket tip radius), added quick-coupler stack height, and the matching thumb tine length along that arc.
Use this single-page checklist to collect the data you’ll give your attachment supplier and to verify your fit before ordering.
| Item | What to record | Por que isso importa |
|---|---|---|
| Machine/Weight Class | e.g., 1–2 t, 3–4 t, 5–6 t | Guides typical PSI/GPM and thumb size ranges |
| Sistema hidráulico auxiliar | Operating pressure (psi) and flow (gpm); single vs. two-way | Ensures cylinder/valving compatibility and speed |
| Engate rápido | Yes/No; model/type; stack height (mm/in) | Changes bucket arc; may require longer thumb body |
| Bucket Tip Radius | Center-to-tip arc length (mm/in) | Primary driver of thumb length selection |
| Dentes de balde | Tooth count and spacing; bucket width | Aligns tine count/spacing and thumb width to mesh and cover |
| Desired Rotation | Main-pin vs. progressive link | Reach and precision vs. simplicity and cost |
| Thumb Build | Tine profile (curved/straight), serrations; abrasion-resistant steel; hardened bushings/pins; replaceable wear pads; corrosion protection | Determines grip, durability, and long-term serviceability |
| Hose Routing Plan | Port orientation, guards, clamp points, slack | Prevents pinching, twisting, or abrasion |
Tip: While measuring tooth spacing and bucket details, you can also review compatible tooth profiles and widths on your bucket supplier’s page, such as the Excavator Bucket category here: excavator bucket.
Follow these steps to pick the right hydraulic thumb for mini excavator work where precision and surface protection matter.
Short worked example:
| Tarefa | Tine profile | Serrations | Rotation type | Thumb width |
|---|---|---|---|---|
| Rocks (irregular shapes) | Curved, multi-tine | Agressivo | Progressive link preferred; main-pin acceptable | Medium–wide for coverage |
| Logs | Curved, multi-tine | Moderate–aggressive | Either; progressive improves reach around piles | Medium–wide for stability |
| Brush | Curved or straight; multi-tine | Moderado | Either; prioritize speed/visibility | Medium to match bucket width |
| Precision near finished surfaces | Straight; 2–3 tines | Light–moderate | Main-pin often sufficient for visibility | Narrow–medium to reduce overhang |
Build and performance notes you should confirm before purchase:
Pro tip: Think of tine serrations like shoe tread—more bite helps with slippery, irregular materials, but too much can scuff or mar delicate surfaces if you’re not careful with control.
Operating pressure determines clamp force; flow governs speed and responsiveness. Minis commonly run in these general bands (always confirm in your operator’s manual):
| Mini excavator class | Typical auxiliary pressure | Typical auxiliary flow |
|---|---|---|
| 1–2 t | ~3,000 psi | ~5–17 gpm |
| 3–4 t | ~3,500–4,100 psi | ~7–17 gpm |
| 5–6 t | ~3,600–4,100 psi | up to ~22 gpm |
Simple visual snapshot (illustrative):
Aux Pressure (psi)
1–2 t  | █████████████ (≈3,000)
3–4 t  | ████████████████ (≈3,500–4,100)
5–6 t  | ████████████████ (≈3,600–4,100)

Aux Flow (gpm)
1–2 t  | ███████ (≈5–17)
3–4 t  | ████████ (≈7–17)
5–6 t  | ███████████ (up to ≈22)
Hydraulic planning checklist:
For the physics behind fluid power and force/area relationships, see hydraulics e hydraulic cylinder. Always defer to your OEM operator’s and service manuals for final settings and procedures.
A coupler changes geometry. Before you buy:
Thumbs are versatile, but dedicated tools sometimes win:
If your bucket is due for renewal, ensure tooth style/spacing will mesh with your planned thumb—review current options on the excavator bucket página.
Let’s walk the workflow using publicly available specs and a simple checklist. Suppose you run a 3–4 t mini excavator sourced from Maquinário Qilu:
This mirrors the checklist-driven process you can reuse on any comparable mini.
| Sintoma | Likely cause | Fix |
|---|---|---|
| Mushrooms/wear at pins or cylinder eyes | Overpressure, side loading, poor lubrication | Verify relief settings, improve technique (let the thumb yield to the bucket), lubricate on schedule |
| Thumb won’t fully close or opens slowly | Flow restriction, diverter valve setting, kinked hose | Check valve orientation, inspect hoses for kinks, confirm two-way flow mode |
| Poor grip or uneven bite | Tine/teeth misalignment, wrong tine spacing, off-center install | Re-center per install guide; select tine spacing to match bucket teeth |
| Boom or ground contact during rotation | Coupler stack height ignored; incorrect thumb length | Re-measure effective radius; specify coupler use; adjust thumb length or stops |
| Cracks at body or welds | Side loading, back-dragging, misuse as a pry bar | Adjust technique; inspect and repair; ensure steel spec/design suits application |
Basic care schedule: Wipe couplers before connection, grease per the attachment’s schedule, inspect hoses and guards daily, and check pin/bushing play weekly. Periodically verify fastener torque and any lock-back brackets. For general lifting safety and job planning near excavations, review OSHA’s trenching and excavation checks e trenching/excavation resources.
For foundational context on how pressure and flow create motion, see hydraulics e hydraulic cylinder. For safe job planning, refer to OSHA’s trenching and excavation resources.
SEO note: This guide focused on how to select a hydraulic thumb for mini excavator tasks in landscaping and material handling, including geometry, rotation, hydraulics, and safety considerations to help you make an informed, on-site decision.


-1.png)