Ласкаво просимо до 1ТП1Т

 Ukrainian
 English
 Arabic
 Bulgarian
 Bengali
 Czech
Czech
 Danish
 German
 Greek
Greek
 Spanish
 Finnish
 French
 Hindi
Hindi
 Croatian
 Hungarian
 Indonesian
 Italian
 Japanese
 Korean
 Lithuanian
 Dutch
Dutch
 Norwegian
 Polish
 Portuguese
 Romanian
 Russian
 Slovak
 Slovenian
 Swedish
 Thai
Thai
 Turkish
 Vietnamese
 Tagalog
 Malay
Malay
 Estonian
 Catalan
 Latvian
 Urdu
Urdu
 Serbian
 Persian
 Swahili
 Albanian
 Armenian
 Icelandic
 Bosnian
 Luxembourgish
 Afrikaans
Ukrainian English
Arabic
Bulgarian
Bengali
Czech
Danish
German
Greek
Spanish
Finnish
French
Hindi
Croatian
Hungarian
Indonesian
Italian
Japanese
Korean
Lithuanian
Dutch
Norwegian
Polish
Portuguese
Romanian
Russian
Slovak
Slovenian
Swedish
Thai
Turkish
Vietnamese
Tagalog
Malay
Estonian
Catalan
Latvian
Urdu
Serbian
Persian
Swahili
Albanian
Armenian
Icelandic
Bosnian
Luxembourgish
Afrikaans
Afrikaans
Ukrainian English
Arabic
Bulgarian
Bengali
Czech
Danish
German
Greek
Spanish
Finnish
French
Hindi
Croatian
Hungarian
Indonesian
Italian
Japanese
Korean
Lithuanian
Dutch
Norwegian
Polish
Portuguese
Romanian
Russian
Slovak
Slovenian
Swedish
Thai
Turkish
Vietnamese
Tagalog
Malay
Estonian
Catalan
Latvian
Urdu
Serbian
Persian
Swahili
Albanian
Armenian
Icelandic
Bosnian
Luxembourgish
Afrikaans

Як спланувати та викопати французький дренаж для максимальної ефективності
Ви досягаєте максимальної ефективності, коли плануєте та копаєте французький дренаж, узгоджуючи його глибину та дизайн із конкретним дренажним питанням Виберіть правильну глибину траншеї, ширину та нахил для свого двору чи фундамент икористовуйте належний розмір гравію та регулярно перевіряйте систем агато власників будинків допускають помилки, такі як розміщення дренажу занадто близько до фундаменту, використання неправильного нахилу та нехтування технічним обслуговування ретельне планування та увага до деталей допомагають запобігти проблемам з водою та забезпечити тривалі результати.
Ключові виноси
- Визначте проблему дренажу перед копанням Розуміння проблеми допомагає спланувати найефективніше рішення.
- Виберіть правильну глибину траншеї, виходячи з ваших потреб дренаж Більшість ярдів вимагають глибини від 18 до 24 дюймів для ефективного дренажу.
- Підтримуйте постійний нахил принаймні 1% у вашій траншеї Цей нахил забезпечує відтік води з вашого будинку та запобігає об'єднанню.
- Використовувати якісні матеріали як перфоровані труби і фільтрувальна тканина Ці матеріали покращують дренаж і запобігають засмічення.
- Регулярно оглядати та підтримувати ваш французький сто Очищення решіток і перевірка на наявність засмічень забезпечує ефективність системи.
- Перевірте місцеві будівельні норми та дозволи перед початком роботи Цей крок допоможе вам уникнути штрафів і гарантує дотримання правил.
- Ретельно плануйте місце скидання Направляйте воду в безпечні зони, щоб запобігти затопленню сусідніх об’єктів.
- Перевірте свою систему після встановленн алийте воду в траншею, щоб вона правильно текла, і за потреби внесіть корективи.
Визначте свою проблему дренажу
Перш ніж почати копати, потрібно розібратися в точній проблемі дренажу у вашому двор ожен вид водного питання вимагає різного підходу, тому визначення джерела допомагає спланувати найбільш ефективне рішення.
Загальні проблеми
Багато домовласників стикаються з подібними проблемами дренаж и можете помітити одну або декілька з цих ознак:
- Стояча вода після дощу
- Затоплений двір або болотисті умови
- Засмічені жолоби або водостічні труби
- Ерозія ґрунтів уздовж схилів
- Тріщини у вашому фундаменті
- Пліснява або цвіль біля стін
- Перенасичення ґрунту
- Уламки накопичуються в низьких місцях
- Затоплені підвали
Якщо ви бачите ці проблеми, ви не самотні За даними The Spruce, стояча вода та затоплення підвалу є одними з найчастіших скарг власників будинків.
Поверхневі Води
Проблеми з поверхневою водою часто з'являються у вигляді калюж або мокрих плям на вашому газон е ділянки можуть вбити траву і залучити комарі и можете побачити, як вода збирається біля внутрішніх двориків, доріжок або під'їзних дорі кщо у вас похилий двір, вода може кинутися вниз і збиратися в найнижчій точц ля отримання додаткових порад, перевірте R/Озеленення Reddit спільнота, де власники будинків діляться реальними дренажними рішеннями.
Фонд Вода
Вода, яка збирається біля вашого фундаменту, може спричинити тріщини та довгострокові пошкодженн и можете помітити вологі плями на стінах підвалу або плями від води вздовж основи вашого будинк акий тип проблеми часто виникає через погану оцінку або засмічені водостічні водостічні труб оректування води фундаменту на ранній стадії допомагає запобігти дорогому ремонту.
Затоплення підвалу
Підтоплення підвалу зазвичай відбувається після сильного дощ ода просочується крізь стіни або підлогу, пошкоджуючи речі та створюючи ризики цвіл кщо ви відчуваєте повторне затоплення, вам потрібен цілеспрямований план дренаж агато домовласників встановлюють французький дренаж, щоб перенаправити воду від фундаменту та зберегти підвали сухими.
Оцінка Вашого Двору
Ви можете діагностувати проблему дренажу за допомогою кількох простих тестів:
- Забийте кілок біля свого фундаменту.
- Відміряйте 10 футів і поставте другий стовп.
- Зав'яжіть нитку між кілками на рівні землі.
- Використовуйте рівень рядка, щоб зробити рівень рядка, а потім виміряйте падіння на другій ставці.
Цей тест показує, як ваш двір схиляє Правильний схил переміщує воду від вашого будинку Ви також можете перевірити дренаж ґрунту, викопавши яму глибиною не менше 12 дюймів і заповнивши її вод озвольте їй зливати, наповнювати та виміряйте, як швидко падає вода за 15 хвилин. Помножте краплю на чотири, щоб знайти погодинну швидкість дренаж оповільнений дренаж означає, що вам можуть знадобитися додаткові рішення.
Порада: Прогуляйтеся по своєму двору після сильного дощу Робіть нотатки або фотографії вологих місць і ерозі е допоможе вам спланувати, де встановити дренажні елементи.
Чому ідентифікація має значення
Вам потрібно узгодити ваше рішення дренажу з проблемо ретельний аналіз ділянки допоможе вам вибрати найкраще розташування, розмір і місце скидання для вашого французького сток Розуміючи унікальні проблеми вашого двору, ви гарантуєте, що ваша система працює ефективно та служить рокам алежна ідентифікація економить ваш час, гроші та розчарування в довгостроковій перспективі.
Французький посібник із глибини стоку
Глибина для дренажу двору
Вам потрібно виберіть правильну глибину траншеї щоб вирішити проблеми дренажу дворик ільшість домовласників виявляють, що траншея між 18 і 24 дюймами глибиною добре працює для стандартного дренажу дворик кщо вам потрібно тільки збирати поверхневі води, більш дрібна траншея, що викопується приблизно від 12 до 18 дюймів, часто виконує робот оли у вашому дворі є часті пудлінгування, ущільнений ґрунт або водостічні труби, які впадають у проблемні зони, вам слід розглянути можливість копати глибше.
Ось коротка довідкова таблиця для поширених сценаріїв:
| Сценарій | Рекомендована глибина |
|---|---|
| Збір поверхневих вод | 12 сов18 дюймів |
| Стандартний дренаж двору | 18 сорти 24 дюйма |
| Розширена глибина для підвалів | 24 сорти 36+ дюймів |
Наприклад, якщо ви помітили, що вода накопичується після кожного зливи, траншея глибиною не менше 18 дюймів допомагає ефективно відводити вод у дворі з важким глинистим ґрунтом, можливо, вам доведеться піти глибше, щоб досягти більш проникних шарі Завжди перевіряйте наявність підземних комунікацій, перш ніж копати.
Порада: Збільште глибину траншеї, якщо у вашому дворі є низькі плями, ущільнений ґрунт або якщо водостічні труби скидаються безпосередньо в проблемну зону.
Глибина для захисту фундаменту
Захист вашого фундаменту від проникнення води вимагає іншого підход и потребуєте a глибше французький дренаж щоб перехопити воду, перш ніж вона досягне вашого підвалу або проповзти простор ільшість експертів рекомендують глибину траншеї між 2 і 6 футів для захисту фундамент а ділянках з сильною підвал затоплення, траншеї може знадобитися досягти 6 до 8 футів.
Тип ґрунту та клімат також впливають на ваше рішенн регіонах з морозом вам може знадобитися копати нижче лінії морозу, щоб запобігти підйому Наприклад, у холоднішому кліматі траншеї часто досягають глибини від 3 до 4 метрів (приблизно від 10 до 13 футів), але більшість житлових проектів залишаються в межах від 2 до 6 футі кщо ваш ґрунт важкий глиною, прагніть принаймні 3 фути, щоб забезпечити належний дренаж.
Примітка: Завжди вбудовуйте траншею принаймні від 6 до 12 дюймів у підстилаючі надра для стабільності, особливо якщо у вас є велика глина.
Ширина та нахил
Ширина і нахил вашого французького стоку відіграють велику роль в його ефективніст ирина траншеї від 6 до 12 дюймів дозволяє достатньо місця для гравію і дренажної труб вужчі траншеї можуть засмічуватися легше, тоді як більш широкі траншеї обробляють більше води, але вимагають більше копання.
Ось таблиця, яка допоможе вам вибрати:
| Глибина Вимога | Рекомендація щодо ширини |
|---|---|
| 12 дюймів (поверхневі води) | 6 сє12 дюймів |
| 18 tes24 дюймів (випуски по двору) | 6 сє12 дюймів |
| 2 shave6 feet (фундамент) | 8 сверху12дюйм |
Нахил так само важливо Вам потрібен мінімальний нахил 1% обхват, що означає падіння 1 дюйм на кожні 10 футів траншеї Цей пологий схил підтримує рух води, не викликаючи ерозії або пошкодження труб.
| Вимога нахилу | Опис |
|---|---|
| Мінімальний нахил | 1% (1 дюйм падіння на 10 футів довжини) |
Якщо ваш двір плоский, використовуйте рівень струни, щоб встановити правильний нахил перед копанням У похилих дворах дотримуйтесь природного рівня, але переконайтеся, що нахил залишається постійним уздовж траншеї.
Порада: Добре спроектований французький дренаж з правильною шириною та нахилом запобігає стоячій воді та захищає фундамент вашого будинку роками.
Коригування ґрунту та ландшафту
Вам потрібно узгодити дизайн французького стоку з типом ґрунту та особливостями ландшафту вашого двор офтальм впливає на те, як рухається вода та наскільки стабільною залишається ваша траншея з часом Ви можете уникнути типових помилок, розуміючи ці відмінності, перш ніж копати.
Почніть з тестування вашого ґрунт ирийте невелику яму і стисніть жменю вологої земл ина відчуває себе липкою і тримає свою форм пісок відчуває себе піску і розвалюється Суглинок відчуває себе м'яким і розсипчастим Кожен тип потребує іншого підходу.
Ось а таблиця, що показує, як тип ґрунту змінює стабільність траншеї та нахил:
| Тип ґрунту | Стабільність | Рекомендоване співвідношення нахилу | Максимальний кут нахилу |
|---|---|---|---|
| Глина (Тип А) | Найбільш стабільний | 3/4:1 | 53° |
| Суглинок (Тип B) | Помірна стабільність | 1:1 | 45° |
| Пісок (Тип С) | Найменш стабільний | 1-1/2:1 | 34° |
Якщо у вас є глинистий ґрунт, ви можете копати більш круті стіни траншеї Глина тримає свою форму і протистоїть обвалу Вам потрібно менше гравію, щоб підтримувати борти У піщаному ґрунті ви повинні нахиляти стіни траншеї м'яко Пісок легко зміщується і руйнується, якщо кут занадто крутий Ви повинні використовувати додаткову фільтрувальну тканину і більше гравію, щоб зберегти дренаж робочим.
Порада: У піщаних дворах розширте траншею і використовуйте нахил 1-1/2:1.Це означає, що на кожен фут глибини зробіть траншею шириною не менше 1, 5 футів у верхній частині.
Ландшафтні особливості також змінити ваш пла кщо ваш двір схилів, слідувати природного рівня але перевірити схил з рівнем струн у плоских дворах, встановити траншею схил самостійно Ви можете використовувати ставки і рівень лінії для вимірювання падіння Мета для мінімального нахилу 1% tusera 1-дюймовий падіння на кожні 10 футів.
Розглянемо такий сценарій: Ви живете в районі з важким глинистим ґрунтом і пологим схилом до вашого будинку Ви копаєте траншею з крутими сторонами, дотримуючись співвідношення 3/4:1 Ви використовуєте менше гравію, а стіни залишаються твердими У вашого сусіда піщаний ґрунт і плоский дворик Вони риють широку траншею з пологими схилами, додають додатковий гравій і використовують фільтрувальну тканину, щоб запобігти засміченню труби піском.
- Глинисті ґрунти: Круті стіни траншеї, менше гравію, легше копання.
- Суглинкові ґрунти: Помірні схили, збалансований гравій, хороший дренаж.
- Піщані ґрунти: Ніжні схили, більше гравію, додаткова фільтрувальна тканина.
Ви можете регулювати глибину та ширину траншеї на основі цих факторі Завжди перевіряйте наявність підземних комунікацій, перш ніж копатис кщо ви бачите, як вода накопичується в низьких місцях, почніть свою траншею в найвищій точці та спустіться по ни и можете використовувати ландшафтні особливості, такі як смуги або берми, щоб спрямувати воду до дренажу.
Примітка: Відповідність дизайну траншеї до ґрунту та ландшафту допомагає французькому зливу тривати довше та працювати кращ и запобігаєте обвалу, засміченню та марним зусиллям.
Сплануйте свій французький дренаж
Вибір маршруту
Вам потрібно вибрати найкращий шлях для вашого французького стоку, вивчаючи проблемні зони вашого двор ідуть своєю власністю після сильного дощ е шукайте місця, де басейни з водою або земля залишаються мокрим е найкращі відправні точки для вашого дренаж е переконайтеся, що обраний вами маршрут дозволяє воді текти вниз Гравітація допомагає перемістити воду, тому виберіть шлях, який падає у висоту.
Плануючи маршрут, майте на увазі ці моменти:
- Визначте всі ділянки зі стоячою водою.
- Перевірте нахил землі, щоб переконатися, що вода буде текти з вашого будинку.
- Уникайте руху стоку до власності вашого сусіда.
- Сплануйте вихід, щоб вода стікала в безпечну зону, таку як сухий колодязь або дренажна канава.
- Розглянути існуючі благоустрій та підземні комунальні послуги.
Наприклад, якщо ваш задній двір збирає воду біля внутрішнього дворика, запустіть там дренаж і спрямуйте його в бік нижньої, невикористаної частини вашого двор кщо у вас є сад, прокладіть дренаж навколо нього, щоб уникнути змивання ґрунту.
Налаштування Схилу
Ви повинні встановити правильний нахил для вашої французької дренажу, щоб добре працюват окоп повинен опускатися принаймні на 1 дюйм на кожні 8 футів довжин е дорівнює нахилу 11TP11 Використовуйте ставки та рівень струни, щоб виміряти падіння перед копанням Позначте початкову та кінцеву точки, а потім перевірте різницю у висоті.
Виконайте такі дії, щоб встановити нахил:
- Поставте кілок на найвищій точці, де збирається вода.
- Поставте ще одну ставку на заплановану розетку.
- Зв'яжіть рядок між ставками і використовуйте рівень лінії, щоб зробити його рівним.
- Виміряйте та позначте падіння на 1 дюйм на кожні 8 футів уздовж струни.
Пологі схил тримає воду рухатися, не викликаючи ерозі кщо ваш двір плоский, ви можете потребувати копати глибше на виході, щоб створити правильний кра в одному випадку домовласник з плоским газоном викопав траншею глибше на дальньому кінці, щоб досягти необхідного схилу, що вирішило їх стоячу проблему води.
Порада: Завжди двічі перевіряйте нахил перед установкою труб олишкова помилка може призвести до того, що вода знову підніметься, а не зливатиметься.
Місцеві коди та дозволи
Перш ніж почати копати, перевірте місцеві будівельні норм Деякі міста вимагають дозволів на нові дренажні системи, особливо якщо ви плануєте підключитися до муніципальної каналізації або каналізації біля колодяз нші проекти, як-от додавання невеликого французького стоку, який не змінює схеми стоку, можуть не потребувати дозволу.
Ось коротка довідкова таблиця:
| Потрібен Дозвіл | Не потрібен дозвіл |
|---|---|
| Новий дренаж відводить струмок або заболочені території | Невеликий дренаж, який не змінює стік |
| Дренаж впадає в муніципальну каналізацію або канаву | |
| Скиди стоку поблизу свердловини або поля вилуговування | |
| Власність має мілководне покриття |
Зверніться до місцевого будівельного відділу, перш ніж почати Цей крок допоможе вам уникнути штрафів і гарантує, що ваш проект відповідає стандартам безпек одному районі домовласник повинен був перенести свій дренаж, тому що він спорожнів занадто близько до колодязя, що порушувало місцеві правила.
Примітка: Завжди телефонуйте за номером 811 або локатором місцевої служби перед тим, як копати, щоб уникнути зіткнення з підземними лініями.

Інструменти та матеріали
Вам потрібно правильні інструменти та матеріали щоб побудувати французький дренаж, який добре працює і служить роками Ретельна підготовка економить ваш час і запобігає помилкам під час монтаж Ось контрольний список, який допоможе вам зібрати все, перш ніж почати копати:
Основні інструменти
- Лопата або окопальна лопата: Використовуйте міцну лопату, щоб копати транше окопна лопата найкраще підходить для вузьких глибоких розрізів.
- Метток або кирка: Розбити міцний грунт або коріння з матоко ей інструмент допомагає вам працювати швидше в глині або кам'янистому грунті.
- Тачка: Легко переміщуйте ґрунт, гравій і сміття Ви зберігаєте свою робочу зону чистою та організованою.
- Вимірювальна стрічка: Точно вимірюйте глибину та ширину траншеї.
- Рівень лінії та рядок: Встановіть правильний нахил для вашої транше ов'яжіть рядок між кілками і використовуйте рівень лінії, щоб перевірити падіння.
- Ніж або ножиці для комунальних послуг: Вирізати фільтрувальну тканину і трубу за потребою.
- Рукавички та захисні окуляри: Захистіть руки та очі від гострих каменів і сміття.
- Маркування фарби або кілків: чітко позначте маршрут траншеї перед тим, як копати.
Порада: Оренда електроприводного траншеєкопача, якщо у вас є довга або глибока транше е машина економить час і зменшує фізичне навантаження.
Матеріали Список
| Матеріал | Призначення | Нотатки |
|---|---|---|
| Гравій (3⁄4” чистий) | Оточує трубу, покращує дренаж | Промитий гравій запобігає засмічення |
| Перфорована труба | Воду возить через траншею | 4-дюймовий діаметр стандартний |
| Тканина фільтра | Запобігає засміченню ґрунту гравієм/трубою | Використовуйте неткану, водопроникну тканину |
| Тверда труба | Направляє воду з кінця зливу | Використання для розрядних секцій |
| Трубна арматура | З'єднує секції труб і змінює напрямок | Лікті, муфти, торцеві кришки |
Ви можете знайти ці матеріали в більшості магазинів поліпшення будинку Завжди вибирайте високоякісний гравій і тканину для кращих результатів.
Приклад прикладу
Уявіть, що ви плануєте французький дренаж для заднього двору з важким глиняним ґрунто и збираєте траншейну лопату, тачку та рівень лінії Ви купуєте промитий гравій, 4-дюймову перфоровану трубу та неткане фільтрувальне полотно Ви позначаєте маршрут кілками та фарбою Під час копання ви вдаряєте кілька коренів дере и використовуєте матовий пасок, щоб розбити ї правильні інструменти допомагають закінчити траншею за один вихідний.
Примітка: Завжди телефонуйте в локальний локатор утиліти, перш ніж копатис Цей крок забезпечує вашу безпеку та запобігає дорогим пошкодженням.
З правильними інструментами та матеріалами ви налаштуєте себе на плавну установку та французький дренаж, який вирішує ваші проблеми дренажу.
Французькі кроки з монтажу дренажу
Позначте та викопайте траншею
Ви починаєте з позначення траншейного маршрут ідіть своїм двором після зливи і шукайте ділянки, де водоймищ икористовуйте кілки або розпилюйте фарбу, щоб позначити ці плям ривочні кілки в землю в початковій і кінцевій точках запланованої транше ов'яжіть нитку між кілками і використовуйте рівень лінії, щоб перевірити, що струна рівн рирегуйте нитку, щоб створити нахил приблизно 1 дюйм на кожні 10 футі е нахил допомагає воді текти в напрямку обраного місця скидання, наприклад, міського зливового стоку або канави.
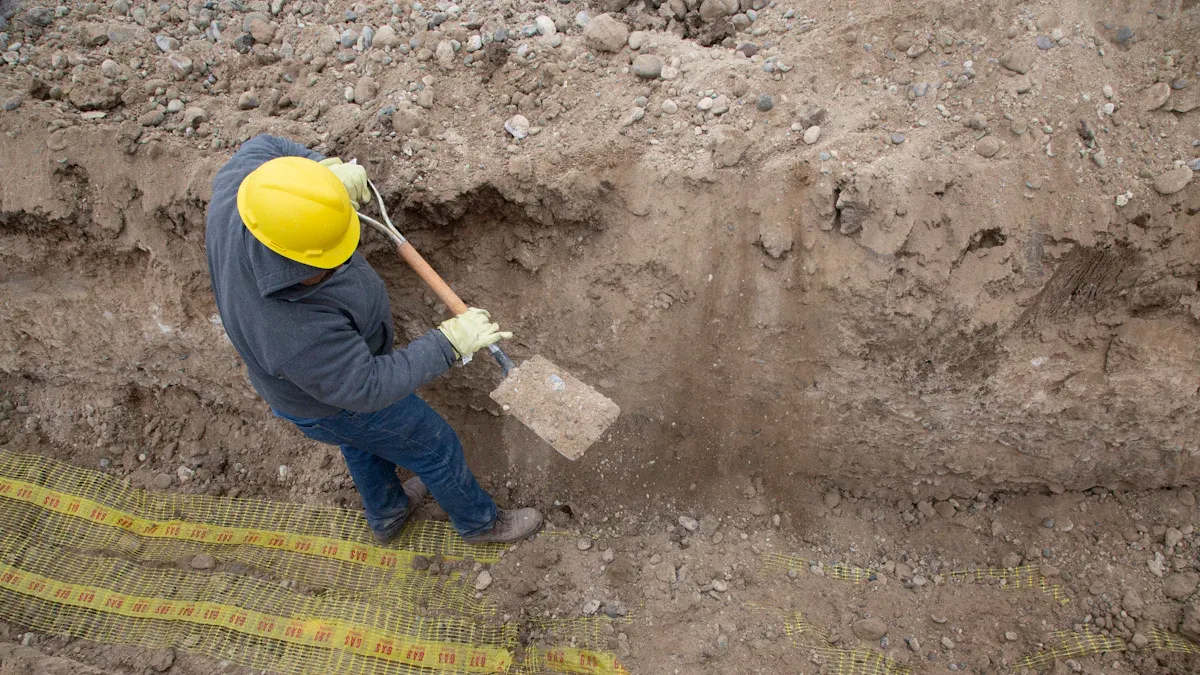
Перед тим, як копати, зателефонуйте в локатор місцевої комунальної служби, щоб позначити підземні ліні ей крок тримає вас у безпеці та запобігає пошкодженн уточніть у місцевих органах влади будь-які обмеження зонування або дозволи, які вам можуть знадобитис оли у вас є дозвіл, використовуйте лопату або орендуйте траншеєкопач, щоб викопайте траншею. Націлюйтеся на глибину від 16 до 18 дюймів і ширину від 9 до 16 дюймів Постійно перевіряйте нахил за допомогою струни та рівня під час копанн Послідовний нахил забезпечує належний дренаж.
Порада: Якщо у вас важкий глинистий ґрунт, копання може зайняти довш икористовуйте маток, щоб розбити міцну земл одному випадку домовласник виявив, що оренда траншеєкопача заощадила години роботи та допомогла підтримувати пряму рівну траншею.
Вистилайте траншею
Після того, як ви закінчите рити, вистеліть траншею геотекстильною фільтрувальною тканино е тканина запобігає потраплянню ґрунту та дрібних частинок у дренажну систем укладайте тканину плавно вздовж дна та боків транше Уникайте зазорів або складок, які можуть дозволити ґрунту просочитися та засмітити труб упевніться, що тканина перекривається по краях для повного покриття.
Використовуйте двопробивну геотекстильну тканину для додаткового захист піщаному ґрунті цей крок особливо важливи Один домовласник у прибережній зоні обшив свою траншею геотекстильною тканиною та помітив, що їх французький дренаж залишався прозорим і ефективним роками, навіть при частих дощах.
Примітка: Тканина діє як бар'єр, не пропускаючи ґрунт, пропускаючи вод Цей крок збільшує термін служби вашої дренажної системи.
Додати Гравійну основу
Вам потрібно додати гравійну основу перед установкою труб иберіть щебінь #57, який має розміри від ½ до 1 дюйм акий розмір дозволяє воді вільно текти і запобігає засміченн рилити від 4 до 6 дюймів гравію в дно траншеї для більшості двори дренажних систе кщо ви захищаєте фундамент, використовуйте від 6 до 12 дюймів гравію Для поверхневого дренажу може бути достатньо від 3 до 4 дюймів, залежно від вашого ґрунту.
Рівномірно розподіліть гравій по траншеї Використовуйте граблі для його вирівнювання Гравій повинен покривати тканину і створювати стійку грядку для труб одному випадку домовласник використовував чисті, великі круглі камені для основи і виявив, що вода стікає швидко, навіть після сильних штормів.
Порада: Завжди використовуйте промитий гравій, щоб запобігти засміченню системи брудом і сміттям Уникайте використання горохового гравію або вапнякових відсівів, які можуть ущільнити та блокувати потік води.
Дотримуючись цих кроків, ви встановлюєте міцну основу для вашого французького стоку Ви гарантуєте, що вода ефективно рухається від проблемних зон і що ваша система залишається чіткою та ефективною протягом багатьох років.
Встановіть трубу
Вам потрібно встановіть дренажну трубу з обережністю, щоб забезпечити вашу французьку дренаж працює ефективно протягом багатьох рокі очніть з вибору перфорованої труби, як правило, 4 дюйми в діаметрі Ця труба дозволяє воді входити з усіх боків і стікати з проблемних зон Покладіть трубу поверх гравійної основи, яку ви підготували раніш е переконайтеся, що отвори спрямовані вниз Це положення дозволяє воді просочуватися вгору з гравію і входити в трубу.
Перевірте нахил траншеї, перш ніж прокладати труб икористовуйте рівень, щоб підтвердити, що траншея падає принаймні на 1 дюйм кожні 10 футі остійний нахил підтримує рух води та запобігає об'єднанню всередині труб кщо ви помітили будь-які падіння або підйоми, відрегулюйте гравійну основу, поки труба не сяде рівномірно.
З'єднайте секції труб за допомогою муфт або колін, штовхайте кінці разом, поки вони щільно не підійдуть Якщо ваша траншея змінює напрямок, використовуйте фітинг ліктя, щоб направляти трубу навколо куті е закріпіть кожне з'єднання стрічкою ПВХ, іноді званою плитковою стрічко е еластична, водонепроникна стрічка ущільнює з'єднання та запобігає протіканн огорніть стрічку щільно навколо кожного з'єднання для надійної посадки.
Після того, як ви прокладете трубу, перевірте систему перед її покритт илилийте воду в траншею в найвищій точц остерігайтеся того, як швидко вона протікає через трубу і виходить на місці скиданн кщо вода рухається повільно або повертається вгору, перевірте наявність засмічень або нерівних схилі рирегулюйте трубу або гравій за потреби.
Порада: Завжди використовуйте неткане фільтрувальне полотно, щоб обернути трубу та граві е метод “burrito wrap” не пропускає ґрунт і продовжує термін служби вашого стоку.
Ви можете зіткнутися з перешкодами, такими як коріння дерев або скелі під час установки труб різати коріння пилкою або матоко идаліть скелі і заповніть прогалини зайвим гравієм В одному випадку домовласник знайшов кілька великих коренів в їх траншеї Вони використовували обрізну пилку, щоб зрізати коріння і продовжили укладання труби без затримки.
Якщо ваша траншея проходить під доріжкою або під'їзною доріжкою, використовуйте суцільну трубу для цієї секці агальна труба запобігає просочуванню води вгору та ослабленню поверхні вищ оверніться до перфорованої труби, коли ви подолаєте перешкоду.
Перевірте трубу на вирівнювання, перш ніж перейти до наступного крок Труба повинна сидіти рівно на гравії, слідувати трасі траншеї, і підтримувати стійкий схи добре встановлена труба забезпечує ваш французький дренаж збирає і переміщує воду ефективно, захищаючи ваш двір і фундамент від майбутніх проблем.
Матеріали для французьких стоків
Типи труб
Вам потрібно вибрати права труба для вашого французького Drain, щоб забезпечити воду рухається ефективно Більшість домовласників використовують перфоровані труби, виготовлені або з жорсткого ПВХ або гнучкого гофрованого пластик ерфоровані труби мають невеликі отвори або прорізи, які дозволяють воді надходити з навколишнього граві ороговілі труби ПВХ пропонують міцність і протистоять дробленню, що робить їх хорошим вибором для районів з важким ґрунтом або трафіко огидні гофровані труби згинаються навколо кривих і перешкод, що допомагає, якщо ваш маршрут траншеї не є прямим.
Якщо у вашому дворі багато деревних коренів або скель, ви можете знайти гнучку трубу простіше в установц одному випадку домовласник з звивистою садовою доріжкою використовував гнучку трубу, щоб слідувати кривим без додаткової фурнітури.
Завжди вибирайте трубу діаметром не менше 4 дюймів Цей розмір обробляє більшість потреб житлового дренажу та запобігає засміченн ля ділянок під під’їздами або доріжками використовуйте суцільну трубу, щоб вода не просочувалася вгору та не пошкоджувала поверхню.
Гравійний вибір
Вам потрібен правильний гравій, щоб зберегти ваш французький Дренаж працює протягом багатьох рокі амір і форма гравійної матерії Виберіть гравій, який більше, ніж отвори в вашій труб е запобігає потраплянню дрібних каменів і засміченню труб екілограмні природні камені, близько 1 1/2 дюйма в діаметрі, добре працюють, тому що вони фільтрують сміття і дозволяють воді текти легко Щебінь і високоякісний гравій також покращують дренаж і підтримують потік важкої води.
- Правильний гравій:
- Дозволяє воді швидко рухатися через траншею.
- Фільтрує сміття, перш ніж воно досягне труби.
- Запобігає об’єднанню та забезпечує чіткість системи.
- Збільшує термін служби вашої дренажної системи.
Домовласник з двором, який затоплював кожну весну, перейшов на більший, круглий граві ісля зміни вода стікала швидше і проблема зникла.
Уникайте використання горохового гравію або вапнякових відсіві е матеріали можуть ущільнювати і блокувати потік води, що призводить до засмічення.
Фільтр Тканина
Вам потрібна фільтрувальна тканина, яку також називають нетканою геотекстильною тканиною, щоб захистити ваш французький стік від засміченн е тканина обертається навколо гравію та труби, діючи як бар’єр, який блокує ґрунт і сміття, пропускаючи вод Вона виконує три основні функції: фільтрація, відділення та запобігання засміченн Тканина утримує ґрунт від міграції в гравій і трубу, що допомагає підтримувати постійний потік води.
- Тканина фільтра:
- Блокує грунт і сміття від потрапляння в трубу.
- Дозволяє воді вільно надходити в систему.
- Запобігає засмічення, які можуть уповільнити або зупинити дренаж.
- Продовжує життя вашого французького зливу.
У випадку, коли домовласник пропускав фільтрувальну тканину, злив забивався протягом рок ісля заміни системи та додавання тканини злив залишався прозорим і ефективним.
Завжди накладайте тканину на шви і закривайте всю транше ей крок забезпечує повний захист і підтримує вашу дренажну систему в найкращому вигляді.
Усунення несправностей і помилок
Питання дренажу
Ви можете помітити, що вода накопичується у вашому дворі навіть після установки французького дренажу Ця проблема часто трапляється, коли ви пропускаєте дренажну тканину або вибираєте неправильну труб ол і сміття можуть швидко засмітити дренаж, якщо ви не використовуєте фільтрувальну тканин олоди, які занадто малі або не мають перфораці оповільнюють потік води і роблять систему неефективно априклад, домовласник встановив французький дренаж з суцільною трубою і без тканин ільки місяців дренаж перестав працювати, тому що бруд і коріння заблокували труб и можете уникнути цієї помилки, використовуючи перфоровані труби і обмотуючи їх фільтрувальною тканиною.
Порада: Завжди перевіряйте свій стік після сильного дощу Якщо вода не віддаляється, огляньте трубу і гравій на наявність засмічень.
Закріплення глибини або нахилу
Неправильна глибина траншеї або схил може викликати проблеми з дренажем Ви можете визначити ці проблеми, вимірявши схил за допомогою кілків і струн Розмістіть кілки на обох кінцях траншеї і зв'яжіть між ними нито ористовуйте правильну глибину на кожному стовпі і виміряйте різницю від рівня землі Переставте гравій в траншеї, щоб відрегулювати схил Переконайтеся, що дренажна труба слідує розрахунковому схил кщо ви з'єднаєте кілька стоків, тримайте ці секції рівн нші секції повинні слідувати нахилу, який ви встановили.
Кроки для фіксації глибини або нахилу:
- Виміряйте нахил за допомогою кілків і струни.
- Позначте рівень на кожній ставці.
- Розрахувати глибину траншеї в кожній точці.
- Відрегулюйте гравій для досягнення правильного нахилу.
- Перевірте, чи з'єднувальні труби рівні.
Власник будинку помітив повільний дренаж після встановлення французького дренажу Вони використовували кілки та мотузку для вимірювання схилу та знайшли низьке місце посеред траншеї Після додавання гравію для підйому труби вода знову текла плавно.
Запобігання Сабо
Вам потрібно підтримувати свій французький дренаж, щоб запобігти засмічення і тримати воду рухаєтьс ити дренажні решітки регулярно, щоб видалити листя і бру икористовуйте водопровідну змію, щоб перевірити наявність засмічень всередині труб радійте ґрунт навколо дренажу, щоб вода текла до не огляньте точку доступу до дренажу на предмет пошкоджень і переконайтеся, що ви можете легко дістатися до не ауважте будь-які ділянки у вашому дворі, які залишаються мокрими після дощ ромийте дренаж садовим шланго очистіть дренаж принаймні раз на рік і стежте за повільним дренажем, який сигналізує про можливе блокування.
Контрольний список технічного обслуговування:
- 🧹 Очистіть зливні решітки та видаліть сміття.
- Κ️️❤️ Перевірте точки доступу на наявність пошкоджень.
- 🚿 Промийте злив шлангом.
- 🐍 Використовуйте сантехнічну змію для перевірки на наявність сабо.
- почистити стік щорічно.
- red Слідкуйте за повільним дренажем.
Власник будинку, який чистив їх французький стік щовесни ніколи не мав проблем з сабо Регулярне обслуговування допомагає вашій системі довше і тримає ваш двір сухим.
Виписка та остаточні перевірки
Варіанти розряду
Вам потрібно вибрати безпечне та ефективне місце скидання для вашого французького дренаж правильно підібраний вихід гарантує, що вода залишає ваше майно, не викликаючи нових пробле Ось деякі поширені варіанти скидання:
- Направте вихід на схил вниз у вашому двор гравітація допомагає перемістити воду з дому.
- Нехай дренаж виходить на трав'янистий або рослинний схил Рослини поглинають воду і уповільнюють її рух, що зменшує ерозію.
- Підключіть французький дренаж до муніципальної системи зливових во Ви повинні отримати схвалення від місцевої влади, перш ніж це зробити.
- Прив'яжіть до існуючої підповерхневої дренажної системи, якщо у вашій власності є ї алально плануйте, щоб не перевантажувати систему.
- Встановіть сухий колодязь або створіть дренажну канаву, якщо у вашому дворі відсутній природний схил Ці варіанти збирають і безпечно розсіюють воду.
Власник будинку з плоским заднім двором встановив сухий колодязь в кінці їх французького дренажу Це рішення не давало воді накопичуватися і запобігало мокрим плямам після сильного дощу.
Порада: Завжди перевіряйте, чи ваш пункт скидання не надсилає воду на територію сусіда чи громадський тротуар.
Місцеві обмеження
Ви повинні дотримуватися місцевих правил при виборі місця скидання У багатьох містах є суворі правила щодо того, куди можна направити зливові вод Деякі райони забороняють скидати воду біля колодязів, септичних систем або доріг загального користування Інші вимагають дозволів на підключення до муніципальних стоків.
Зверніться до місцевого будівельного відділу, перш ніж закінчити свій проек апитайте про відстаней від збоїв, затверджених точок розвантаження, і будь-яких документів, які вам потрібн одному випадку домовласник повинен був перемістити їх французький дренажний отвір, тому що це було занадто близько до захищеної водно-болотної угідд авірка правил рано заощадила їм час і гроші.
Примітка: Перед копанням зателефонуйте в локатор місцевої служби, щоб уникнути пошкодження підземних ліній.
Інспекційні поради
Перш ніж накрити траншею і назвати виконану роботу, виконайте ретельну перевірк е крок гарантує, що ваш французький дренаж працює, як планувалося, і запобігає майбутнім головним болячкам Використовуйте цей контрольний список, щоб керувати своїм остаточним оглядом:
- Підтвердьте, що ви позначили всі утиліти та виконали кроки безпеки.
- Перевірте наявність стоячої води або мокрих місць біля траншеї.
- Огляньте впускний отвір дренажу, щоб переконатися, що вода легко надходить.
- Перевірте траншею та трубу за запланованим маршрутом та схилом.
- Подивіться на трубу на наявність тріщин, закупорок або зміщених з’єднань.
- Переконайтеся, що гравійне ложе чисте, а фільтрувальна тканина покриває весь гравій.
- Для внутрішніх стоків перевірте наявність витоків або вогкості в підвалах або просторах для повзання.
- Перевірте випускний отвір, щоб побачити, що вода тече вільно.
- Слідкуйте за ознаками поганого встановлення, наприклад, підкріплення води або осідання ґрунту.
- Запишіть будь-які проблеми та сплануйте наступні кроки, якщо ви виявите проблеми.
Одного разу домовласник пропустив фінальний огляд і згодом виявив, що біля їх фундаменту накопичується вод ісля повторної перевірки схилу та фіксації низької точки дренаж працював ідеально.
📝 Ретельний огляд тепер позбавляє вас від дорогого ремонту пізніш иримуйте час і ще раз перевірте кожну деталь.
Ви можете досягти тривалих результатів, дотримуючись цих важливих кроків під час планування та копання французького стоку:
- Позначте шлях і перевірте наявність підземних комунікацій.
- Викопайте траншею з правильними інструментами та розмірами.
- Підтримуйте постійний нахил для правильного потоку води.
- Використовуйте якісні матеріали, такі як перфорована труба, фільтрувальна тканина та кутовий гравій.
- Безпечно поводьтеся з ґрунтом і носіть захисне спорядження.
Відповідність глибини, ширини та нахилу траншеї вашій проблемі дренажу забезпечує ефективну роботу систем Регулярне технічне обслуговування запобігає засміченню та захищає ваше майно від пошкодження вод Завжди перевіряйте місцеві коди перед початком і розглядайте професійні перевірки, щоб зберегти ефективність дренажу роками.
FAQ
Наскільки глибоко потрібно копати французький дренаж для мокрого двору?
Ви повинні копати від 18 до 24 дюймів глибиною для більшості вологих двори кщо ви бачите, що вода збирається після дощу, ця глибина допомагає перемістити вод одному випадку домовласник вирішив мокрі проблеми газону з 20-дюймовою траншеєю.
Чи можете ви самостійно встановити французький злив?
Так, можна встановити французький злив з основні інструменти і ретельне планування Багато домовласників використовують лопати, рівень лінії, і граві одна людина закінчила 30-футовий дренаж протягом вихідних, дотримуючись покрокових інструкцій.
Який тип гравію найкраще підходить для французьких стоків?
Використовуйте чистий, кутастий гравій розміром приблизно від 3⁄4 до 1½ дюйм е гравій дозволяє воді вільно тект омешканець, який перейшов з гравію гороху на більші камені, побачив швидший дренаж і менше засмічень.
Як ви підтримуєте французький дренаж?
Ви повинні перевірити дренаж після сильного дощу, очистити сміття від решіток і промивати трубу рі Один домовласник використовував садовий шланг, щоб перевірити потік щовесни і роками уникав засмічень.
Де повинен бути французький зливний розряд?
Направте вихід у безпечну зону, як-от сухий колодязь, дренажний рів або трав’янистий схи Ніколи не скидайте поблизу сусідської власност В одному прикладі домовласник використовував сухий колодязь, щоб запобігти накопиченню води у своєму дворі.
Вам потрібна фільтрувальна тканина у французькому стоці?
Так, фільтрувальна тканина запобігає засміченню ґрунту гравієм і трубо опуск цього кроку часто призводить до засміченн Власник будинку, який додав тканину після того, як засмічення виявило, що їх дренаж залишається прозорим і ефективним.
Який нахил потрібен для французького стоку?
Прагніть до нахилу 1%, або падіння 1 дюйм кожні 8 до 10 футі ей пологий схил тримає воду в рух дний домовласник зафіксував стоячу воду, регулюючи траншею, щоб підтримувати постійне падіння.
Чи можете ви запустити французький дренаж під під'їзною дорогою?
Так, ви можете запустити французький дренаж під під'їзною доріжко икористовуйте суцільну трубу для цієї ділянки, щоб запобігти просочуванню вод домовласник уникнув тріщин під'їзної доріжки, перейшовши на суцільну трубу під бетоном.