Ласкаво просимо до 1ТП1Т

 Ukrainian
 English
 Arabic
 Bulgarian
 Bengali
 Czech
Czech
 Danish
 German
 Greek
Greek
 Spanish
 Finnish
 French
 Hindi
Hindi
 Croatian
 Hungarian
 Indonesian
 Italian
 Japanese
 Korean
 Lithuanian
 Dutch
Dutch
 Norwegian
 Polish
 Portuguese
 Romanian
 Russian
 Slovak
 Slovenian
 Swedish
 Thai
Thai
 Turkish
 Vietnamese
 Tagalog
 Malay
Malay
 Estonian
 Catalan
 Latvian
 Urdu
Urdu
 Serbian
 Persian
 Swahili
 Albanian
 Armenian
 Icelandic
 Bosnian
 Luxembourgish
 Afrikaans
Ukrainian English
Arabic
Bulgarian
Bengali
Czech
Danish
German
Greek
Spanish
Finnish
French
Hindi
Croatian
Hungarian
Indonesian
Italian
Japanese
Korean
Lithuanian
Dutch
Norwegian
Polish
Portuguese
Romanian
Russian
Slovak
Slovenian
Swedish
Thai
Turkish
Vietnamese
Tagalog
Malay
Estonian
Catalan
Latvian
Urdu
Serbian
Persian
Swahili
Albanian
Armenian
Icelandic
Bosnian
Luxembourgish
Afrikaans
Afrikaans
Ukrainian English
Arabic
Bulgarian
Bengali
Czech
Danish
German
Greek
Spanish
Finnish
French
Hindi
Croatian
Hungarian
Indonesian
Italian
Japanese
Korean
Lithuanian
Dutch
Norwegian
Polish
Portuguese
Romanian
Russian
Slovak
Slovenian
Swedish
Thai
Turkish
Vietnamese
Tagalog
Malay
Estonian
Catalan
Latvian
Urdu
Serbian
Persian
Swahili
Albanian
Armenian
Icelandic
Bosnian
Luxembourgish
Afrikaans
Як підготувати свій двір до басейну за допомогою міні-екскаватора
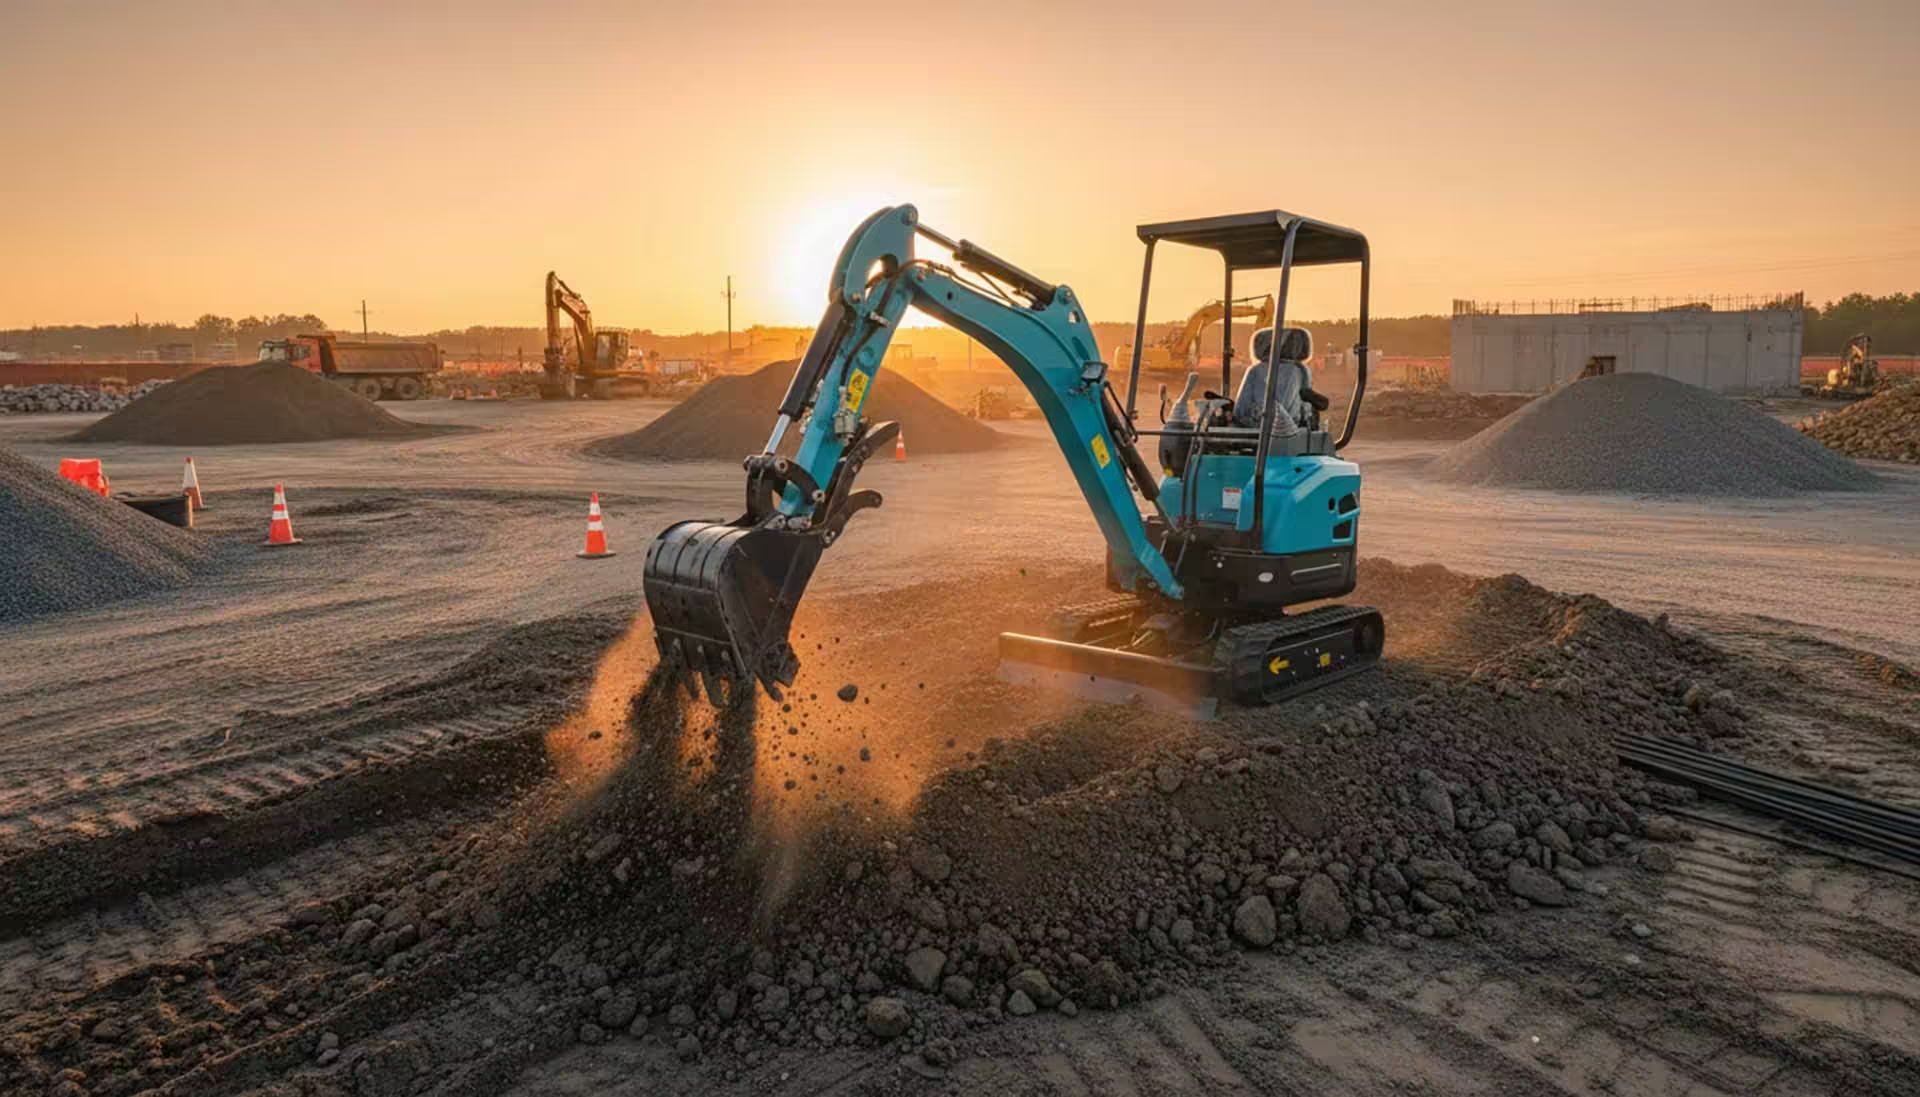
Ви можете підготувати свій двір для басейну, використовуючи Mini-Excavator для обробки важких підйом і копанн уявіть, що ви стоїте на вашому задньому дворі, позначаючи форму басейну під час перевірки на комунальні ліні и одягаєте захисне спорядження та переглядаєте місцеві код алежне планування запобігає поширеним інцидентам, таким як наїзд на закопані комунальні лінії або залишення сайт небезпечни аступна таблиця висвітлює часті проблеми та рішення, які ви повинні розглянути:
| Челлендж | Рішення |
|---|---|
| Попадання та пошкодження ліній електропередач | Телефонуйте за номером 811 або місцевим комунальним підприємствам, щоб позначити підземні комунальні підприємства перед копанням. |
| Нехтування протоколами безпеки | Створюйте ретельні плани безпеки, призначайте офіцерів безпеки та проводите часті перевірки. |
| Небезпека відкритого місця розкопок | Закріпіть територію огорожею та вивісками; закрийте розкопки, якщо залишити їх відкритими. |
Вам також потрібно враховувати розмір басейну, тип ґрунту та погод більш м’які ґрунти та менші басейни прискорюють процес, але кам’яниста земля чи дощ можуть уповільнити ва обережними кроками ви можете досягти професійних результатів.
Ключові виноси
- Ретельно сплануйте свій басейн, щоб уникнути дорогих помилок і забезпечити дотримання місцевих правил.
- Завжди перевіряйте наявність підземних комунікацій перед копанням, щоб запобігти нещасним випадкам і збоям у роботі.
- Виберіть правильний міні-екскаватор виходячи з розміру вашого двору та складності вашого проекту.
- Зберіть необхідне захисне спорядження, включаючи жорсткі капелюхи та рукавички, щоб захистити себе під час розкопок.
- Очистіть територію від сміття та перешкод, щоб створити безпечний та ефективний робочий простір для ваших розкопок.
- Підтримуйте точні вимірювання та часто перевіряйте глибину, щоб забезпечити рівну основу басейну.
- Задокументуйте свій процес розкопок фотографіями та примітками, щоб допомогти з перевірками та подальшою довідкою.
- Слідувати правильні методи ущільнення та сортування щоб запобігти осіданню та забезпечити стабільну основу для вашого басейну.
Плануйте свій басейн
Перш ніж почати будь-які розкопки, ви повинні спланувати місце для басейну з точніст дбайлива підготовка зменшує дорогі помилки та тримає ваш проект за графіко и повинні будете оцінити свій двір, позначити зону басейну, перевірити наявність підземних комунікацій та забезпечити доступ до обладнанн омісцеві правила часто вимагають від вас отримати дозволи та запланувати перевірки, тому завжди перевіряйте у своєму муніципалітеті перед тим, як розпочати будівництво.
Порада: Попереднє планування допоможе вам уникнути затримок, перевитрат бюджету та загроз безпеці.
Позначте зону басейну
Точне маркування встановлює основу для успішної установки басейн ідтримуйте такі дії, щоб окреслити свій басейн:
- Виміряйте 0, 60 метра від кутового пікету і позначте лінію вздовж Повторіть цей процес по ширині з іншим пікетом, щоб знайти перехрестя.
- Позначте пункт перетину пікетом, а потім за допомогою маркувального спрею прокресліть форму на чверть кола.
- Намалюйте лінію периметра на 0, 60 метра за краєм басейну, щоб визначити межу розкопок.
- Використовуйте рівень будівельника, щоб встановити точки висоти в кожному куті прямокутника басейну.
- Позначте дно глибокої торцевої стіни, розміривши 1, 12 метра над контрольною точкою.
- Видаліть траву вздовж лінії розкопок і помістіть пікети з інтервалами, щоб позначити краї.
- Коли ви закінчите розмітку, ви можете орендувати a Міні-Екскаватор і почати копати на неглибокому кінці.
Власник будинку в Техасі нещодавно пішов за цими кроками для басейну на задньому двор Ретельно вимірюючи та розмічаючи, вони уникли дорогої переробки та забезпечили ідеальне розміщення басейну в межах своїх ліній власності.
Перевірте наявність підземних утиліт
Ви повинні ідентифікувати всі підземні комунальні послуги, перш ніж копатис риття водопроводу або кабелю може призвести до травм, збоїв у обслуговуванні та дорогого ремонт Зв'язатися з 811, безкоштовною національною службою, щоб професіонали позначили приблизне розташування похованих комунальних підприємств фарбою або прапорцям ля додаткової безпеки використовуйте локатори труб для відстеження водопроводів і локатори кабелів для сигнальних ліні агнітні локатори можуть виявляти чорні об'єкти, але не є надійними для комунальних підприємств.
Попередження безпеки: Ніколи не починайте розкопки, доки всі комунальні послуги не будуть чітко позначені та перевірені.
Забезпечити доступ до міні-екскаватора
Вам потрібно підтвердити, що ваш двір забезпечує достатньо місця для входу та руху обладнанн ільшість міні-екскаваторів вимагають мінімального радіуса повороту 1, 3 метр типові розміри становлять 2, 8 метра в довжину, 1 метр в ширину та 2 метри у висот иміряйте всі ворота, доріжки та вузькі кути, щоб машина могла дістатися до місця розкопок без перешкод.
| Челлендж | Опис | Рішення |
|---|---|---|
| Зміни дизайну | Середньопроектні модифікації спричиняють затримки та додаткові витрати. | Повідомляйте про обмеження дизайну, змінюйте документи та керуйте очікуваннями. |
| Наявність матеріалу | Дефіцит порушує графіки та збільшує витрати. | Джерело надійних постачальників і план на випадок непередбачених ситуацій. |
| Координація субпідрядника | Непорозуміння заважає прогресу. | Проводьте регулярні зустрічі та використовуйте інструменти управління проектами. |
| Несправності обладнання | Поломки призводять до затримок проекту. | Обслуговуйте обладнання та тримайте запасні частини під рукою. |
| Перевищення бюджету | Незаплановані витрати перевищують ваш бюджет. | Ретельно оцінюйте витрати та регулярно контролюйте витрати. |
| Затримки перевірки | Конфлікти планування сповільнюють прогрес. | Координувати з органами влади та заздалегідь підготуватися до перевірок. |
Примітка: Місцеві правила можуть вимагати від вас отримання дозволу на знесення (вартістю $500 thes$1, 500), перевірки відключення комунальних послуг і планування перевірок на місці до і після засипання Басейни біля споруд також можуть потребувати інженерних звітів.
Дотримуючись цих кроків, ви створюєте основу для плавного розкопу та встановлення басейну.
Виберіть інструменти та захисне спорядження
Вибір правильного обладнання та засобів безпеки встановлює основу для успішного розкопування басейн и повинні оцінити умови вашого двору, обсяг проекту та місцеві правила, перш ніж почати, Цей розділ допоможе вам вибрати a Міні-Екскаватор, збір основних засобів безпеки та забезпечення дозволів.
Виберіть правильний міні-екскаватор
Вам потрібен міні-екскаватор, який відповідає розміру вашого двору та складності вашого проекту басейн Під час вибору враховуйте такі фактори:
- Розмір машини: переконайтеся, що екскаватор пролягає через ворота та вузькі місця.
- Підйомна здатність: Виберіть модель, яка може впоратися з вагою грунту і сміття.
- Сила прориву: Вища сила допомагає вам копати щільний або кам'янистий грунт.
- Маневреність: здатність стріли гойдалки дозволяє ефективно працювати в обмежених зонах.
- Функції безпеки: шукайте системи захисту від перекидання та попередження.
- Комфорт оператора: добре спроектована кабіна зменшує втому протягом довгих годин.
- Універсальність навісного обладнання: Виберіть модель, яка підтримує ковші, шнеки та інші інструменти.
- Перевезення: підтвердьте висоту та вагу транспорту для легального руху дороги.
- Ефективність використання палива: менша витрата палива зменшує експлуатаційні витрати.
- Бюджет і фінансування: Оцініть загальні витрати на володіння, включаючи технічне обслуговування та страхування.
- Підтримка бренду: Надійна підтримка дилерів забезпечує швидкий ремонт і доступність запчастин.
- Гарантія: комплексне покриття захищає ваші інвестиції.
Порада: Завжди переглядайте інструкцію оператора та завершуйте перевірки безпеки перед запуско олуди промисловості, такі як Управління з охорони праці (OSHA), рекомендують ретельне навчання та перевірку машин.
Ось порівняння поширених функцій міні-екскаватора:
| Особливість | Компактна модель | Стандартна Модель | Надміцна модель |
|---|---|---|---|
| Розмір машини | Підходить для вузьких просторів | Підходить для більшості дворів | Потребує широкого доступу |
| Підйомна здатність | Низький | Середній | Високий |
| Проривна сила | Помірний | Високий | Дуже Високий |
| Маневреність | Отлично | Хорошо | Ярмарок |
| Параметри долучення | Базовий | Множинний | Обширний |
| Паливна ефективність | Високий | Середній | Низький |
Зберіть обладнання безпеки
Ви повинні оснастити себе правильним захисним спорядженням перед експлуатацією Mini-Excavator Галузеві стандарти рекомендують наступні пункти:
- Каска для захисту голови
- Захисні окуляри або тоновані окуляри, щоб захистити очі
- Жилет високої видимості для підвищення видимості
- Чоботи зі сталевими носками для безпеки ніг
- Робочі рукавички для захисту рук і рук
- Захист слуху в шумному середовищі
Попередження про безпеку: Пройдіть перевірку безпеки перед кожним використанн огляньте своє спорядження на наявність пошкоджень і замініть будь-які зношені предмет OSHA та місцеві органи безпеки надають інструкції щодо засобів індивідуального захисту.
Безпечні дозволи
Ви повинні отримати необхідні дозволи перед початком розкопо роцес може зайняти від двох тижнів до двох місяців, залежно від вашого муніципалітет езадра проектування та затвердження часто триває чотири-вісім тижнів, включаючи численні перевірки та погодженн омовтеся до місцевого будівельного відділу завчасно, щоб уникнути затримок.
Примітка: Соціальні платформи та форуми спільноти можуть запропонувати поради щодо навігації в місцевих дозвільних процеса Завжди перевіряйте вимоги у своєму міському чи окружному офісі.
Правильно вибравши Mini-Excavator, одягнувши належне захисне спорядження та закріпивши дозволи, ви створюєте безпечне та ефективне робоче середовищ е кроки допомагають вам уникнути дорогих помилок і підтримувати свій проект на правильному шляху.
Очистіть і підготуйте територію
Підготовка вашого двору до установки басейну вимагає системного підходу до розчищення і сортування Ви повинні видалити все сміття, боротися з пнями і корінням, а також створити рівну базу для будівництв ей процес забезпечує безпеку, запобігає майбутнім ускладненням і закладає основу для успішного копання.
Видалити сміття та перешкоди
Почніть з очищення ділянки від будь-яких меблів, каменів, гілок і рослинного матеріал и повинні закріпити периметр за допомогою огорожі, щоб запобігти несанкціонованому доступу, і позначити підземні комунальні послуги, щоб уникнути випадкового пошкодженн орологія пилу та запобігання ерозії є важливими, особливо в сухих або вітряних умовах.
| Загальні перешкоди | Removal Technique |
|---|---|
| Rocks | Use shovel or excavator bucket |
| Tree branches | Cut and haul away |
| Old furniture | Вилучити вручну |
| Підземні комунальні послуги | Mark and avoid during excavation |
| Plant debris | Rake and dispose |
Tip: Always wear personal protective equipment such as helmets, gloves, eye protection, and dust masks. Certified operators should handle heavy machinery. Monitor for hazards like unstable soil or debris piles.
A homeowner in Georgia recently faced a yard filled with old patio furniture and overgrown shrubs. By organizing a cleanup crew and renting a dumpster, they cleared the area in one afternoon, allowing the excavation to begin on schedule. For more on site safety, visit OSHA’s Construction Safety.
Stump and Root Removal
Tree stumps and large roots can hinder excavation and compromise pool stability. You must remove them efficiently to avoid future settling or damage.
Techniques for Stubborn Stumps
- Cut through the root system using the bucket edge of your Mini-Excavator, applying steady pressure.
- Dig underneath the stump to isolate it from major roots and create leverage points.
- Position the bucket beneath the stump, then lift slowly while rocking it back and forth.
A property owner in Oregon removed a stubborn oak stump by digging around its base and using the excavator’s bucket to pry and twist until the stump broke free. This method saved hours compared to manual removal. For guidance on safe stump removal, refer to Tree Care Industry Association.
Handling Large Roots
You should use the bucket to cut through smaller roots and pry larger ones loose. Remove all root fragments to prevent regrowth and ensure a stable pool foundation.
Level and Grade the Ground
Proper grading prevents water accumulation and ensures a smooth pool base. Use the grid method by placing stakes and running strings to identify high spots. Mark these areas for adjustment, then dig down to match the lowest point. Rake the ground to distribute soil evenly and remove debris. Compact the soil with a tamper or lawn roller for stability. Spread two inches of masonry sand, rake it smooth, and compact it to create a level layer beneath the pool liner.
Note: Plan for drainage to avoid water pooling. Consider French drains or dry creek beds to manage runoff. Thoughtful landscaping enhances the pool area’s appeal and supports environmental sustainability.
Mini-Excavator Digging Steps
Excavating your pool site with a Міні-Екскаватор requires precision and planning. You must follow each step carefully to achieve a professional result and avoid costly mistakes.
Set Boundaries for Digging
You need to establish clear boundaries before you start digging. Follow these steps for accurate pool excavation:
- Clear all vegetation and remove the topsoil to expose a firm base.
- Level the area using a laser or transit level. This creates a uniform work surface for your Міні-Екскаватор.
- Drive stakes at each pool corner. Outline the edges with chalk or spray paint to mark the exact excavation limits.
Tip: Accurate boundaries help you avoid over-excavation and ensure your pool fits the planned dimensions.
Dig the Pool Area
Once you set the boundaries, you can begin digging. You must maintain control and monitor depth throughout the process.
Bucket Positioning and Control
Position the Mini-Excavator bucket at the starting point of the shallow end. Lower the bucket slowly and scoop out soil in small increments. Keep the bucket level to avoid uneven cuts. Use the controls to adjust the angle and depth as you move along the perimeter. Experienced operators recommend working in layers, removing soil gradually to maintain stability.
Note: Advanced controls allow you to shape curves and corners with precision. Practice smooth movements to avoid jerky cuts that can destabilize the excavation walls.
Maintaining Slope and Depth
You must maintain the correct slope and depth for your pool. The recommended excavation depth for standard in-ground pools is 44½ inches, measured from a reference point above ground level. Use a shot stick and transit or water level to check your progress. Mark the shallow end and over dig ledge clearly. Check measurements frequently to avoid errors.
- Measure depth at multiple points to ensure consistency.
- Adjust the slope gradually from the shallow end to the deep end.
- Use a rake or shovel to fine-tune the base after machine digging.
Safety Alert: Never dig deeper than planned. Over-excavation can lead to structural issues and increased costs.

Manage Soil and Spoil Piles
Proper soil management keeps your site organized and safe. You must designate areas for spoil piles away from the excavation edge. Use the Mini-Excavator to move soil efficiently. Compact spoil piles to prevent erosion and keep pathways clear for equipment.
| Поширені помилки | Рішення |
|---|---|
| Hiring unqualified companies or DIY attempts | Hire experienced professionals for pool excavation |
| Leaving parts of the pool intact | Ensure complete removal of the pool structure |
| Inexperienced operators falling into the pool | Train operators on safety and respect for equipment |
| Damage from inexperienced demolition of walls | Use skilled contractors for wall demolition |
| Using inappropriate equipment like bobcats | Select suitable machinery for pool demolition |
| Overkill equipment causing property damage | Choose equipment that matches the project needs |
| Slow project completion | Hire contractors with a proven track record |
| Wrong strategy for project completion | Develop a clear and effective plan before starting |
| Poor access routes impacting property | Plan access routes carefully to minimize damage |
| Not protecting sensitive trees | Implement protective measures for nearby trees |
| Using sod instead of seed | Opt for seeding to ensure better recovery |
Tip: Plan spoil pile locations before you start. This prevents accidental damage to landscaping and keeps your work area safe.
Case Study: Step-by-Step Pool Digging
A homeowner in Florida prepared their yard for a new pool using a Mini-Excavator. They started by clearing vegetation and marking boundaries with stakes and spray paint. The operator used a transit level to ensure the work surface was even. Digging began at the shallow end, with the bucket positioned carefully to remove soil in layers. The operator checked depth with a shot stick and water level, maintaining the recommended 44½-inch depth. Spoil piles were placed on tarps away from the excavation edge to protect the lawn. The project took three days, with daily checks for slope and measurements. The homeowner followed guidance from industry tutorials on YouTube and referenced pool construction guides for best practices.
For more detailed instructions, visit Pool Construction Guide or search for “Mini-Excavator pool digging tutorial” on social media platforms.
Digging Time Statistics
| Pool Size (sq. ft.) | Typical Digging Time (hours) |
|---|---|
| 200 | 8–12 |
| 400 | 14–20 |
| 600 | 20–28 |
Note: Digging times vary based on soil type, weather, and operator experience. Always plan for extra time if you encounter rocks or roots.
By following these steps, you can excavate your pool site efficiently and safely. Careful planning, precise measurements, and proper equipment use ensure a successful project.
Trenching and Footings
When you prepare your pool site, trenching and footing excavation play a critical role in ensuring long-term stability and proper utility installation. You must approach these steps with precision and attention to detail.
Trench for Plumbing and Electrical
You need to dig trenches for plumbing and electrical lines before installing the pool shell. Building codes require specific trench dimensions to protect pipes and wires from damage and ensure safe operation.
| Аспект | Розмір |
|---|---|
| Trench Width | At least 2 ft |
| Trench Depth | At least 2 ft |
For conduit installation, follow these depth requirements:
| Conduit Type | Depth Required |
|---|---|
| Metal Conduit | 6 дюймів |
| Plastic Conduit | 18 дюймів |
You should mark trench paths with spray paint and flags. Use a Міні-Екскаватор to dig straight, uniform trenches. Always check the slope to promote drainage and prevent water pooling. Place warning tape above utility lines before backfilling to alert future diggers.
Tip: Call your local inspection office to confirm trench dimensions and placement before you start. This step helps you avoid costly rework and code violations.
Case Study: Safe Trenching in Residential Pool Installation
A homeowner in Arizona planned a pool with integrated lighting and water features. They marked trench paths and measured widths and depths according to local codes. The operator used a Mini-Excavator to dig trenches 2 feet wide and deep, then installed plastic conduit at an 18-inch depth for electrical lines. The project passed inspection on the first attempt, and no safety incidents occurred. According to local safety reports, most trenching accidents result from improper depth or lack of warning tape. By following code and marking utilities, you reduce risk.
Excavate Pool Footings
Pool footings support the structure and prevent shifting or settling. You must excavate footings with care to maintain stability and alignment.
Depth and Width Tips
Follow these recommended techniques for footing excavation:
- Bulk Excavation: Shape the pool and reach the required depth using heavy machinery.
- Trenching: Dig precise trenches for plumbing and utilities to avoid leaks.
- Rock Excavation: Break up hard materials in rocky soil to secure the pool’s foundation.
- Grading and Sloping: Adjust the ground to manage drainage and prevent water problems.
You should dig footings to the depth specified in your pool plans, usually between 12 and 24 inches below the pool base. Maintain a consistent width, typically 12 inches, to support the walls evenly. Use a measuring tape and level to check dimensions as you work.
Alignment Checks
You must verify alignment at every stage. Place stakes and run string lines along the footing edges. Use a builder’s level to confirm that the footings are straight and at the correct elevation. Check for gaps or uneven sections, then adjust as needed. Accurate alignment ensures the pool shell sits evenly and prevents future cracking.
Note: Document your measurements and take photos for inspection records. Consistent checks help you catch errors early and avoid structural issues.
By following these steps, you create a safe, code-compliant foundation for your pool. Careful trenching and footing excavation set the stage for a successful installation.
Final Prep and Cleanup
Check Depth and Dimensions
You must verify the accuracy of your excavation before moving forward. Start by establishing fixed reference points in your yard. Use a measuring tape or laser measure to check the pool’s length and width from these points. Walk the perimeter and measure at several locations to confirm consistency. For pools with curves or special features, measure those areas separately. Record every measurement in a notebook or on your phone for future reference.
To check depth, insert a measuring pole vertically at multiple spots across the pool base. Mark the pole at ground level, then read the distance to the bottom. Repeat this process at the shallow and deep ends. Taking several measurements ensures you catch any uneven spots early.
Порада: Document your measurements and take photos. This record helps during inspections and if you need to troubleshoot later.
| Common Issues Found During Final Prep | How to Address Them |
|---|---|
| Uneven base or slopes | Re-grade and re-measure affected areas |
| Incorrect pool dimensions | Adjust excavation boundaries as needed |
| Standing water in excavation | Improve drainage or pump out water |
| Missed utility lines | Pause work and re-check with locator tools |
Compact and Grade Base
Proper compaction and grading prevent future settling and structural problems. Use heavy machinery to grade the base evenly. For clay-heavy soil, larger excavators break through dense material efficiently. In sandy or loose soil, wider tracks or stabilizers keep equipment from sinking. Mechanical compactors or rollers are essential for compacting loose soils. Spread each lift of soil in 6-inch layers and compact thoroughly before adding the next.
“Fill the pool correctly to avoid a sinking mud hole in your yard. It’s crucial to do it right. Spread each lift of soil in 6″ layers and compact it. We use a padded foot drum roller for the best results.”
After grading, check the surface with a level or laser to confirm uniformity. Good compaction ensures your pool will not shift or settle over time.
Clean Up and Remove Equipment
A thorough cleanup leaves your site safe and ready for the next phase. Begin by rough grading the disturbed areas and leveling the ground to match existing landscaping. Provide proper drainage by sculpting the land and smoothing out the surface. Aerate the topsoil to encourage new grass growth. Apply seed and straw mat or lay sod for a finished look. Reinstall any fencing you removed for equipment access.
Pick up and haul away all debris, including broken concrete and rebar. Import engineered fill if needed to restore the area. Complete a final walk-through to inspect the site and collect any remaining debris.
Примітка: Final inspections often focus on permits, electrical safety, and adherence to plans. Schedule these with your local authority before proceeding.
| Inspection Requirement | Опис |
|---|---|
| Permits and Regulations | Inspections ensure adherence to submitted plans and safety regulations. |
| Electrical Safety | Focus on ensuring electrical installations are up to code to prevent hazards. |
| Continuous Inspections | Inspections occur at various stages from excavation to final installation, ensuring safety. |
Приклад:
A homeowner in North Carolina completed their pool excavation by double-checking all measurements, compacting the base with a mechanical roller, and restoring the yard with fresh seed. Their attention to detail helped them pass inspection on the first try and achieve a smooth transition to pool installation. For more best practices, review pool construction guidelines.
You have learned how to prepare your yard for a pool using a mini-excavator. Careful planning, accurate measurements, and strict safety practices set you up for success. When you double-check every step, you avoid costly mistakes and pass inspections with ease. For example, a homeowner who measured twice and compacted the base thoroughly enjoyed a smooth installation and fewer repairs. The table below shows the long-term benefits of thorough site preparation:
| Вигода | Опис |
|---|---|
| Stable foundation | Pool withstands settling and uneven stresses over time. |
| Reduced maintenance costs | Fewer repairs from cracking or structural issues. |
| Durability through weather | Pool resists movement during severe conditions. |
| Спокій | Proper base minimizes risks of sinks or premature wear. |
| Longevity for owners | Structural integrity lasts for generations. |
Take your time, follow local codes, and ask for help when needed. You will enjoy the satisfaction of a well-prepared pool site.
FAQ
How deep should you dig for a standard in-ground pool?
You should dig to a depth of 44½ inches for most standard in-ground pools. Always check your pool design and local codes. Measure at several points to confirm consistent depth. Adjust as needed for sloped or multi-level pools.
Can you operate a mini-excavator on wet or muddy ground?
You can operate a mini-excavator on damp soil, but avoid saturated or muddy areas. Wet ground increases the risk of equipment sinking or sliding. Wait for drier conditions or lay down gravel for better traction.
What safety checks should you perform before starting excavation?
You should inspect the mini-excavator for leaks, loose parts, and proper fluid levels. Test all controls. Confirm that safety gear fits. Mark all utilities. Review your emergency plan with anyone on-site.
How do you handle unexpected rocks or boulders during excavation?
You should use the mini-excavator’s bucket to loosen smaller rocks. For large boulders, dig around them and lift with the machine if possible. If the rock is too heavy, consider breaking it into smaller pieces or hiring a specialist.
What should you do if you find unmarked utility lines?
Stop work immediately. Mark the location and contact your local utility provider. Do not attempt to move or repair the line yourself. Wait for professional guidance before continuing.
How do you ensure the pool area remains level during excavation?
You should use a laser level or builder’s level to check elevation points frequently. Mark reference stakes around the site. Adjust the excavation as you go. A homeowner in California avoided costly rework by checking levels every hour.
Is it possible to prepare a yard for a pool without professional help?
You can prepare your yard if you have the право обладнання, safety training, and follow local codes. Many homeowners succeed by researching best practices and consulting with inspectors. For complex sites, consider hiring a professional for guidance.
What is the best way to dispose of excess soil from excavation?
You should contact local waste management or landscaping companies. Some areas allow you to reuse soil for grading or garden beds. A homeowner in Ohio arranged for a hauler to remove spoil piles, keeping the site clean and compliant.