Correo electrónico: [email protected] WhatsApp: +8618266768780

Correo electrónico: [email protected] WhatsApp: +8618266768780

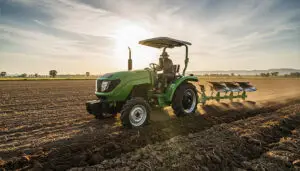
Una miniexcavadora puede cambiar rápidamente la forma en que aborda el paisajismo de jardines. Obtienes la capacidad de cavar, levantar y mover tierra con facilidad. Esta máquina se adapta a muchos entornos de jardín, ya sea que trabajes en un patio trasero pequeño o en un espacio al aire libre más grande. Puedes elegir entre varios tipos, como modelos de balanceo de cola cero, balanceo de cola reducido o balanceo de cola convencional, para adaptarse a las necesidades de su proyecto. Elegir los archivos adjuntos adecuados le ayuda a gestionar las tareas de forma más eficiente. No es necesario ser un profesional para lograr grandes resultados, sólo voluntad de aprender y probar nuevas herramientas.
Puede transformar la línea de tiempo de su proyecto de jardín utilizando un miniexcavadora. Imagínese cavar una zanja a mano para riego. Podrías pasar varios días con palas y carretillas. Con una miniexcavadora, tú termina la misma tarea en horas. La máquina te permite trabajar solo, reduciendo la necesidad de ayuda adicional. También evitas el esfuerzo físico de la excavación manual.
Aquí hay una comparación práctica del trabajo manual versus el uso de una miniexcavadora para un proyecto típico de zanjas de jardín:
| Método | Tiempo requerido | Número de trabajadores | Costo del proyecto | Precisión | Duración del proyecto |
|---|---|---|---|---|---|
| Trabajo manual | 3 días | 3 | Alto | Moderado | Largo |
| miniexcavadora | 4 horas | 1 | Más bajo | Alto | Corto |
Ahorras tiempo y dinero eligiendo una miniexcavadora. También logras una mayor precisión, lo que significa menos reparaciones más adelante. Para más historias del mundo real, puedes explorar foros de paisajismo o únete a las discusiones en La comunidad paisajística de Reddit.
Consejo: planifique su flujo de trabajo antes de comenzar. Esto le ayuda a maximizar los beneficios de ahorro de tiempo de su equipo.
A menudo se enfrenta a desafíos cuando se trabaja en pequeños patios traseros o entre edificios. Es posible que los equipos tradicionales no encajen o no maniobren fácilmente. Una miniexcavadora resuelve este problema. Es el tamaño compacto te permite moverte libremente en áreas confinadas. Puede excavar, nivelar y levantar materiales incluso en lugares con acceso limitado.
El diseño sin cola permite que la máquina gire dentro de su propio espacio. Esta característica aumenta la maniobrabilidad y reduce el riesgo de daños accidentales. El avanzado sistema hidráulico garantiza un funcionamiento suave, por lo que trabajas eficientemente en cualquier espacio. Para obtener más detalles sobre el rendimiento de los equipos compactos, visite Mundo de equipos o consulte las experiencias de los usuarios en Gorjeo.
Quieres que tu jardín luzca pulido y bien diseñado. Un miniexcavadora le ayuda a lograr resultados profesionales sin contratar a un contratista. Puede crear parterres de jardín, excavar estanques y preparar cimientos sólidos para patios o terrazas. La máquina te lo da control preciso sobre la profundidad y calificación.
El aislamiento acústico en la cabina mantiene bajos los niveles de ruido, haciendo que tu trabajo sea más cómodo. La eficiencia de la miniexcavadora significa que completas proyectos más rápido y con menos esfuerzo. Para inspiración y consejos, navegue Sección de paisajismo de Houzz o siga las historias de transformación de jardines Instagram.
Nota: No necesita capacitación profesional para operar una miniexcavadora. La mayoría de los modelos ofrecen controles intuitivos y funciones de seguridad para principiantes.

Antes de comenzar cualquier proyecto de jardín con una miniexcavadora, debe preparar su sitio con cuidado. Una buena preparación le ayuda a trabajar de forma eficiente y segura.
Comience haciendo una lista clara de todas las tareas que desea completar. Anote cada paso, como cavar zanjas, quitar tocones o nivelar tierra. Esta lista lo mantiene organizado y lo ayuda a estimar cuánto tiempo y esfuerzo tomará cada trabajo. También puedes usar tu lista de tareas para decidir qué archivos adjuntos necesitas para tu miniexcavadora.
A continuación, marca las áreas donde planeas trabajar. Utilice pintura en aerosol, estacas o cuerdas para delinear zanjas, parterres o lugares para cimientos. Esta guía visual le ayuda a mantener el rumbo y evitar errores. Marcar el área también le permite ver si necesita mover algún obstáculo antes de comenzar.
Consejo: tome fotografías de su sitio marcado antes de comenzar. Estos pueden ayudarle a recordar su plan y compartir su progreso con otros.
Siempre deberías hacerlo inspeccione su miniexcavadora antes de usarla. Busque daños visibles, grietas o fugas. Revise las orugas y asegúrese de que estén en buenas condiciones. Confirme que todos los fluidos (líquido hidráulico, aceite de motor y refrigerante) estén en los niveles correctos. Pruebe los controles y las características de seguridad, como el cinturón de seguridad y la protección contra vuelcos. Asegúrese de que el área alrededor de la máquina esté libre de peligros.
Antes de excavar, verifique si hay servicios públicos subterráneos. Comuníquese con su servicio local de marcado de servicios públicos (como el 811 en los Estados Unidos) para identificar líneas de gas, agua o electricidad. Nunca comience a excavar hasta que conozca la ubicación de estos servicios públicos. Este paso previene accidentes y reparaciones costosas.
Muchos proyectos de jardines requieren permisos. Consulte con su gobierno local antes de comenzar. La siguiente tabla muestra permisos comunes y cuándo podrías necesitarlos:
| Tipo de permiso | Descripción | Cuando sea necesario | Quién lo emite |
|---|---|---|---|
| Permiso de excavación o nivelación | Garantiza el cumplimiento de las leyes locales para el movimiento de tierras | Movimiento significativo de la tierra o remodelación de la tierra | Departamentos gubernamentales de la ciudad o del condado |
| Permiso de liquidación de servicios públicos | Identifica servicios públicos subterráneos | Cualquier excavación cerca de redes de servicios públicos | Empresas de servicios públicos o servicios designados |
| Permiso Ambiental | Protege zonas sensibles | Cerca de cuerpos de agua o tierras protegidas | EPA o agencias ambientales locales |
| Permiso de manejo de aguas pluviales | Controla el drenaje y la erosión | Proyectos que afecten patrones de escorrentía o drenaje | Juntas de agua locales u obras públicas |
| Permiso de construcción | Para excavación relacionada con la construcción | Excavación en busca de patios, terrazas o estructuras | Departamentos de construcción municipal |
| Permiso de Control de Erosión y Sedimentos | Previene la erosión y la contaminación por sedimentos | En laderas o cerca de arroyos y ríos | Oficinas ambientales o de obras públicas |
Nota: Los requisitos de permiso varían según la ubicación. Siempre consulte con las autoridades locales o visite Estados Unidos.gov para más información.
Los cubos y las herramientas de zanja le brindan el poder de abordar una amplia gama de tareas de jardín. Puede recoger y mover tierra, mantillo, grava o rocas con facilidad. Los cubos especializados, como los de uso general, los de uso pesado y los basculantes, le ayudan a cavar, nivelar y dar forma a su paisaje. Los cubos para zanjas le permiten crear zanjas precisas para instalaciones de riego o tuberías, reduciendo el desplazamiento del suelo y ahorrando tiempo.
| Tipo de cubo | Ventajas | Aplicaciones |
|---|---|---|
| Propósito general | Aumenta la productividad para la excavación diaria | Excavación de suelos blandos |
| Trabajo pesado | Maneja materiales resistentes y abrasivos | Terreno rocoso o duro |
| Zanjadora | Permite una excavación precisa y un menor desplazamiento del suelo | Riego, instalación de tuberías |
| Inclinación | Mejora la calificación y nivelación | Preparación del sitio |
Los cubos especializados mejoran la eficiencia operativa. Reduces el trabajo manual y consigues resultados más limpios. Por ejemplo, al instalar un nuevo sistema de riego, puede utilizar un cucharón de zanja para cavar zanjas rectas y estrechas. Este método mantiene su jardín ordenado y minimiza las interrupciones. Para obtener más consejos sobre la selección de cubos, visite Para ConstructionPros o busque publicaciones en Instagram.
Consejo: siempre haga coincidir el tamaño y tipo de cubo con las condiciones de su suelo y los objetivos del proyecto.
Las hojas de nivelación le ayudan a nivelar el suelo, la grava o el césped con precisión. Puede preparar superficies lisas para césped, patios o parterres de jardín. El amplio diseño de las hojas de nivelación cubre grandes áreas rápidamente, reduciendo el tiempo de rastrillado manual de varias horas a solo unas pocas. Este accesorio es ideal para crear terreno uniforme y dar forma a pendientes suaves.
Un cubo de nivelación transforma la preparación del terreno. En un lote de un cuarto de acre, puedes hacerlo reduzca el tiempo de rastrillado manual de 8 a 10 horas a aproximadamente 2 a 3 horas. Para conocer las mejores prácticas, consulte Consejos de calificación de Equipment World y siga #gradingblade en Gorjeo.
Las barrenas y taladros facilitan mucho la plantación y la preparación del suelo. Puede perforar agujeros para bulbos, árboles o postes de cercas rápidamente. Las barrenas también ayudan a mezclar el abono y las enmiendas del suelo de manera uniforme, mejorando la calidad del suelo. Puede airear el suelo compactado, lo que aumenta el drenaje y favorece raíces saludables. Las barrenas aflojan la tierra alrededor de las malas hierbas, lo que hace que sea más fácil eliminarlas.
Por ejemplo, al plantar una hilera de arbustos, puedes utilizar una barrena hidráulica para perforar agujeros uniformes. Este método ahorra tiempo y garantiza que cada planta tenga las condiciones adecuadas para el desarrollo de las raíces. Para más consejos, visite Revista de Gestión del Paisaje o explore #augerdrill en Instagram.
Nota: Inspeccione siempre su barrena antes de usarla y ajuste el tamaño de la broca para satisfacer sus necesidades de plantación.
| Tipo de archivo adjunto | Objetivo | Ventajas |
|---|---|---|
| cubos | Mueve grandes volúmenes de material | Formas versátiles para diferentes tareas de excavación |
| Balde de clasificación | Nivele el suelo y cree superficies lisas | Cobertura rápida, ideal para césped y camas |
| Barrena | Taladrar agujeros para plantar o publicaciones | Resultados consistentes y de alta velocidad |
| Rastrillo | Rompe y limpia los escombros | Superficie limpia para la construcción |
Seleccionar el accesorio adecuado para su miniexcavadora le garantiza completar las tareas del jardín de manera eficiente y con resultados profesionales.
Cuando necesita limpiar su jardín de escombros, maleza excesiva o maleza no deseada, las garfios y rastrillos se convierten en accesorios esenciales para su miniexcavadora. Estas herramientas le ayudan a gestionar las tareas de limpieza con rapidez y precisión, haciendo que sus proyectos de paisajismo sean más eficientes.
Las garfios te lo permiten agarra y levanta materiales pesados, como troncos, ramas y grandes montones de cepillos. Puede sacar fácilmente estos artículos de su área de trabajo sin esforzarse ni correr el riesgo de sufrir lesiones. El fuerte agarre de un accesorio de agarre garantiza que incluso los residuos de formas extrañas se eliminen en una sola pasada. Esto le ahorra tiempo y reduce la necesidad de mano de obra.
Los garfios de rastrillo, a veces llamados rastrillos de raíz o rastrillos de cepillo, tienen un propósito ligeramente diferente. Los utiliza para limpiar escombros sueltos, ramas pequeñas y maleza espesa. Su diseño le permite peinar el suelo, recogiendo material no deseado y dejando el suelo prácticamente intacto. Esta característica es especialmente útil cuando desea preparar un sitio para plantar o colocar césped. Evita la alteración excesiva del suelo, lo que ayuda a preservar la salud de los parterres de su jardín.
Consejo: utilice un garfio para recoger hojas, ramitas y raíces superficiales antes de comenzar nuevos proyectos de paisajismo. Este paso crea una pizarra limpia para plantar o construir.
Aquí hay una comparación de cómo los garfios y rastrillos ayudan con las tareas comunes de limpieza del jardín:
| Adjunto | Mejor para | Beneficio clave | Alteración del suelo |
|---|---|---|---|
| Luchar | Troncos, ramas grandes, escombros pesados | Levantamiento y remoción de objetos pesados eficientes | Mínimo |
| Rastrillo Grapple | Cepillo, escombros sueltos, raíces superficiales | Limpieza del sitio y preparación del terreno | Muy bajo |
También puedes usar estos accesorios para romper tierra compactada o quitar mantillo viejo. Cuando te enfrentas a áreas cubiertas de maleza, un garfio de rastrillo te ayuda a extraer malezas rebeldes y raíces enredadas. Esto hace que sea más fácil recuperar partes descuidadas de su jardín.
Muchos propietarios descubren que el uso de garfios y rastrillos reduce el tiempo dedicado a la limpieza manual a más de la mitad. Puede completar lo que llevaría horas con un rastrillo y una carretilla en solo una fracción del tiempo. Para obtener más consejos sobre el uso de estos accesorios, puede explorar recursos Revista de Gestión del Paisaje o siga #excavatorattachments en las redes sociales para ver ejemplos del mundo real.
Nota: Inspeccione siempre sus accesorios antes de usarlos. Verifique si hay púas dobladas o pernos flojos para garantizar un funcionamiento seguro y eficaz.
Elegir el accesorio adecuado para su tarea de limpieza depende del tipo y la cantidad de escombros en su jardín. Si tiene ramas y troncos en su mayoría grandes, una pinza funciona mejor. Para una limpieza de superficies y cepillos más livianos, una pinza de rastrillo ofrece mejores resultados. Al hacer coincidir la herramienta con el trabajo, maximiza la eficiencia de su miniexcavadora y mantiene su jardín con el mejor aspecto.
Puedes cavar zanjas rectas para riego o cables con una miniexcavadora en menos tiempo que los métodos manuales. Empezar por posicionar la máquina a una altura productiva, haciendo coincidir los aparadores de su vehículo de transporte. Retire primero la capa superior del suelo para fomentar el nuevo crecimiento más tarde. Comience a hacer zanjas en la parte superior y trabaje en capas. Esta técnica mantiene la zanja uniforme y reduce la alteración del suelo.
“Las excavadoras compactas pueden ayudar a aumentar la eficiencia si se utilizan correctamente”, afirma un director nacional de productos y formación de Takeuchi.
Una zanja típica de 30 pies para riego de jardines podría requerir tres trabajadores por día completo a mano. Con un miniexcavadora, terminas en menos de dos horas.
| Método | Tiempo requerido | Se necesita mano de obra | Estimación de costos |
|---|---|---|---|
| Excavación manual | 8 horas | 3 personas | Alto |
| Excavador | 2 horas | 1 persona | Más bajo |
Para obtener más consejos sobre zanjas, visite Para ConstructionPros o consulte #trenching activado Instagram.
Puedes cavar hoyos para plantar árboles y arbustos rápidamente. Retire primero la capa superior de tierra. Utilice el cubo para crear agujeros a la profundidad y ancho correctos. Este método ayuda a que las raíces se establezcan y promueve un crecimiento saludable. Ahorras tiempo y evitas la fatiga en comparación con el uso de una pala.
Se logran superficies lisas para césped y patios mediante el uso de a cucharón de nivelación que coincide con el ancho de la pista de tu miniexcavadora. Comience con una nivelación aproximada para establecer contornos básicos. Mueva sólo un tercio del ancho del balde por pasada para un mejor control. Rocie el suelo en varias pasadas hasta que se sienta viable.
Un cuarto de acre de césped se puede nivelar en aproximadamente tres horas con una miniexcavadora, en comparación con un día completo a mano.
| Tamaño del área | Calificación manual | Clasificación de excavadoras |
|---|---|---|
| 0,25 acre | 8 horas | 3 horas |
Para técnicas de calificación, consulte Mundo de equipos o siga #grading en Gorjeo.
Previene la compactación del suelo minimizando los pases repetidos sobre la misma zona. Mantenga una pendiente mínima de 2% para el drenaje lejos de los edificios. Los cubos inclinables le ayudan a crear pendientes precisas para la escorrentía de agua.
Eliminas tocones y rocas de manera eficiente siguiendo un proceso paso a paso:
Estacione siempre la excavadora en un terreno estable y verifique si hay líneas de servicios públicos marcadas antes de excavar. Utilice movimientos suaves y controlados para proteger el sistema hidráulico.
| Tarea | Trabajo manual | Tiempo de excavadora |
|---|---|---|
| Eliminación de tocones | 4 horas | 1 hora |
Encuentre más estrategias de eliminación en Revista de Gestión del Paisaje o explore #stumpremoval en Instagram.
Limpia áreas cubiertas de maleza usando accesorios de rastrillo o garfio. Comience recogiendo escombros sueltos y raíces superficiales. Peine el suelo para recolectar material no deseado mientras mantiene el suelo intacto. Este método prepara su sitio para plantar o construir y ahorra horas en comparación con la limpieza manual.
Consejo: Inspeccione siempre los accesorios antes de usarlos para garantizar un funcionamiento seguro.
Para obtener más consejos de limpieza, visite Sección de paisajismo de Houzz o consulte #landscapeclearing en Gorjeo.

Seleccionar la miniexcavadora adecuada para su proyecto de jardín puede marcar una diferencia significativa tanto en eficiencia como en resultados. Debes considerar varios factores antes de tomar tu decisión. La elección correcta depende del alcance de su proyecto, el tipo de terreno y las tareas que planea completar.
Debes empezar evaluando los principales requisitos de tu proyecto. Piense en el tamaño de su jardín, el tipo de suelo y las tareas específicas que desea realizar. Por ejemplo, un patio trasero pequeño con senderos estrechos puede requerir un modelo compacto, mientras que un espacio más grande con necesidades de levantamiento de objetos pesados puede beneficiarse de una máquina más robusta. La siguiente tabla describe los factores clave que le ayudarán a comparar opciones:
| Factor | Descripción |
|---|---|
| Tamaño y peso | Haga coincidir el modelo con el tamaño de su proyecto y verifique los límites de su vehículo remolcador. |
| Profundidad y alcance de excavación | Elija un modelo que cumpla con la profundidad de excavación requerida, generalmente entre 5 y 14 pies. |
| Accesorios y versatilidad | Busque modelos que admitan una variedad de archivos adjuntos para diferentes tareas. |
| Potencia y rendimiento | Asegúrese de que el motor y el sistema hidráulico puedan manejar el terreno y la carga de trabajo de su jardín. |
| Facilidad de uso | Seleccione un modelo con controles intuitivos para una operación más segura y eficiente. |
Consejo: considere siempre el alcance de su proyecto, el tipo de terreno y su presupuesto antes de tomar una decisión final.
los tamaño y capacidad de a miniexcavadora afecta directamente su rendimiento en tu jardín. Los micromodelos de menos de 1 tonelada funcionan mejor en espacios muy reducidos, como pequeños jardines urbanos o áreas con acceso limitado. Las miniexcavadoras estándar en el rango de 1 a 3 toneladas se encargan de la mayoría de las tareas de paisajismo residencial, incluidas la excavación, nivelación y elevación. Los modelos más grandes, de 4 a 8 toneladas, se adaptan a proyectos más grandes que requieren excavaciones más profundas o levantamientos más pesados.
Debes adaptar el tamaño de la máquina a las necesidades de tu proyecto. Si elige un modelo demasiado pequeño, puede tener dificultades con suelos duros o materiales pesados. Si selecciona un modelo demasiado grande, es posible que tenga problemas para maniobrar en espacios reducidos. Evalúe la profundidad de excavación y la capacidad de elevación necesarias para sus tareas para evitar trabajar demasiado la máquina.
Compatibilidad de archivos adjuntos es esencial para maximizar la versatilidad de su miniexcavadora. Debe asegurarse de que los accesorios que planea utilizar, como cubos, barrenas o garfios, se ajusten al modelo elegido. Consulte los siguientes puntos:
Si no está seguro de qué modelo o accesorios elegir, puede consultar con un equipo de ventas experto. Pueden ayudarle a adaptar la máquina y las herramientas adecuadas a las necesidades únicas de su jardín. Para obtener más orientación, puede explorar recursos Mundo de equipos o Para ConstructionPros.
Nota: Una planificación y selección cuidadosas lo ayudarán a lograr los mejores resultados y proteger su inversión.
Operas una miniexcavadora de manera más eficiente cuando comprendes los controles y planificas tu secuencia de trabajo. Antes de comenzar, marque áreas clave con estacas o pintura en aerosol. El mapeo visual le ayuda a evitar confusiones y mantiene organizado su flujo de trabajo. Debes inspeccionar la tensión de la pista con regularidad. La tensión adecuada mejora la estabilidad y la maniobrabilidad, lo que reduce el desgaste.
Las máquinas modernas ofrecen controles fáciles de usar. Puede cambiar entre accesorios rápidamente, lo que ahorra tiempo y aumenta la productividad. Al cavar, incline el cucharón correctamente y utilice varias pasadas pequeñas. Esta técnica le brinda mayor precisión y le ayuda a lograr resultados más limpios. Debe monitorear las métricas de rendimiento, como los tiempos de ciclo y la eficiencia del combustible, para identificar áreas de mejora.
Aquí hay una tabla de mejores prácticas para controles operativos:
| Mejores prácticas | Descripción |
|---|---|
| Planificar secuencias de trabajo | Marque áreas y trace visualmente su flujo de trabajo. |
| Utilice accesorios auxiliares | Utilice accesorios para aumentar la productividad y reducir el trabajo manual. |
| Mantenga una tensión de vía adecuada | Inspeccione las pistas en busca de estabilidad y maniobrabilidad. |
| Utilice excavación eficiente | Incline el cubo y use pases pequeños para mayor precisión. |
| Optimice el consumo de combustible | Reduzca el tiempo de inactividad y ajuste las RPM del motor. |
| Evaluar el desempeño | Supervise los tiempos de ciclo y el uso de combustible para mejorar. |
Consejo: familiarícese siempre con el diseño de control antes de comenzar un nuevo proyecto.
A menudo se enfrenta a desafíos cuando se trabaja en zonas de jardín confinadas. Es necesario maniobrar la miniexcavadora sin dañar las estructuras o plantas cercanas. Columpio de cola cero el diseño le permite operar cerca de paredes o cercas. Reduces el riesgo de contacto accidental. Las máquinas ligeras ejercen menos presión sobre el suelo, lo que protege las superficies delicadas.
Siga estos pasos para maniobrar eficazmente en espacios reducidos:
Aumenta la eficiencia y reduce la posibilidad de errores al planificar sus movimientos. Las características de seguridad, como la protección contra vuelcos y caídas de objetos, lo mantienen seguro en áreas confinadas. Para obtener más consejos sobre maniobras, puede visitar Mundo de equipos o siga la operación de #excavator en las redes sociales.
Quiere proteger las plantas y el suelo existentes mientras opera su miniexcavadora. Una planificación cuidadosa le ayuda a evitar daños innecesarios. Mapear ubicaciones raíz antes de excavar. Utilice equipos aptos para raíces, como máquinas con orugas estrechas, para minimizar la alteración del suelo. Establezca barreras protectoras alrededor de áreas sensibles para protegerlas del contacto accidental.
Puede utilizar herramientas manuales para mayor precisión cuando trabaja cerca de raíces delicadas. Programar sus renovaciones para evitar períodos vulnerables de las raíces también ayuda a preservar la salud de las plantas. A continuación se ofrecen algunas técnicas prácticas para minimizar las perturbaciones:
Nota: Proteger el ecosistema de su jardín garantiza el éxito a largo plazo de sus proyectos de paisajismo.
Para obtener más orientación sobre cómo minimizar las perturbaciones, puede explorar recursos desde Revista de Gestión del Paisaje o explore #gardeningtips en las redes sociales.
Gestionar el combustible y el tiempo de manera eficiente le ayuda a aprovechar al máximo su miniexcavadora. Puede reducir los costos operativos y terminar los proyectos de jardín más rápido siguiendo algunas estrategias comprobadas. La planificación inteligente y la operación cuidadosa marcan una gran diferencia en sus resultados.
Debes comenzar cada día con un plan claro. Traza tus tareas y decide el mejor orden para completarlas. Este enfoque reduce los movimientos innecesarios y ahorra combustible. Cuando sabes exactamente dónde cavar, nivelar o despejar, evitas retroceder y realizar pases repetidos.
Aquí hay dos estrategias clave que lo ayudan a optimizar el uso de combustible y la gestión del tiempo:
| Estrategia | Descripción |
|---|---|
| Reducir el tiempo de inactividad | Apague la excavadora cuando no esté en uso para ahorrar combustible. |
| Planificación | Minimice los movimientos planificando secuencias de trabajo de manera efectiva para reducir el consumo de combustible. |
También puedes utilizar estos consejos prácticos para mejorar la eficiencia:
Consejo: realice un seguimiento de su consumo diario de combustible y del tiempo dedicado a cada tarea. Este registro le ayuda a detectar patrones y encontrar nuevas formas de mejorar la eficiencia.
Puede encontrar más consejos sobre gestión de combustible y operación de equipos en Mundo de equipos y Para ConstructionPros. Estas plataformas ofrecen consejos de expertos y ejemplos del mundo real de operadores experimentados.
La gestión eficiente del tiempo y el combustible no sólo ahorra dinero sino que también reduce su impacto medioambiental. Terminas los proyectos más rápido y mantienes tu jardín luciendo lo mejor posible.

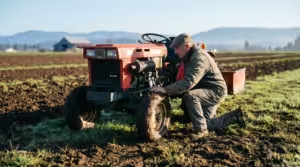
Cuidar su miniexcavadora garantiza un rendimiento confiable y extiende su vida útil. Puede mantener su equipo en óptimas condiciones siguiendo las rutinas diarias y semanales, limpiándolo y almacenándolo adecuadamente y solucionando problemas a medida que surjan.
Debe inspeccionar su miniexcavadora todos los días antes de comenzar a trabajar. Verifique los niveles de líquido, examine las conexiones y asegúrese de que los accesorios estén bien engrasados. Estos sencillos pasos ayudan a prevenir averías y a mantener su máquina funcionando sin problemas. Las rutinas semanales añaden otra capa de protección. Engrase el cojinete del anillo giratorio, verifique la tensión de la vía e inspeccione la correa de transmisión. La atención regular reduce el desgaste y evita reparaciones costosas.
Aquí hay una tabla que resume las tareas esenciales de mantenimiento:
| Frecuencia | Tarea de mantenimiento | Descripción |
|---|---|---|
| A diario | Comprobación del nivel de líquido | Revise el líquido hidráulico, el aceite del motor y el refrigerante. Inspeccione las conexiones y los accesorios de grasa. |
| Semanalmente | Engrasar y comprobar | Engrase el cojinete del anillo giratorio, verifique la tensión de la oruga e inspeccione la correa de transmisión. |
También te beneficias de controles diarios sobre niveles de fluido hidráulico, rendimiento del motor, sistema de orugas, sistemas eléctricos e inspecciones de accesorios. Estos hábitos le ayudan a detectar problemas tempranamente y prolongar la vida útil de su equipo.
Consejo: Configure un recordatorio en su teléfono o calendario para el mantenimiento semanal. La consistencia marca una gran diferencia.
Después de cada proyecto, debes limpiar bien tu miniexcavadora. Elimina la suciedad y los residuos de todas las superficies. Esto evita la corrosión y le permite detectar cualquier daño. Elija un lugar de almacenamiento adecuado. El almacenamiento en interiores funciona mejor, pero puede utilizar una lona transpirable si debe guardar la máquina en el exterior.
Siga estos pasos para una limpieza y almacenamiento efectivos:
Nota: La limpieza y el almacenamiento adecuados reducen el riesgo de oxidación y problemas mecánicos. Para más consejos, visite Mundo de equipos o Para ConstructionPros.
Si su miniexcavadora encuentra problemas operativos, puede seguir algunos pasos para solucionar problemas. Verifique los niveles de aceite y reemplace el aceite lubricante cada 250 horas. Inspeccione el sistema hidráulico en busca de contaminación por aceite y desgaste de la bomba. Aborde las fallas eléctricas verificando las conexiones y fusibles de la batería. Un mantenimiento adecuado le ayuda a evitar el sobrecalentamiento y la pérdida de energía.
Puede utilizar esta lista de verificación cuando surjan problemas:
Llamada: si no puede resolver un problema, consulte a un técnico profesional o consulte el manual de su operador para obtener orientación.
El mantenimiento regular, la limpieza cuidadosa y la rápida resolución de problemas mantienen su miniexcavadora lista para cada proyecto de jardín.

Es posible que se sienta tentado a llevar su miniexcavadora más allá de sus límites, especialmente cuando desea terminar un proyecto rápidamente. Trabajar demasiado la máquina puede provocar averías y reparaciones costosas. Siempre deberías hacerlo consulte el manual de funcionamiento para conocer los límites de carga y evita excederlos. Cuando intentas levantar o mover más del peso recomendado, corres el riesgo de dañar el sistema hidráulico y otros componentes.
También debes prestar atención al terreno. Si conduce demasiado rápido sobre terreno irregular, aumenta la posibilidad de volcar o perder el control. Reduzca la velocidad y evalúe el área antes de avanzar. Asegure siempre las cargas adecuadamente y evite operar más allá de la capacidad de la máquina.
Consejo: Tome descansos regulares durante tareas largas. Esto ayuda a prevenir el sobrecalentamiento y prolonga la vida útil de su equipo.
La seguridad siempre debe ser su máxima prioridad al operar una miniexcavadora. Muchos accidentes ocurren porque los operadores ignoran los protocolos básicos de seguridad. Debe usar el equipo de protección adecuado, como un casco, un chaleco de alta visibilidad y botas con punta de acero. Antes de comenzar, inspeccione el área en busca de peligros como líneas eléctricas aéreas o servicios públicos subterráneos.
Debe hacer una lista de verificación antes de transportar la excavadora. Esto le garantiza asegurar la máquina y evitar accidentes durante la carga y descarga. Familiarícese siempre con las normas de seguridad y sígalas atentamente. Si nota algún signo de desgaste o daño, deténgase e inspeccione el equipo antes de continuar.
A continuación se muestran algunos errores de seguridad comunes que se deben evitar:
Nota: La conciencia situacional lo protege a usted y a otras personas en el lugar de trabajo.
Usar el accesorio incorrecto para una tarea puede ralentizarlo y dañar su miniexcavadora. Debe hacer coincidir cada accesorio con el trabajo en cuestión. Por ejemplo, el uso de un cucharón de uso general para zanjas puede provocar líneas desiguales y un esfuerzo desperdiciado. Compruebe siempre que el accesorio se ajuste a las especificaciones y la capacidad hidráulica de su máquina.
Debe inspeccionar los accesorios antes de cada uso. Busque púas dobladas, pernos sueltos o signos de desgaste. Si utiliza un accesorio dañado, corre el riesgo de sufrir lesiones y reducir la eficiencia. Mantenga un registro de qué accesorios utiliza para cada proyecto. Esto le ayuda a planificar tareas futuras y evitar repetir errores.
| Error | Impacto | Prevención |
|---|---|---|
| Tipo de archivo adjunto incorrecto | Eficiencia reducida | Haga coincidir el apego a la tarea |
| Accesorio dañado | Riesgo de seguridad, malos resultados | Inspeccionar antes de su uso |
| Ajuste inadecuado | Daños en el equipo | Comprobar compatibilidad |
Consejo: consulte el manual de su operador para conocer los archivos adjuntos recomendados y las pautas de uso.
Puede encontrar más consejos operativos y de seguridad en Para ConstructionPros y Mundo de equipos.
Es posible que se sienta tentado a saltarse el mantenimiento regular cuando su miniexcavadora parece funcionar sin problemas. Sin embargo, descuidar estas tareas esenciales puede provocar averías inesperadas, reparaciones costosas e incluso riesgos para la seguridad. El mantenimiento constante mantiene su máquina confiable y extiende su vida útil.
Por qué es importante el mantenimiento
Las comprobaciones de rutina le ayudan a detectar pequeños problemas antes de que se conviertan en problemas importantes. Por ejemplo, el nivel bajo de líquido hidráulico puede provocar un rendimiento lento o dañar el sistema. Los filtros de aire sucios reducen la eficiencia del motor y aumentan el consumo de combustible. Las orugas desgastadas o los pernos flojos pueden afectar la estabilidad y la seguridad.
Consejo: Configure un recordatorio en su teléfono o calendario para revisiones de mantenimiento diarias y semanales. La consistencia evita costosas sorpresas.
Tareas de mantenimiento comunes que nunca debes omitir
Consecuencias del mantenimiento de saltos
Corre el riesgo de algo más que el simple tiempo de inactividad cuando ignora el mantenimiento. La siguiente tabla muestra el impacto potencial:
| Tarea omitida | Posible consecuencia | Costo estimado de reparación* |
|---|---|---|
| Ignorar las comprobaciones de líquidos | Fallo hidráulico | $1.000-$5.000 |
| Saltarse la lubricación | Desgaste prematuro de las articulaciones | $500-$2.000 |
| No limpiar filtros | Daños en el motor, mal uso de combustible | $800-$3.000 |
| Pernos flojos | Inestabilidad del equipo | $200-$1.000 |
*Estimaciones basadas en promedios de la industria. Para más detalles, ver Mantenimiento de equipos mundiales.
Cómo construir una rutina de mantenimiento
Nota: Puede encontrar ejemplos de listas de verificación y guías de mantenimiento de fuentes confiables como Para ConstructionPros.
El mantenimiento regular no sólo protege su inversión. También garantiza que su miniexcavadora funcione de forma segura y eficiente cada vez que inicia un nuevo proyecto de jardín.
Puede lograr mejores resultados en sus proyectos de jardín planificando su flujo de trabajo antes de comenzar. Comience marcando áreas clave con estacas o pintura en aerosol. El mapeo visual le ayuda a organizar sus tareas y evitar confusiones. Debes dividir tu proyecto en pasos claros. Asigne a cada paso un orden específico para maximizar la eficiencia.
Considere estos consejos prácticos para la planificación del flujo de trabajo:
Consejo: Mantener un registro diario de su progreso le ayuda a identificar patrones y mejorar los flujos de trabajo futuros.
Un flujo de trabajo bien planificado reduce la pérdida de tiempo y energía. Terminas las tareas más rápido y evitas movimientos innecesarios. Para obtener más consejos sobre la planificación del flujo de trabajo, puede visitar Para ConstructionPros o siga #excavatorworkflow en las redes sociales.
Puede desbloquear todo el potencial de su miniexcavadora utilizando las técnicas y accesorios adecuados. Seleccione accesorios que coincidan con las tareas específicas de su jardín. Por ejemplo, utilice una cuchilla niveladora para nivelar el suelo o una barrena para perforar agujeros para plantar. Cambie los accesorios según sea necesario para evitar retrasos.
Aquí hay una tabla que muestra cómo diferentes accesorios pueden aumentar su eficiencia:
| Adjunto | Tarea | Ganancia de eficiencia |
|---|---|---|
| Cuchilla niveladora | Nivelación del suelo | Cubre grandes áreas rápidamente |
| Barrena | Perforación de agujeros | Profundidad uniforme, menos trabajo manual |
| Luchar | Limpieza de escombros | Maneja materiales pesados fácilmente |
| Cuchara para zanjas | Cavando zanjas | Líneas rectas y precisas |
También debes ajustar tus técnicas operativas en función de la tarea. Para excavar, utilice múltiples pasadas pequeñas en lugar de un corte profundo. Este método protege la máquina y mejora la precisión. Evalúe periódicamente su rendimiento mediante el seguimiento del uso de combustible y los tiempos de ciclo. Pequeños ajustes pueden conducir a mejoras significativas.
Nota: El uso eficiente de archivos adjuntos y técnicas le ayuda a completar proyectos con resultados profesionales.
Puede encontrarse con situaciones en las que se necesite ayuda profesional. Las tareas complejas, como la excavación profunda cerca de líneas de servicios públicos o la construcción de grandes muros de contención, requieren habilidades especializadas. Si nota problemas mecánicos persistentes o problemas de seguridad, comuníquese con un técnico certificado.
Considere llamar a un profesional cuando:
La seguridad y el cumplimiento importan. En caso de duda, consulte a un experto para proteger su inversión y garantizar que su proyecto de jardín cumpla con todos los requisitos.
Puede encontrar profesionales calificados a través de directorios de contratistas locales o plataformas industriales como Mundo de equipos y Revista de Gestión del Paisaje. Buscar asesoramiento de expertos le ayuda a evitar errores costosos y garantiza que su proyecto de jardín tenga éxito.
¿Listo para transformar tu espacio al aire libre? Explorar opciones de miniexcavadoras y comuníquese con expertos de la industria para obtener orientación sobre su próximo proyecto de paisajismo.

Debe leer el manual del operador antes de comenzar. Use equipo de seguridad, verifique si hay servicios públicos subterráneos e inspeccione la máquina. Mantenga siempre a los transeúntes alejados del área de trabajo. Para obtener más consejos de seguridad, visite Seguridad en las excavaciones de OSHA.
Puede utilizar cubos para cavar, cuchillas niveladoras para nivelar, barrenas para plantar agujeros y garfios para eliminar escombros. Haga coincidir cada accesorio con su tarea específica para obtener mejores resultados. Verifique la compatibilidad con su máquina antes de usarla.
Debe inspeccionar los niveles de líquido, las vías y los accesorios diariamente. Complete una revisión exhaustiva semanalmente, que incluye engrase de piezas móviles y limpieza de filtros. El mantenimiento regular evita averías y prolonga la vida útil del equipo.
Sí, puedes maniobrar modelos compactos en zonas estrechas. Los diseños de giro de cola cero te ayudan a trabajar cerca de paredes o vallas. Planifique siempre sus movimientos y tenga cuidado para evitar dañar plantas o estructuras.
El uso de combustible depende del modelo y la carga de trabajo. La mayoría de las miniexcavadoras consumen entre 1 y 2 galones por hora. Puede reducir los costos de combustible minimizando el tiempo de inactividad y planificando secuencias de trabajo eficientes.
| Tamaño del modelo (toneladas) | Uso promedio de combustible (gal/h) |
|---|---|
| 1–2 | 1.0 |
| 3–5 | 1.5 |
| 6–8 | 2.0 |
Debe considerar el tamaño de su jardín, la profundidad de excavación necesaria y el peso de los materiales. Los modelos más pequeños se adaptan a espacios reducidos y tareas livianas. Los modelos más grandes manejan excavaciones más profundas y cargas más pesadas.
Primero, verifique los niveles de líquido y las conexiones de la batería. Inspeccione si hay daños visibles o fugas. Si no puede identificar el problema, comuníquese con un técnico calificado. Mantenga siempre cerca el manual del operador para conocer los pasos de solución de problemas.
Consejo: Mantenga un registro de mantenimiento para realizar un seguimiento de los problemas y reparaciones. Esto le ayuda a detectar patrones y evitar futuras averías.
Es posible que necesite permisos para excavar, nivelar o trabajar cerca de servicios públicos. Consulte con su gobierno local antes de comenzar. Los requisitos de permisos varían según la ubicación. Para más información, visita Gobiernos locales de USA.gov.


-1.png)