E-mail: [email protected] WhatsApp: +8618266768780

E-mail: [email protected] WhatsApp: +8618266768780

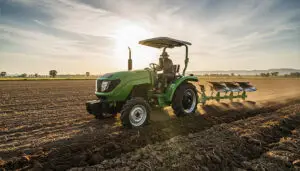
Un miniescavatore può cambiare rapidamente il tuo approccio alla progettazione del giardino. Acquisisci la capacità di scavare, sollevare e spostare il terreno con facilità. Questa macchina si adatta a molti ambienti, sia che tu lavori in un piccolo cortile o in uno spazio esterno più ampio. Puoi scegliere tra diversi tipi, come modelli a ingombro posteriore zero, a ingombro posteriore ridotto o a ingombro posteriore convenzionale, per soddisfare le esigenze del tuo progetto. Scegliere gli accessori giusti ti aiuta a gestire le attività in modo più efficiente. Non è necessario essere un professionista per ottenere ottimi risultati: basta la volontà di imparare e provare nuovi strumenti.
Puoi trasformare la cronologia del tuo progetto di giardinaggio utilizzando un miniescavatore. Immagina di scavare una trincea per l'irrigazione a mano. Potresti passare diversi giorni con pale e carriole. Con un miniescavatore, finire lo stesso compito in poche ore. La macchina consente di lavorare da soli, riducendo la necessità di aiuto esterno. Si evita anche lo sforzo fisico dello scavo manuale.
Ecco un confronto pratico tra il lavoro manuale e l'uso di un miniescavatore per un tipico progetto di scavo di trincee in giardino:
| Metodo | Tempo richiesto | Numero di lavoratori | Costo del progetto | Precisione | Durata del progetto |
|---|---|---|---|---|---|
| Lavoro manuale | 3 giorni | 3 | Alto | Moderare | Lungo |
| Miniescavatore | 4 ore | 1 | Inferiore | Alto | Corto |
Scegliendo un miniescavatore risparmi tempo e denaro. Otterrai anche una maggiore precisione, il che significa meno riparazioni in seguito. Per altre storie reali, puoi esplorare forum di paesaggistica o unisciti alle discussioni su La comunità di paesaggisti di Reddit.
Suggerimento: pianifica il tuo flusso di lavoro prima di iniziare. Questo ti aiuterà a massimizzare i vantaggi in termini di risparmio di tempo delle tue attrezzature.
Spesso si incontrano difficoltà quando si lavora in piccoli cortili o tra edifici. Le attrezzature tradizionali potrebbero non adattarsi o manovrare facilmente. Un miniescavatore risolve questo problema. le dimensioni compatte ti consentono di muoverti liberamente in aree ristrette. È possibile scavare, livellare e sollevare materiali anche in luoghi con accesso limitato.
Il design senza coda consente alla macchina di ruotare all'interno del proprio ingombro. Questa caratteristica aumenta la manovrabilità e riduce il rischio di danni accidentali. L'avanzato sistema idraulico garantisce un funzionamento fluido, per lavorare in modo efficiente in qualsiasi spazio. Per maggiori dettagli sulle prestazioni delle attrezzature compatte, visita Mondo delle attrezzature o dai un'occhiata alle esperienze degli utenti su Cinguettio.
Vuoi che il tuo giardino abbia un aspetto curato e ben progettato. miniescavatore ti aiuta a ottenere risultati professionali senza dover assumere un appaltatore. Puoi creare aiuole, scavare stagni e preparare solide fondamenta per patii o terrazze. La macchina ti offre controllo preciso della profondità e classificazione.
L'isolamento acustico in cabina mantiene bassi i livelli di rumore, rendendo il lavoro più confortevole. L'efficienza del miniescavatore consente di completare i progetti più velocemente e con meno sforzo. Per ispirazione e suggerimenti, sfoglia Sezione paesaggistica di Houzz o segui le storie di trasformazione del giardino su Instagram.
Nota: non è necessaria una formazione professionale per utilizzare un miniescavatore. La maggior parte dei modelli offre comandi intuitivi e funzioni di sicurezza adatte ai principianti.

Prima di iniziare qualsiasi progetto di giardinaggio con un miniescavatore, è necessario preparare attentamente il sito. Una buona preparazione aiuta a lavorare in modo efficiente e sicuro.
Inizia stilando un elenco chiaro di tutte le attività che vuoi completare. Annota ogni passaggio, come scavare trincee, rimuovere ceppi o livellare il terreno. Questo elenco ti aiuta a organizzare il lavoro e a stimare il tempo e l'impegno necessari per ogni lavoro. Puoi anche usare l'elenco delle attività per decidere quali accessori ti servono per il tuo... miniescavatore.
Successivamente, contrassegna le aree in cui intendi lavorare. Usa vernice spray, picchetti o spago per delineare trincee, aiuole o punti di fondazione. Questa guida visiva ti aiuta a rimanere sulla buona strada ed evitare errori. Contrassegnare l'area ti permette anche di vedere se è necessario rimuovere eventuali ostacoli prima di iniziare.
Suggerimento: scatta foto del sito contrassegnato prima di iniziare. Ti aiuteranno a ricordare il tuo piano e a condividere i tuoi progressi con gli altri.
Dovresti sempre ispezionare il miniescavatore prima dell'uso. Verificare la presenza di danni visibili, crepe o perdite. Controllare i cingoli e assicurarsi che siano in buone condizioni. Verificare che tutti i fluidi (fluido idraulico, olio motore e liquido di raffreddamento) siano ai livelli corretti. Testare i comandi e i dispositivi di sicurezza, come la cintura di sicurezza e la protezione antiribaltamento. Assicurarsi che l'area intorno alla macchina sia libera da pericoli.
Prima di scavare, verifica la presenza di utenze sotterranee. Contatta il servizio di segnalazione delle utenze locali (come l'811 negli Stati Uniti) per identificare le linee di gas, acqua o elettricità. Non iniziare mai gli scavi finché non si conosce l'ubicazione di queste utenze. Questo passaggio previene incidenti e costose riparazioni.
Molti progetti di giardinaggio richiedono permessi. Verifica con il tuo ente locale prima di iniziare. La tabella seguente mostra permessi comuni e quando potrebbero servirti:
| Tipo di permesso | Descrizione | Quando richiesto | Chi lo emette |
|---|---|---|---|
| Permesso di scavo o livellamento | Garantisce la conformità alle leggi locali per il movimento terra | Movimento significativo del terreno o rimodellamento del territorio | Dipartimenti governativi della città o della contea |
| Permesso di sgombero servizi pubblici | Identifica i servizi sotterranei | Eventuali scavi in prossimità delle reti di pubblica utilità | Società di servizi pubblici o servizi designati |
| Permesso ambientale | Protegge le aree sensibili | Vicino a specchi d'acqua o terreni protetti | EPA o agenzie ambientali locali |
| Permesso di gestione delle acque piovane | Controlla il drenaggio e l'erosione | Progetti che influenzano i modelli di deflusso o drenaggio | Enti idrici locali o lavori pubblici |
| Permesso di costruire | Per scavi legati alla costruzione | Scavi per patii, ponti o strutture | Dipartimenti edilizi comunali |
| Permesso per il controllo dell'erosione e dei sedimenti | Previene l'erosione e l'inquinamento dei sedimenti | Sui pendii o vicino a corsi d'acqua e fiumi | Uffici ambientali o dei lavori pubblici |
Nota: i requisiti per i permessi variano a seconda della località. Verificare sempre con le autorità locali o visitare il sito USA.gov per maggiori informazioni.
Benne e utensili da scavo ti offrono la possibilità di affrontare una vasta gamma di lavori in giardino. Puoi raccogliere e spostare terra, pacciame, ghiaia o rocce con facilità. Benne specializzate, come quelle multiuso, quelle per impieghi gravosi e quelle basculanti, ti aiutano a scavare, livellare e modellare il tuo paesaggio. Le benne da scavo ti consentono di creare trincee precise per l'irrigazione o l'installazione di condotte, riducendo lo spostamento del terreno e risparmiando tempo.
| Tipo di secchio | Vantaggi | Applicazioni |
|---|---|---|
| Uso generale | Aumenta la produttività per gli scavi quotidiani | Scavo di terreno soffice |
| Per impieghi gravosi | Gestisce materiali duri e abrasivi | Terreno roccioso o duro |
| Scavo di trincee | Consente uno scavo preciso, con minore spostamento del terreno | Irrigazione, installazione di condotte |
| Inclinazione | Migliora la classificazione e il livellamento | Preparazione del sito |
Le benne specializzate migliorano l'efficienza operativa. Si riduce il lavoro manuale e si ottengono risultati più puliti. Ad esempio, quando si installa un nuovo impianto di irrigazione, è possibile utilizzare una benna da scavo per scavare trincee dritte e strette. Questo metodo mantiene il giardino in ordine e riduce al minimo i disagi. Per ulteriori suggerimenti sulla scelta della benna, visitare il sito Per i professionisti delle costruzioni o sfoglia i post su Instagram.
Suggerimento: adatta sempre le dimensioni e il tipo di secchio alle condizioni del terreno e agli obiettivi del progetto.
Le lame livellatrici aiutano a livellare con precisione terreno, ghiaia o zolle erbose. È possibile preparare superfici lisce per prati, patii o aiuole. L'ampio design delle lame livellatrici copre rapidamente ampie aree, riducendo i tempi di rastrellatura manuale da diverse ore a poche. Questo accessorio è ideale per creare terreni uniformi e modellare pendenze dolci.
Una benna livellatrice trasforma la preparazione del terreno. Su un lotto di un quarto di acro, puoi ridurre il tempo di rastrellatura manuale da 8-10 ore a circa 2-3 ore. Per le migliori pratiche, consulta Suggerimenti per la classificazione di Equipment World e segui #gradingblade su Cinguettio.
Trivelle e trapani semplificano notevolmente la semina e la preparazione del terreno. È possibile praticare rapidamente fori per bulbi, alberi o pali di recinzione. Le trivelle aiutano anche a mescolare uniformemente compost e ammendanti, migliorando la qualità del terreno. È possibile arieggiare il terreno compattato, migliorando il drenaggio e favorendo la salute delle radici. Le trivelle allentano il terreno attorno alle erbacce, facilitandone la rimozione.
Ad esempio, quando si pianta una fila di arbusti, è possibile utilizzare una trivella idraulica per praticare fori uniformi. Questo metodo fa risparmiare tempo e garantisce a ogni pianta le condizioni giuste per lo sviluppo delle radici. Per ulteriori consigli, visita Rivista di gestione del paesaggio o esplora #augerdrill su Instagram.
Nota: ispezionare sempre la trivella prima dell'uso e adattare le dimensioni della trivella alle proprie esigenze di semina.
| Tipo di allegato | Scopo | Vantaggi |
|---|---|---|
| Secchi | Spostare grandi volumi di materiale | Forme versatili per diverse attività di scavo |
| Benna livellatrice | Livellare il terreno e creare superfici lisce | Copertura rapida, ideale per prati e aiuole |
| Trivella | Praticare i fori per la semina o post | Risultati costanti e ad alta velocità |
| Rastrello | Rompere e rimuovere i detriti | Superficie pulita per la costruzione |
Scegliendo l'accessorio giusto per il tuo miniescavatore potrai svolgere i lavori di giardinaggio in modo efficiente e con risultati professionali.
Quando devi liberare il tuo giardino da detriti, erbacce o cespugli indesiderati, pinze e rastrelli diventano accessori essenziali per il tuo miniescavatore. Questi strumenti ti aiutano a gestire le attività di pulizia con velocità e precisione, rendendo i tuoi progetti di giardinaggio più efficienti.
Le rampine ti permettono di afferrare e sollevare materiali pesanti, come tronchi, rami e grandi cumuli di sterpaglia. Puoi spostare facilmente questi oggetti fuori dall'area di lavoro senza sforzarti o rischiare lesioni. La forte presa di un accessorio a pinza assicura che anche i detriti di forma irregolare vengano rimossi in una sola passata. Questo ti fa risparmiare tempo e riduce la necessità di lavoro manuale.
Le pinze rastrello, a volte chiamate rastrelli per radici o rastrelli per cespugli, hanno uno scopo leggermente diverso. Si usano per rimuovere detriti, piccoli rami e fitto sottobosco. Il loro design consente di setacciare il terreno, raccogliendo materiale indesiderato e lasciandolo per lo più indisturbato. Questa caratteristica è particolarmente utile quando si desidera preparare un sito per la semina o la posa di un manto erboso. Si evita un'eccessiva interruzione del terreno, contribuendo a preservare la salute delle aiuole.
Suggerimento: usa un rastrello con pinza per raccogliere foglie, ramoscelli e radici superficiali prima di iniziare nuovi progetti di giardinaggio. Questo passaggio crea una base pulita per la piantumazione o la costruzione.
Ecco un confronto tra il modo in cui le pinze e i rastrelli aiutano nelle comuni attività di pulizia del giardino:
| Allegato | Ideale per | Vantaggio chiave | Disturbo del suolo |
|---|---|---|---|
| Rampino | Tronchi, rami grandi, detriti pesanti | Sollevamento e rimozione di carichi pesanti efficienti | Minimo |
| Rastrello a pinza | Pennello, detriti sciolti, radici superficiali | Pulizia del sito e preparazione del terreno | Molto basso |
Puoi anche usare questi accessori per rompere il terreno compatto o rimuovere il vecchio pacciame. Quando ti trovi di fronte a zone invase dalla vegetazione, una pinza rastrello ti aiuta a estirpare le erbacce ostinate e le radici aggrovigliate. Questo rende più facile recuperare le parti trascurate del tuo giardino.
Molti proprietari di casa scoprono che l'uso di pinze e rastrelli riduce di oltre la metà il tempo dedicato alla pulizia manuale. Ciò che richiederebbe ore con un rastrello e una carriola può essere completato in una frazione del tempo. Per ulteriori suggerimenti sull'utilizzo di questi accessori, è possibile consultare le risorse di Rivista di gestione del paesaggio oppure segui #excavatorattachments sui social media per esempi concreti.
Nota: ispezionare sempre gli accessori prima dell'uso. Verificare che non vi siano denti piegati o bulloni allentati per garantire un funzionamento sicuro ed efficace.
La scelta dell'accessorio giusto per la pulizia dipende dal tipo e dalla quantità di detriti presenti nel giardino. Se si hanno principalmente rami e tronchi di grandi dimensioni, una pinza è la soluzione migliore. Per una pulizia più leggera di cespugli e superfici, una pinza a rastrello offre risultati migliori. Scegliendo l'attrezzo più adatto al lavoro da svolgere, massimizzerai l'efficienza del tuo miniescavatore e manterrai il tuo giardino al meglio.
Con un miniescavatore puoi scavare trincee dritte per l'irrigazione o per i cavi in meno tempo rispetto ai metodi manuali. Inizia con posizionare la macchina ad un'altezza produttiva, in linea con le sponde del tuo mezzo di trasporto. Rimuovi prima il terriccio superficiale per favorire la ricrescita in seguito. Inizia a scavare dalla parte superiore e procedi a strati verso il basso. Questa tecnica mantiene lo scavo uniforme e riduce l'alterazione del terreno.
“"Se utilizzati correttamente, gli escavatori compatti possono contribuire ad aumentare l'efficienza", afferma un responsabile nazionale dei prodotti e della formazione presso Takeuchi.
Una tipica trincea di 30 piedi per l'irrigazione del giardino potrebbe richiedere tre lavoratori a mano per un giorno intero. Con un miniescavatore, finisci in meno di due ore.
| Metodo | Tempo richiesto | Manodopera necessaria | Stima dei costi |
|---|---|---|---|
| Scavo manuale | 8 ore | 3 persone | Alto |
| Escavatore | 2 ore | 1 persona | Inferiore |
Per ulteriori suggerimenti sullo scavo, visitare Per i professionisti delle costruzioni o controlla #trenching su Instagram.
È possibile scavare rapidamente buche per piantare alberi e arbusti. Rimuovete prima lo strato superficiale di terra. Usate il secchio per creare buche alla giusta profondità e larghezza. Questo metodo aiuta le radici a stabilizzarsi e favorisce una crescita sana. Risparmierete tempo ed eviterete la fatica rispetto all'uso di una pala.
Si ottengono superfici lisce per prati e patii utilizzando un benna livellatrice che corrisponde alla larghezza del cingolo del tuo miniescavatore. Iniziare con una livellatura approssimativa per definire i contorni di base. Spostare solo un terzo della larghezza della benna per passata per un migliore controllo. Rastrellare il terreno in più passate fino a quando non risulta lavorabile.
Un prato di un quarto di acro può essere livellato in circa tre ore con un miniescavatore, rispetto a un giorno intero di lavoro manuale.
| Dimensione dell'area | Classificazione manuale | Livellamento dell'escavatore |
|---|---|---|
| 0,25 acri | 8 ore | 3 ore |
Per le tecniche di classificazione, vedere Mondo delle attrezzature o segui #grading su Cinguettio.
Si previene la compattazione del terreno riducendo al minimo i passaggi ripetuti sulla stessa area. Si mantiene una pendenza minima di 2% per il drenaggio lontano dagli edifici. Le benne basculanti aiutano a creare pendenze precise per il deflusso dell'acqua.
Per rimuovere ceppi e rocce in modo efficiente, segui questa procedura passo dopo passo:
Parcheggiare sempre l'escavatore su un terreno stabile e verificare la presenza di linee di servizio segnalate prima di scavare. Eseguire movimenti fluidi e controllati per proteggere l'impianto idraulico.
| Compito | Lavoro manuale | Tempo di escavazione |
|---|---|---|
| Rimozione del ceppo | 4 ore | 1 ora |
Trova più strategie di rimozione su Rivista di gestione del paesaggio oppure esplora #stumpremozione su Instagram.
Si eliminano le aree ricoperte di vegetazione utilizzando attacchi a rastrello o rampino Inizia raccogliendo detriti sciolti e radici superficiali Pettina il terreno per raccogliere materiale indesiderato mantenendo indisturbato il terreno Questo metodo prepara il tuo sito per la semina o la costruzione e consente di risparmiare ore rispetto alla pulizia manuale.
Suggerimento: ispezionare sempre gli accessori prima dell'uso per garantire un funzionamento sicuro.
Per ulteriori suggerimenti per la compensazione, visita Sezione paesaggistica di Houzz oppure controlla #landscapeclearing on Cinguettio.

Selezionare il mini escavatore giusto per il progetto del giardino può fare una differenza significativa sia in termini di efficienza che di risultati È necessario considerare diversi fattori prima di prendere la decisione La scelta giusta dipende dalla portata del progetto, dal tipo di terreno e dalle attività che si prevede di completare.
Dovresti iniziare valutando i requisiti principali del tuo progetto Pensa alle dimensioni del tuo giardino, al tipo di terreno e alle attività specifiche che vuoi svolgere, ad esempio, un piccolo cortile con percorsi stretti potrebbe richiedere un modello compatto, mentre uno spazio più ampio con esigenze di sollevamento pesanti potrebbe beneficiare di una macchina più robusta La tabella seguente delinea i fattori chiave per aiutarti a confrontare le opzioni:
| Fattore | Descrizione |
|---|---|
| Dimensioni e peso | Abbina il modello alle dimensioni del tuo progetto e controlla i limiti del tuo veicolo trainante. |
| Profondità e portata di scavo | Scegli un modello che soddisfi la profondità di scavo richiesta, solitamente tra 5 e 14 piedi. |
| Accessori e versatilità | Cerca modelli che supportino una varietà di allegati per diverse attività. |
| Potenza e prestazioni | Assicurati che il motore e l'impianto idraulico siano in grado di gestire il terreno e il carico di lavoro del tuo giardino. |
| Facilità d'uso | Seleziona un modello con controlli intuitivi per un funzionamento più sicuro ed efficiente. |
Suggerimento: considera sempre il ambito del tuo progetto, il tipo di terreno, e il vostro budget prima di prendere una decisione finale.
IL dimensioni e capacità di un miniescavatore influenza direttamente le sue prestazioni nel tuo giardino I micro modelli sotto 1 tonnellata funzionano meglio in spazi molto ristretti, come piccoli giardini urbani o aree ad accesso limitato Gli escavatori standard della gamma 1.3 ton gestiscono la maggior parte delle attività paesaggistiche residenziali, tra cui lo scavo, la classificazione e il sollevamento. I modelli più grandi, da 4 a 8 tonnellate, si adattano a progetti più grandi che richiedono scavi più profondi o sollevamenti più pesanti.
Dovresti abbinare le dimensioni della macchina alle esigenze del tuo progetto Se scegli un modello troppo piccolo, potresti avere difficoltà con terreni resistenti o materiali pesanti Se selezioni un modello troppo grande, potresti avere problemi a manovrare in spazi ristretti Valuta la profondità di scavo e la capacità di sollevamento necessarie per le tue attività per evitare di lavorare eccessivamente la macchina.
Compatibilità degli allegati è essenziale per massimizzare la versatilità del tuo miniescavatore Devi assicurarti che gli attacchi che intendi utilizzare come benne, o pinze, aumentino si adattino al modello scelto Controlla i seguenti punti:
Se non ti senti sicuro su quale modello o allegati scegliere, puoi consultare un team di vendita esperto Possono aiutarti a far corrispondere la macchina e gli strumenti giusti alle esigenze uniche del tuo giardino Per ulteriori indicazioni, puoi esplorare le risorse da Mondo delle attrezzature O Per i professionisti delle costruzioni.
Nota: un'attenta pianificazione e selezione ti aiuterà a ottenere i migliori risultati e a proteggere il tuo investimento.
Si utilizza un mini escavatore nel modo più efficiente quando si comprendono i controlli e si pianifica la sequenza di lavoro Prima di iniziare, contrassegnare le aree chiave con paletti o vernice spray La mappatura visiva aiuta a evitare confusione e mantiene organizzato il flusso di lavoro È necessario ispezionare regolarmente la tensione della pista La tensione corretta migliora la stabilità e la manovrabilità, che riduce l'usura.
Le macchine moderne offrono controlli user-friendly È possibile passare da un attacco all'altro rapidamente, il che consente di risparmiare tempo e aumentare la produttività Durante lo scavo, angolare correttamente il secchio e utilizzare diversi piccoli passaggi Questa tecnica ti offre una migliore precisione e ti aiuta a ottenere risultati più puliti Dovresti monitorare le metriche delle prestazioni, come i tempi di ciclo e l'efficienza del carburante, per identificare le aree di miglioramento.
Ecco una tabella delle best practice per i controlli operativi:
| Migliori pratiche | Descrizione |
|---|---|
| Pianifica le sequenze di lavoro | Contrassegna le aree e mappa visivamente il tuo flusso di lavoro. |
| Utilizza gli allegati ausiliari | Utilizzare gli allegati per aumentare la produttività e ridurre il lavoro manuale. |
| Mantenere una corretta tensione della pista | Ispezionare le tracce per stabilità e manovrabilità. |
| Usa scavatura efficiente | Secchio angolare e utilizzare piccoli passaggi per la precisione. |
| Ottimizzare il Consumo di Carburante | Ridurre il tempo di inattività e regolare i giri del motore. |
| Valutare le prestazioni | Monitorare i tempi di ciclo e l'utilizzo del carburante per migliorarli. |
Suggerimento: familiarizzare sempre con il layout di controllo prima di iniziare un nuovo progetto.
Spesso si affrontano sfide quando si lavora in aree di giardino ristrette È necessario manovrare il mini escavatore senza danneggiare le strutture o le piante vicine. Zero oscillazione della coda il design consente di operare in prossimità di pareti o recinzioni Si riduce il rischio di contatto accidentale Le macchine leggere esercitano una minore pressione al suolo, che protegge le superfici delicate.
Seguire questi passaggi per manovrare efficacemente in spazi ristretti:
Aumenti l'efficienza e riduci la possibilità di errori quando pianifichi le tue mosse Funzionalità di sicurezza, come il ribaltamento e la caduta della protezione degli oggetti, ti mantengono sicuro in aree ristrette Per ulteriori suggerimenti sulle manovre, puoi visitare Mondo delle attrezzature oppure segui #excavatoroperazione sui social media.
Vuoi proteggere le piante e il terreno esistenti durante il funzionamento del tuo mini escavatore Una pianificazione attenta ti aiuta a evitare danni inutili. Mappa le posizioni delle radici prima di scavare Usare attrezzature root-friendly, come macchine con cingoli stretti, per ridurre al minimo i disturbi del terreno Stabilire barriere protettive attorno alle aree sensibili per proteggerle da contatti accidentali.
Puoi utilizzare utensili manuali per una maggiore precisione quando lavori vicino a radici delicate Anche il tempismo dei tuoi lavori di ristrutturazione per evitare periodi di radici vulnerabili aiuta a preservare la salute delle piante Ecco alcune tecniche pratiche per ridurre al minimo il disturbo:
Nota: la protezione dell'ecosistema del tuo giardino garantisce un successo a lungo termine per i tuoi progetti paesaggistici.
Per ulteriori indicazioni sulla riduzione al minimo dei disturbi, puoi esplorare le risorse da Rivista di gestione del paesaggio oppure sfoglia #gardeningtips sui social media.
Gestire il carburante e il tempo in modo efficiente ti aiuta a ottenere il massimo dal tuo mini escavatore Puoi abbassare i costi operativi e finire i progetti di giardino più velocemente seguendo alcune strategie comprovate Una pianificazione intelligente e un funzionamento attento fanno una grande differenza nei tuoi risultati.
Dovresti iniziare ogni giornata con un piano chiaro Mappa i tuoi compiti e decidi l'ordine migliore per completarli Questo approccio riduce i movimenti inutili e risparmia carburante Quando sai esattamente dove scavare, valutare o cancellare, eviti di fare marcia indietro e passaggi ripetuti.
Ecco due strategie chiave che ti aiutano a ottimizzare l'utilizzo del carburante e la gestione del tempo:
| Strategia | Descrizione |
|---|---|
| Riduci il tempo inattivo | Spegnere l'escavatore quando non è in uso per risparmiare carburante. |
| Pianificazione | Ridurre al minimo i movimenti pianificando le sequenze di lavoro in modo efficace per ridurre il consumo di carburante. |
Puoi anche utilizzare questi consigli pratici per migliorare l'efficienza:
Suggerimento: tieni traccia del consumo giornaliero di carburante e del tempo impiegato in ciascuna attività Questo record ti aiuta a individuare i modelli e trovare nuovi modi per migliorare l'efficienza.
Puoi trovare ulteriori consigli sulla gestione del carburante e sul funzionamento delle apparecchiature su Mondo delle attrezzature E Per i professionisti delle costruzioni. Queste piattaforme offrono suggerimenti di esperti ed esempi reali di operatori esperti.
Una gestione efficiente del carburante e del tempo non solo consente di risparmiare denaro ma riduce anche l'impatto ambientale, Si finiscono i progetti più velocemente e mantenere il vostro giardino al suo meglio.

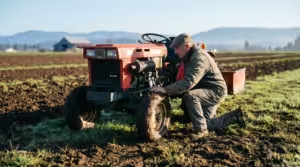
Prendersi cura del mini escavatore garantisce prestazioni affidabili e ne prolunga la durata È possibile mantenere l'attrezzatura in ottime condizioni seguendo le routine quotidiane e settimanali, pulendola e conservandola correttamente e risolvendo i problemi man mano che si presentano.
Dovresti ispezionare il tuo mini escavatore ogni giorno prima di iniziare il lavoro Controlla i livelli dei fluidi, esamina le connessioni e assicurati che gli attacchi siano ben unti Questi semplici passaggi aiutano a prevenire guasti e a mantenere la macchina in funzione senza intoppi Le routine settimanali aggiungono un altro livello di protezione Ungi il cuscinetto dell'anello di rotazione, controlla la tensione della pista e ispeziona la cinghia di trasmissione L'attenzione regolare riduce l'usura ed evita costose riparazioni.
Ecco una tabella che riassume le attività di manutenzione essenziali:
| Frequenza | Attività di manutenzione | Descrizione |
|---|---|---|
| Quotidiano | Controllo del livello del fluido | Controllare il fluido idraulico, l'olio motore e il liquido di raffreddamento Ispezionare i collegamenti e gli attacchi di grasso. |
| Settimanale | Ungere e Controllare | Cuscinetto con anello di rotazione in grasso, controllare la tensione della pista e ispezionare la cinghia di trasmissione. |
Puoi anche beneficiare di controlli giornalieri sui livelli del fluido idraulico, sulle prestazioni del motore, sul sistema di cingoli, sui sistemi elettrici e sulle ispezioni degli attacchi Queste abitudini ti aiutano a individuare i problemi in anticipo e prolungare la durata della tua attrezzatura.
Suggerimento: imposta un promemoria sul telefono o sul calendario per la manutenzione settimanale La coerenza fa una grande differenza.
Dopo ogni progetto, è necessario pulire accuratamente il mini escavatore Rimuovere sporco e detriti da tutte le superfici Questo previene la corrosione e consente di individuare eventuali danni Scegli un luogo di stoccaggio appropriato Lo stoccaggio interno funziona meglio, ma è possibile utilizzare un telo traspirante se è necessario riporre la macchina all'esterno.
Seguire questi passaggi per una pulizia e una conservazione efficaci:
Nota: una corretta pulizia e conservazione riducono il rischio di ruggine e problemi meccanici Per ulteriori suggerimenti, visitare Mondo delle attrezzature O Per i professionisti delle costruzioni.
Se il mini escavatore riscontra problemi operativi, è possibile seguire alcuni passaggi per la risoluzione dei problemi Controllare i livelli dell'olio e sostituire l'olio lubrificante ogni 250 ore. Ispezionare il sistema idraulico per la contaminazione dell'olio e l'usura della pompa Affrontare i guasti elettrici controllando i collegamenti della batteria e i fusibili Una corretta manutenzione consente di evitare surriscaldamenti e perdite di potenza.
È possibile utilizzare questa lista di controllo quando sorgono problemi:
Callout: se non riesci a risolvere un problema, consulta un tecnico professionista o fai riferimento al manuale del tuo operatore per ricevere indicazioni.
Manutenzione regolare, pulizia accurata e risoluzione tempestiva dei problemi, tieni il tuo mini escavatore pronto per ogni progetto di giardino.

Potresti sentirti tentato di spingere il tuo mini escavatore oltre i suoi limiti, soprattutto quando vuoi finire un progetto velocemente Il sovralavoro della macchina può portare a guasti e riparazioni costose Dovresti sempre controllare il manuale operativo per i limiti di carico ed evitare di superarli Quando si tenta di sollevare o spostare più del peso consigliato, si rischia di danneggiare l'impianto idraulico e altri componenti.
È inoltre necessario prestare attenzione al terreno Se si guida troppo velocemente su un terreno irregolare, si aumenta la possibilità di ribaltamento o perdita di controllo Rallentare e valutare l'area prima di andare avanti Sempre fissare correttamente i carichi ed evitare di operare oltre la capacità della macchina.
Suggerimento: fai pause regolari durante le attività lunghe Questo aiuta a prevenire il surriscaldamento e prolunga la durata della tua attrezzatura.
La sicurezza dovrebbe sempre essere la tua massima priorità quando si utilizza un mini escavatore Molti incidenti accadono perché gli operatori ignorano i protocolli di sicurezza di base È necessario indossare l'attrezzatura protettiva giusta, come un cappello rigido, un giubbotto ad alta visibilità e stivali con punta d'acciaio Prima di iniziare, ispezionare l'area per pericoli come linee elettriche aeree o servizi sotterranei.
Dovresti fare una lista di controllo prima di trasportare l'escavatore Questo ti assicura di fissare la macchina ed evitare incidenti durante il carico e lo scarico, familiarizza sempre con le norme di sicurezza e seguile da vicino Se noti segni di usura o danni, fermati e ispeziona l'attrezzatura prima di continuare.
Ecco alcuni errori comuni di sicurezza da evitare:
Nota: la consapevolezza della situazione protegge te e gli altri sul sito di lavoro.
L'utilizzo dell'attacco sbagliato per un'attività può rallentarti e danneggiare il tuo miniescavatore È necessario abbinare ogni attacco al lavoro da svolgere Ad esempio, l'utilizzo di una benna generica per lo scavo può comportare linee irregolari e uno sforzo sprecato Controlla sempre che l'attacco si adatti alle specifiche e alla capacità idraulica della tua macchina.
È necessario ispezionare gli attacchi prima di ogni utilizzo Cercare denti piegati, bulloni allentati o segni di usura Se si utilizza un attacco danneggiato, si rischia di ferirsi e ridurre l'efficienza Conservare un registro di quali allegati si utilizzano per ogni progetto Questo aiuta a pianificare le attività future ed evitare di ripetere gli errori.
| Errore | Impatto | Prevenzione |
|---|---|---|
| Tipo di attacco sbagliato | Ridotta efficienza | Abbina l'allegato all'attività |
| Attaccamento danneggiato | Rischio sicurezza, scarsi risultati | Ispezionare prima dell'uso |
| Vestibilità impropria | Danni all'attrezzatura | Verifica compatibilità |
Suggerimento: consultare il manuale dell'operatore per gli allegati consigliati e le linee guida sull'utilizzo.
Puoi trovare ulteriori consigli operativi e di sicurezza su Per i professionisti delle costruzioni E Mondo delle attrezzature.
Potresti sentirti tentato di saltare la manutenzione regolare quando il tuo mini escavatore sembra funzionare senza intoppi Tuttavia, trascurare queste attività essenziali può portare a guasti imprevisti, riparazioni costose e persino rischi per la sicurezza Una manutenzione costante mantiene la tua macchina affidabile e ne prolunga la durata.
Perché la manutenzione è importante
I controlli di routine consentono di individuare piccoli problemi prima che diventino problemi importanti, ad esempio, un basso fluido idraulico può causare prestazioni lente o danneggiare il sistema Filtri dell'aria sporca riducono l'efficienza del motore e aumentano il consumo di carburante Le piste usurate o i bulloni allentati possono influire sulla stabilità e sulla sicurezza.
Mancia: Imposta un promemoria sul telefono o sul calendario per i controlli di manutenzione giornalieri e settimanali La coerenza previene costose sorprese.
Compiti di manutenzione comuni che non dovresti mai saltare
Conseguenze della manutenzione del salto
Rischi di più che un semplice tempo di inattività quando ignori la manutenzione La tabella seguente mostra il potenziale impatto:
| Attività saltata | Possibile Conseguenza | Costo di riparazione stimato* |
|---|---|---|
| Ignorare i controlli dei fluidi | Guasto idraulico | 1TP1,000TP4T5,00000 |
| Saltare la lubrificazione | Usura prematura sulle articolazioni | $500, $2,0000 |
| Non pulire i filtri | Danni al motore, scarso utilizzo di carburante | $800, $3,0000 |
| Bulloni allentati | Instabilità dell'attrezzatura | $200, $1,0000 |
*Stime basate sulle medie del settore Per maggiori dettagli, vedere Equipaggiamento Manutenzione Mondiale.
Come costruire una routine di manutenzione
Nota: Puoi trovare liste di controllo e guide di manutenzione di esempio da fonti attendibili come Per i professionisti delle costruzioni.
Una manutenzione regolare non protegge solo il tuo investimento Garantisce inoltre che il tuo mini escavatore funzioni in modo sicuro ed efficiente ogni volta che inizi un nuovo progetto di giardino.
Puoi ottenere risultati migliori nei tuoi progetti di giardino pianificando il flusso di lavoro prima di iniziare Inizia contrassegnando le aree chiave con paletti o vernice spray La mappatura visiva ti aiuta a organizzare le tue attività ed evitare confusione Dovresti suddividere il tuo progetto in passaggi chiari Assegna a ogni passaggio un ordine specifico per massimizzare l'efficienza.
Considera questi suggerimenti pratici per la pianificazione del flusso di lavoro:
Suggerimento: tenere un registro giornaliero dei tuoi progressi ti aiuta a identificare i modelli e migliorare i flussi di lavoro futuri.
Un flusso di lavoro ben pianificato riduce il tempo e l'energia sprecati Si terminano le attività più velocemente ed evitano movimenti inutili Per ulteriori consigli sulla pianificazione del flusso di lavoro, è possibile visitare Per i professionisti delle costruzioni oppure segui #excavatorworkflow sui social media.
Puoi sbloccare il pieno potenziale del tuo mini escavatore utilizzando le tecniche e gli accessori giusti Seleziona gli allegati che corrispondono alle tue attività specifiche in giardino Ad esempio, utilizza una lama di classificazione per livellare il terreno o una coclea per praticare fori di semina Cambia gli accessori secondo necessità per evitare ritardi.
Ecco una tabella che mostra come diversi allegati possono aumentare la tua efficienza:
| Allegato | Compito | Guadagno di efficienza |
|---|---|---|
| Lama di classificazione | Terreno livellante | Copre rapidamente vaste aree |
| Trivella | Foratura dei fori | Profondità uniforme, meno lavoro manuale |
| Rampino | Rimozione dei detriti | Gestisce facilmente materiali pesanti |
| Benna da scavo | Scavare trincee | Linee precise e rette |
Dovresti anche regolare le tue tecniche operative in base all'attività Per scavare, usa più piccoli passaggi invece di un taglio profondo Questo metodo protegge la macchina e migliora la precisione Valuta regolarmente le tue prestazioni monitorando l'uso di carburante e i tempi di ciclo Piccole regolazioni possono portare a miglioramenti significativi.
Nota: l'uso efficiente di allegati e tecniche ti aiuta a completare i progetti con risultati professionali.
Potreste incontrare situazioni in cui è necessario un aiuto professionale Compiti complessi, come lo scavo profondo vicino a linee di servizio o la costruzione di grandi muri di sostegno, richiedono competenze specializzate Se notate problemi meccanici persistenti o problemi di sicurezza, contattate un tecnico certificato.
Considera l'idea di chiamare un professionista quando:
La sicurezza e la conformità contano In caso di dubbio, consulta un esperto per proteggere il tuo investimento e garantire che il tuo progetto di giardino soddisfi tutti i requisiti.
Puoi trovare professionisti qualificati attraverso directory di appaltatori locali o piattaforme di settore come Mondo delle attrezzature E Rivista di gestione del paesaggio. La ricerca della consulenza di esperti ti aiuta a evitare errori costosi e garantisce il successo del tuo progetto di giardino.
Pronti a trasformare il vostro spazio esterno? Esplorare opzioni mini escavatore e contatta gli esperti del settore per ricevere indicazioni sul tuo prossimo progetto paesaggistico.

Dovresti leggere il manuale dell'operatore prima di iniziare Indossa un equipaggiamento di sicurezza, controlla la presenza di utenze sotterranee e ispeziona la macchina Tieni sempre gli astanti lontani dall'area di lavoro Per ulteriori consigli di sicurezza, visita La sicurezza degli scavi dell'OSHA.
È possibile utilizzare benne per scavare, lame di classificazione per livellare, coclee per piantare fori e pinze per la rimozione dei detriti Abbinare ogni attacco al compito specifico per ottenere i migliori risultati Verificare la compatibilità con la macchina prima dell'uso.
Dovresti ispezionare quotidianamente i livelli, i binari e gli accessori dei fluidi Completa settimanalmente un controllo approfondito, includendo l'ingrassaggio delle parti mobili e i filtri di pulizia Una manutenzione regolare previene guasti e prolunga la durata dell'attrezzatura.
Sì, puoi manovrare modelli compatti in aree strette I design con oscillazione a coda zero ti aiutano a lavorare vicino a pareti o recinzioni Pianifica sempre le tue mosse e usa cautela per evitare di danneggiare piante o strutture.
L'uso del carburante dipende dal modello e dal carico di lavoro La maggior parte dei mini escavatori consuma tra 1 e 2 galloni all'ora È possibile ridurre i costi del carburante riducendo al minimo il tempo di inattività e pianificando sequenze di lavoro efficienti.
| Dimensione del Modello (Tonnellate) | Utilizzo medio del carburante (gal/ora) |
|---|---|
| 1–2 | 1.0 |
| 3–5 | 1.5 |
| 6–8 | 2.0 |
Dovresti considerare le dimensioni del tuo giardino, la profondità di scavo necessaria e il peso dei materiali I modelli più piccoli si adattano a spazi ristretti e compiti leggeri I modelli più grandi gestiscono scavi più profondi e carichi più pesanti.
In primo luogo, controllare i livelli del fluido e le connessioni della batteria Ispezionare per eventuali danni visibili o perdite Se non è possibile identificare il problema, contattare un tecnico qualificato Tenere sempre il manuale dell'operatore nelle vicinanze per i passaggi di risoluzione dei problemi.
Suggerimento: tieni un registro di manutenzione per tenere traccia dei problemi e delle riparazioni Questo ti aiuta a individuare i modelli e prevenire guasti futuri.
Potresti aver bisogno di permessi per lo scavo, la classificazione o il lavoro vicino ai servizi pubblici Verifica con il tuo governo locale prima di iniziare I requisiti di autorizzazione variano in base alla posizione Per ulteriori informazioni, visita Governi locali USA.gov.


-1.png)