Email: [email protected] Whatsapp: +8618266768780

Email: [email protected] Whatsapp: +8618266768780

Small farm owners and ranchers often ask how to use a mini excavator for quick landscaping jobs, simple grading, and occasional stump removal. This beginner guide shows you safe, practical steps to get started, with clear references to standards and real-world workflows.
Before you turn the key, set yourself up for a safe day’s work. OSHA requires proper PPE and seat belt use on earthmoving equipment with ROPS. See the federal criteria for PPE fit and safe design in OSHA Subpart E 1926.95 (eCFR) and seat belt/ROPS requirements in OSHA 1926.602 (eCFR).
Here’s a simple pre‑operation checklist to use as a starting point. Confirm details against your operator’s manual.
| Area | What to check | Why it matters |
|---|---|---|
| Visual walkaround | Tracks, rollers, idlers, sprockets; hydraulic hoses/cylinders; leaks; structural cracks | Catch problems early and avoid breakdowns or hazards |
| Fluids | Engine oil, coolant, hydraulic fluid, fuel levels and leaks | Prevent overheating, cavitation, or power loss |
| Safety systems | ROPS/FOPS integrity; seat belt present and functional; horn/lights/alarms | Stay protected and visible per OSHA standards |
| Controls test | Start, warm up; verify smooth boom/arm/bucket; blade up/down; swing and travel; emergency stop | Confirm responsive controls before working |
| Cab entry/exit | Three‑point contact; clean steps/handholds; clear floor | Reduce slip/fall risk |
Wear head, eye, and hand protection, plus high‑visibility outerwear where needed. If noise or dust is high, add hearing or respiratory protection per your hazard assessment, grounded in OSHA 1926.95.
Utility strikes are preventable. OSHA requires locating underground installations before opening an excavation; see OSHA 1926.651 (eCFR). Practically, place a request a few business days in advance using the 811 homeowner portal, then wait for positive responses and markings.
Respect the tolerance zone around marked facilities. The Common Ground Alliance Best Practices Guide (Version 21) notes that excavation within the tolerance zone should use non‑destructive methods (hand digging or vacuum) to expose the utility before mechanized equipment gets close. Learn the marking colors through CGA/APWA references; for example, see the CGA overview.
Start on level ground with no bystanders. Keep attachments low while traveling and move slowly. The left joystick typically manages boom movement and swing; the right joystick works the arm (stick) and bucket curl/dump. Travel levers or pedals move the machine forward and back and let you turn. The blade control raises and lowers the dozer blade for stability or light grading. Set the throttle low to moderate until your motions feel smooth.

Practice sequence:
Video support for visual learners: Beginner tutorial on mini digger controls (YouTube).
A common small‑farm task is shaping a gentle drainage slope away from structures. Many university extensions suggest about a 1–2% surface slope as a practical starting point, such as the Illinois Extension guidance on lawn site preparation and WVU Extension establishing a lawn. Always verify with local codes.
Example scenario: grading a 15′ × 30′ area to roughly 2% away from a shed. Walk the site, confirm all utilities are marked, and avoid tolerance zones. Identify high and low spots and plan the flow path. Position the machine on stable ground with the blade down for stability, and keep the attachment low during travel. Start at the high side and make light cuts with the bucket. Push soil toward the low side using the blade in small passes. Periodically check grade with a tight string line between stakes or a laser level to confirm fall (about 2 feet per 100 feet run for 2%), then adjust cuts and fills gradually. Move slowly, avoid jerking, and never undercut beneath the tracks. Finish with back‑dragging using the bucket or blade to smooth the surface and lightly compact as appropriate.
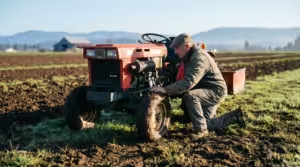
Disclosure: Qilu Machinery is our product. For a compact machine suitable for small farm landscaping tasks, a unit like the Qilu QL‑12Eco 1.2‑ton mini excavator can be used in this workflow. Keep use within the operator manual’s guidance.

Large or complex stumps near utilities or structures are best handled by professionals. University guidance often points to grinding as the fastest, safest option for bigger stumps; see Iowa State Extension. For small stumps in open areas, a mini excavator can help if you proceed cautiously.
Work in a circle around the stump from level, stable ground. Dig a shallow trench (roughly 1–2 feet deep) to expose lateral roots, staying a safe distance from the tracks. Peel back soil with controlled bucket motions rather than yanking. Sever small roots steadily and keep the counterweight uphill when practical. Never undermine beneath the tracks or undercut near the machine. As roots release, pry gently and lift small sections rather than the entire stump at once. Backfill the trench and tamp lightly when done. If terrain feels unstable at any point, stop and reassess. For larger or sensitive situations, consider a stump grinder or a professional; Colorado State PlantTalk: Stump Removal provides homeowner guidance.
For excavation hazards and trenching cautions (keep spoils and heavy equipment away from edges; never enter unprotected trenches), review CDC/NIOSH trenching and excavation safety.
Daily care keeps small machines ready for work. Clear debris from the undercarriage, check track tension, inspect hoses and cylinders for leaks, verify fluid levels, clean air screens, and grease pivot points per the manual.
If traction fades on soft ground, reduce cuts, keep loads low, use the blade for stability, and avoid sharp turns. When hydraulics feel hesitant, warm up the machine, confirm fluid levels, and operate controls smoothly. If the bucket bounces on hardpack, lighten pressure, shorten the stroke, and use back‑dragging for the final pass.
For more small‑farm landscaping context, see Qilu’s neutral articles:
If you’re planning light grading or simple landscaping tasks and want to compare compact models, you can explore the Qilu QL‑12Eco 1.2‑ton mini excavator and confirm capabilities in the operator’s manual.


-1.png)