Welcome to Shandong Qilu Industrial Co., Ltd

 English
 Arabic
 Bulgarian
 Bengali
 Czech
Czech
 Danish
 German
 Greek
Greek
 Spanish
 Finnish
 French
 Hindi
Hindi
 Croatian
 Hungarian
 Indonesian
 Italian
 Japanese
 Korean
 Lithuanian
 Dutch
Dutch
 Norwegian
 Polish
 Portuguese
 Romanian
 Russian
 Slovak
 Slovenian
 Swedish
 Thai
Thai
 Turkish
 Ukrainian
 Vietnamese
 Tagalog
 Malay
Malay
 Estonian
 Catalan
 Latvian
 Urdu
Urdu
 Serbian
 Persian
 Swahili
 Albanian
 Armenian
 Icelandic
 Bosnian
 Luxembourgish
 Afrikaans
English Arabic
Bulgarian
Bengali
Czech
Danish
German
Greek
Spanish
Finnish
French
Hindi
Croatian
Hungarian
Indonesian
Italian
Japanese
Korean
Lithuanian
Dutch
Norwegian
Polish
Portuguese
Romanian
Russian
Slovak
Slovenian
Swedish
Thai
Turkish
Ukrainian
Vietnamese
Tagalog
Malay
Estonian
Catalan
Latvian
Urdu
Serbian
Persian
Swahili
Albanian
Armenian
Icelandic
Bosnian
Luxembourgish
Afrikaans
Afrikaans
English Arabic
Bulgarian
Bengali
Czech
Danish
German
Greek
Spanish
Finnish
French
Hindi
Croatian
Hungarian
Indonesian
Italian
Japanese
Korean
Lithuanian
Dutch
Norwegian
Polish
Portuguese
Romanian
Russian
Slovak
Slovenian
Swedish
Thai
Turkish
Ukrainian
Vietnamese
Tagalog
Malay
Estonian
Catalan
Latvian
Urdu
Serbian
Persian
Swahili
Albanian
Armenian
Icelandic
Bosnian
Luxembourgish
Afrikaans
Lawn Mower Slope Safety and Cutting Height Planning for Large Properties
A practical guide to lawn mower slope safety and cutting height planning for large properties, with route planning, inspection checks, and operator stop conditions.
Lawn mower slope safety starts before the blades turn. A large property may look open and simple, but slope, damp grass, hidden holes, tree roots, drainage edges, and uneven cutting height can change a routine mowing day into a control problem. A safe mowing plan combines machine inspection, route choice, cutting height, operator judgment, and a clear decision to stop when terrain is wrong.
QiLu Machinery customers reviewing lawn mower options often compare cutting width, power, runtime, and comfort. Those details matter, but the property itself decides how the mower should be used. A machine that performs well on flat lawn still needs a different plan around slopes, ditches, wet grass, embankments, and tight tree lines.
This guide connects practical mowing routines with safety references such as CPSC lawn mower safety guidance and National Safety Council mower safety information. The aim is a clean cut without rushed turns, deck scalping, thrown debris, or unnecessary slope risk.
Walk the Property Before Setting Cutting Height
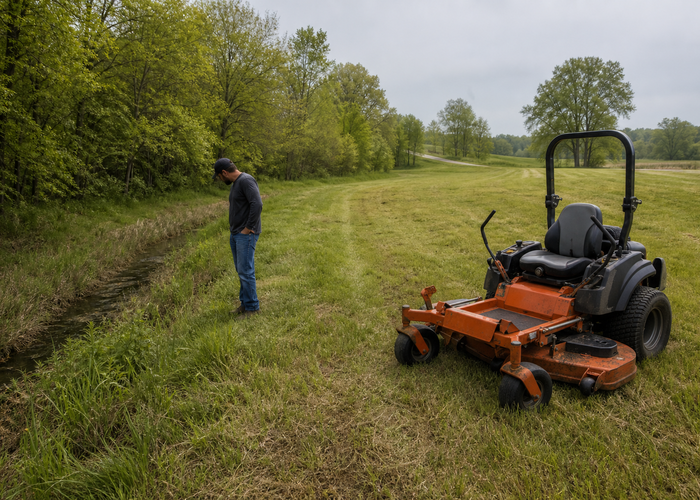
A property walk is faster than repairing a damaged deck or injured machine. Look for holes, loose stones, irrigation heads, toys, branches, wire, steep transitions, soft ground, and wet areas. Mark or remove hazards before the mower starts. If the grass hides the ground, treat the first pass as an inspection pass rather than a speed pass.
Cutting height should match grass condition, season, mower capability, and the desired finish. Cutting too low can scalp uneven ground, stress turf, expose obstacles, and make the mower work harder. A higher first pass may be the better choice when grass is tall, wet, or uneven.
Slope, Moisture, and Traction
Wet grass changes braking, steering, and traction. A slope that is manageable when dry may be unsafe after rain or irrigation. Operators should avoid mowing steep slopes that exceed the machine guidance and should never rely on momentum to cross a questionable area.
Route planning matters. Mow slopes according to the mower manual and terrain conditions, keep turns slow, avoid sudden direction changes, and leave a buffer near ponds, ditches, retaining walls, and drop-offs. If the route feels uncomfortable, the answer is to change the job, not to keep testing the machine.
Deck Inspection and Blade Condition
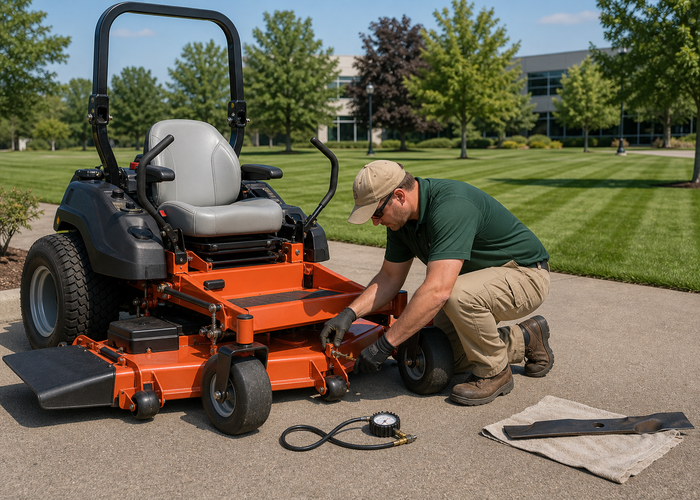
Before mowing, inspect blades, belt guards, discharge area, tire pressure, deck height, steering, brakes, and safety switches. The engine should be off before hands go near the deck. A dull blade tears grass and can increase load, while debris near the discharge can create thrown-object risk.
Large properties make small defects repeat for a long time. A loose deck wheel, uneven tire pressure, or damaged blade can leave visible patterns across the whole lawn. Correct the setup before the first long pass.
Create a Safe Mowing Pattern
A good mowing pattern reduces tight turns, keeps the operator away from hazards, and gives clippings a place to discharge safely. Start with perimeter passes where conditions are clear, then use long straight passes where possible. Avoid backing when a forward route is available.
Keep people and pets away from the mowing area. Thrown debris can travel farther than expected, especially near gravel drives, tree beds, and construction edges. If people enter the area, stop the blades and wait.
Cutting height should be adjusted as conditions change. Tall grass may need two passes. Wet areas may need to be skipped until they dry. Shaded areas may be cut differently from sunny open areas. The best finish comes from matching the mower to the property, not forcing one setting everywhere.
Record the height setting, weather, problem areas, and any objects found during the walk. Over time, the notes reveal recurring wet spots, rut-prone turns, or areas that need trimming instead of mowing.

When to Stop Mowing
Stop when the mower slides, the deck strikes an object, the engine bogs unusually, a belt smells hot, a blade vibration appears, bystanders enter the area, or the operator cannot see the ground ahead. Continuing usually makes the problem worse.
If the mower hits an object, shut down and inspect before restarting. Blade damage, bent spindles, loose guards, and deck cracks should be handled before the next pass.
Planning Resources and Field Notes
For internal planning, compare this routine with QiLu Machinery’s lawn mower category, all machinery products, and product application solutions pages. These pages help buyers connect mower choice to property size and route conditions.
For outside reading, keep CPSC mower safety guidance, National Safety Council mower safety tips, and OSHA safety resources close to training notes for property crews.
A Practical Mowing Checklist
Walk the property, remove debris, check slope conditions, set cutting height, inspect blades and deck, confirm tire pressure, plan discharge direction, keep bystanders away, mow slowly near edges, and stop for vibration or impact.
Management Notes for Daily Use
Managers should map recurring hazards: wet corners, steep banks, hidden rocks, low branches, and areas that need trimming. A simple map helps new operators avoid repeating old mistakes.
Weekly notes should include cutting height, weather, route problems, mower condition, and repairs needed. Good property care is built from patterns, not memory.
Field Scenario: How the Checklist Changes the Workday
Consider a crew that arrives with a clear schedule but only a vague plan. The machine is unloaded, the operator sees the work area, and everyone expects the job to begin immediately. Without a checklist, the first decision is usually speed: move the material, cut the grass, start the bore, or finish the first pass. With a checklist, the first decision is control. The operator confirms the surface, machine condition, people nearby, attachment condition, and stop points before committing the equipment.
That difference changes the whole day. A loose fitting is found before hydraulic pressure rises. A soft shoulder is marked before the machine turns across it. A bystander route is moved before the operator reverses. A poor discharge direction is corrected before debris reaches glass, vehicles, or workers. These are ordinary details, but ordinary details are where many job delays begin.
Good operators do not treat inspection as separate from production. They know the first clean setup is part of the work. If the route, attachment, ground, or crew communication is wrong, production will slow down later anyway. The checklist simply moves that pause to a safer moment.
Operator Communication and Stop Signals
Every job should have a simple stop signal. It may be a hand signal, radio call, horn signal, or verbal command, but everyone on site should understand it before the machine moves. The person operating the equipment should not have to guess whether a helper is asking for a small adjustment or an immediate stop.
Communication is especially important when visibility is limited. Buckets, mower decks, drilling masts, trailers, walls, shrubs, parked vehicles, and slopes all create blind spots. A helper who steps into the wrong area can become invisible at the worst time. Define where helpers stand, how they signal, and when they must leave the work zone.
Maintenance Clues During the Job
Some defects only appear under load. A hose may look fine when parked but rub when the attachment is lifted. A belt may sound normal at idle but smell hot during long operation. A tire may hold pressure in the shop but show sidewall stress on uneven ground. An access pad may look firm until vibration, water, or repeated passes expose weakness.
When a symptom appears, record it in plain language. Write what the machine was doing, where it was working, what attachment was connected, what the ground felt like, and what changed. These notes help a manager decide whether the issue is a machine repair, operator training point, route problem, or mismatch between equipment and job.
Training New Operators Without Overloading Them
New operators do not need a lecture on every possible failure. They need a repeatable routine they can remember under pressure. Start with five anchors: inspect the machine, inspect the work area, confirm people are clear, test movement slowly, and stop when anything changes. More detailed checks can be added as the operator gains experience.
Experienced operators also benefit from a written routine because familiarity can hide risk. A person who has completed the same job for years may skip the step that catches a changed ground condition, missing pin, dull blade, loose hose, or blocked access route. The checklist protects skill from becoming habit without attention.
Recordkeeping That Actually Helps
A useful record does not need to be long. Date, operator, machine, attachment, site condition, work performed, unusual observations, and follow-up action are enough for many crews. The important part is reviewing the record. If notes disappear into a binder that no one opens, the crew loses the value of its own experience.
Review patterns once a week. If the same attachment is difficult to connect, inspect the latch and storage method. If the same area becomes soft after rain, improve drainage or change the route. If operators keep reporting vibration, do not wait for a breakdown. Repeated notes are not complaints; they are early warnings.
Cost Control Through Better Setup
Better setup often saves money quietly. It reduces damaged turf, broken hoses, bent guards, wasted travel time, repeated site visits, and emergency repairs. It also protects the finished work. A job can be technically complete and still disappoint a customer if the machine left ruts, torn grass, scattered spoil, or damaged edges behind.
Machine choice matters, but machine discipline matters too. The best equipment package is one the crew can inspect, operate, service, and document consistently. That is why buyers should compare specifications with real work routines rather than only looking at headline power or capacity.
For more internal planning, compare this topic with QiLu Machinery product range, product application solutions, the machinery blog, and the relevant product category pages before choosing a machine package.
For outside references, keep general safety guidance from OSHA, NIOSH, the National Safety Council, and USDA NRCS available when training operators or reviewing site conditions.
Final Pre-Start Review
The final review should be short, spoken aloud if a crew is present, and tied to the actual job. Confirm the machine, attachment, route, ground condition, nearby people, emergency stop method, and first task. This last review often catches the one item that was assumed rather than checked.
For purchase and planning context, operators can also compare the current job with QiLu Machinery’s equipment application page. That page helps connect daily field use with broader machine selection, especially when one site uses loaders, mowers, tractors, excavators, and drilling equipment together.
A good crew learns from every job. If the setup worked, record why it worked. If the setup was slow, record what caused the delay. If the machine felt wrong, record the first moment it changed. These small notes help the next operator start with better information instead of repeating the same discovery.
After mowing, review the property while the cut pattern is still visible. Uneven color, scalped spots, rough turns, clumped grass, or missed wet areas all tell the crew something useful. The review should not be about blame. It should help the next mowing plan choose a better route, different cutting height, slower turn, or separate trimming method for problem areas.
Practical FAQ
How should this guide be used? Use it as a field planning aid together with the operator manual and local safety rules. The exact machine manual always controls service limits, fluids, attachment ratings, and shutdown steps.
What should stop the job? Stop for unstable handling, damaged guards, missing pins, leaking hoses, unclear ground conditions, bystanders inside the work area, or any warning that the operator cannot explain.
How can a small team keep the routine consistent? Keep a short checklist near the machine, assign one person to review notes weekly, and turn repeated observations into repair, training, or route-planning actions.
Lawn mower slope safety and cutting height planning protect both the operator and the finish. A careful route, correct height, and willingness to skip unsafe ground will produce better work across the season.