Welcome to Shandong Qilu Industrial Co., Ltd

 English
 Arabic
 Bulgarian
 Bengali
 Czech
Czech
 Danish
 German
 Greek
Greek
 Spanish
 Finnish
 French
 Hindi
Hindi
 Croatian
 Hungarian
 Indonesian
 Italian
 Japanese
 Korean
 Lithuanian
 Dutch
Dutch
 Norwegian
 Polish
 Portuguese
 Romanian
 Russian
 Slovak
 Slovenian
 Swedish
 Thai
Thai
 Turkish
 Ukrainian
 Vietnamese
 Tagalog
 Malay
Malay
 Estonian
 Catalan
 Latvian
 Urdu
Urdu
 Serbian
 Persian
 Swahili
 Albanian
 Armenian
 Icelandic
 Bosnian
 Luxembourgish
 Afrikaans
English Arabic
Bulgarian
Bengali
Czech
Danish
German
Greek
Spanish
Finnish
French
Hindi
Croatian
Hungarian
Indonesian
Italian
Japanese
Korean
Lithuanian
Dutch
Norwegian
Polish
Portuguese
Romanian
Russian
Slovak
Slovenian
Swedish
Thai
Turkish
Ukrainian
Vietnamese
Tagalog
Malay
Estonian
Catalan
Latvian
Urdu
Serbian
Persian
Swahili
Albanian
Armenian
Icelandic
Bosnian
Luxembourgish
Afrikaans
Afrikaans
English Arabic
Bulgarian
Bengali
Czech
Danish
German
Greek
Spanish
Finnish
French
Hindi
Croatian
Hungarian
Indonesian
Italian
Japanese
Korean
Lithuanian
Dutch
Norwegian
Polish
Portuguese
Romanian
Russian
Slovak
Slovenian
Swedish
Thai
Turkish
Ukrainian
Vietnamese
Tagalog
Malay
Estonian
Catalan
Latvian
Urdu
Serbian
Persian
Swahili
Albanian
Armenian
Icelandic
Bosnian
Luxembourgish
Afrikaans
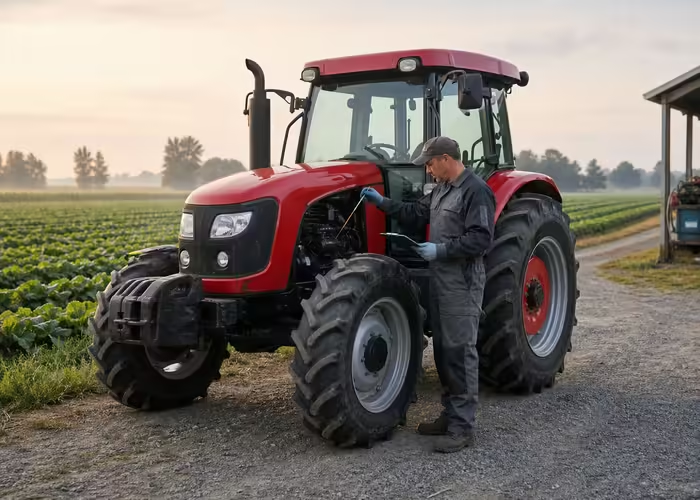
How to Build a Farm Tractor Daily Maintenance Checklist Before Field Work
A practical daily farm tractor maintenance checklist for pre-field inspections, covering fluids, tires, hitch hardware, hydraulics, operator station checks, and stop conditions.
A useful farm tractor maintenance checklist is less about making a tractor look tidy and more about catching small faults before they become field delays. On a busy farm morning, ten quiet minutes around the machine can protect the operator, the implement, and the crop schedule. This guide is written for owners and operators who use a farm tractor for loader work, mowing, hauling, tillage, and everyday utility jobs.
QiLu Machinery buyers often compare horsepower and attachments first, but the real ownership experience depends on repeatable checks. A tractor that starts, steers, stops, lifts, cools, and connects predictably is easier to use than a bigger machine that surprises the operator. The same habit also helps when matching a machine to tractor application solutions or deciding which implement should be used first on a long workday.
The following sections focus on practical decisions rather than brand claims. They combine field routines with public safety reminders from sources such as OSHA tractor operation safety guidance, NIOSH agricultural safety resources, and university extension guidance. Use the ideas as a working framework and always follow the specific operator manual for the tractor and implement in front of you.
Start With the Job, Not the Form
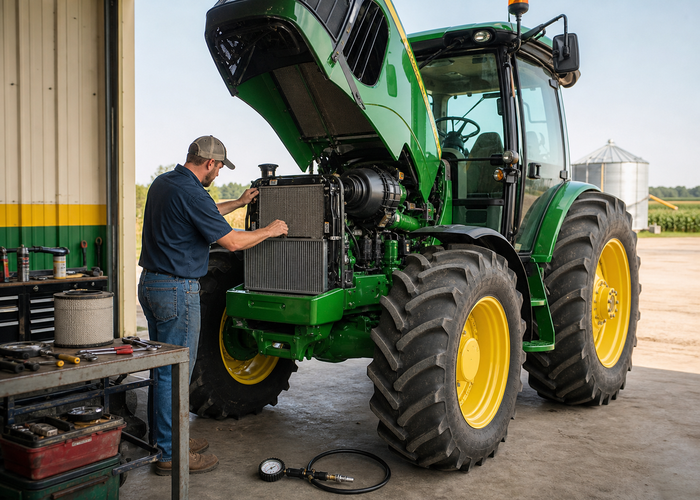
Begin with the ground around the tractor. Fresh oil spots, wet hydraulic couplers, coolant drips, cracked hoses, or a dusty fan screen tell a story before the operator climbs into the seat. Check under the engine, transmission, axle housings, loader valve, and implement connection points. If a leak is new, do not normalize it just because the tractor still runs.
Next check engine oil, coolant level, fuel level, air intake, radiator screen, belts, and battery terminals according to the operator manual. The point is not to rebuild the tractor every morning. The point is to notice the difference between normal wear and a problem that will become expensive after two hot hours in the field.
Tires deserve a slower look than they usually get. Uneven pressure changes steering, braking, traction, and loader stability. Cuts in the sidewall, missing valve caps, loose lug nuts, or fluid ballast imbalance can change how the tractor behaves under load. A compact utility tractor with a loader can feel stable empty and become nervous with a raised bucket.
Engine, Cooling, Tires, and Controls
Controls should be tested at idle before work begins. Steering, brakes, clutch, throttle, lights, horn, parking brake, seat switch, and dashboard warnings all belong in the pre-work habit. If a warning lamp appears, treat it as information, not background decoration. The best time to diagnose it is before the implement is moving.
Public safety agencies keep repeating the same message because farm tractors concentrate weight, power, rotating shafts, hydraulics, and human judgement in one machine. Penn State Extension tractor safety guidance and University of Minnesota Extension tractor safety material both stress that safe operation begins before the work starts. The best checklist is not a wall poster; it is a sequence the operator can actually complete beside the tractor.
For a purchase team, the same thinking also improves specification choices. A buyer reviewing all machinery products should ask how the tractor will be inspected, serviced, connected, and stored. A machine that fits the work but cannot be checked easily will invite skipped steps. That is where product selection and daily practice meet.
When the job involves multiple tools, walk the whole work chain. Look at the tractor, the implement, the travel route, the loading point, the slope, the gate width, and the turnaround space. If the task depends on a loader, PTO, or hydraulic coupler, include that system in the first inspection rather than waiting until the tractor is already in position.
Inspect the hitch and drawbar area before backing toward an implement. Keep the tractor square to the attachment, check pin size, confirm retaining clips, and look for bent holes or cracked welds. A poorly matched pin can fail under shock load even when it looked acceptable from the seat.
Hitch, Hydraulics, and Operator Station Checks
Hydraulic couplers should be clean before connection. Dust and grit shorten valve life and can make a loader or implement behave unevenly. Wipe couplers, relieve trapped pressure safely, route hoses away from pinch points, and confirm that the attachment lowers and raises smoothly before traveling away from the hookup area.
The operator station matters as much as the engine bay. Clear loose tools, bottles, phones, and twine from the platform. Adjust the seat, mirrors, and steering wheel before moving. Wear the seat belt when rollover protection is present and keep bystanders outside the work area, especially near gates, trailers, and material piles.
End the inspection by planning the first ten minutes of work. Decide where the tractor will turn, where the implement will be raised, where a loader bucket will stay low, and where a helper should stand if one is needed. A checklist becomes more valuable when it connects the machine condition to the actual job site.

For daily records, keep the form short. Date, tractor hours, operator initials, fuel, oil, coolant, tire condition, leaks, lights, brakes, hitch hardware, guard condition, and notes are enough for many small fleets. Long forms look impressive but often stop being used after a week.
The first fifty hours of ownership deserve extra attention because bolts seat, filters collect early debris, operators learn the controls, and attachments reveal fit problems. Record anything that repeats. A small seep, rubbing hose, or recurring warning light is easier to solve when the pattern is documented.
Maintenance should also match the environment. Dusty mowing, loader work in gravel, winter feeding, wet soil transport, and road travel create different wear. Clean the radiator screen more often in chaff, watch tire pressure more closely during loader work, and inspect lighting before any road movement.
A good daily checklist does not replace scheduled service. It supports it. Use the manufacturer intervals for oil, filters, hydraulic fluid, coolant, grease points, and transmission service. The daily walk-around catches visible changes between those intervals and gives the operator confidence that the tractor is ready for the next task.
Turn the Checklist Into a Field Routine
Good routines are simple enough to survive pressure. Keep the checklist near the key, toolbox, fuel point, or service bay. Keep spare hitch pins, lynch pins, gloves, shop towels, and tire pressure tools where they are actually used. For larger fleet planning, the same records can support service decisions around the QL 60HP tractor, the QL 904B tractor, and other equipment in a mixed yard.
The final test is whether the operator can explain the stop condition. If a leak, damaged guard, low tire, loose pin, warning light, unusual sound, or unstable load appears, the correct answer is to stop and fix the cause. University of Missouri farm machinery maintenance guidance and other extension publications frame maintenance as a prevention habit, not a paperwork exercise.
A farm tractor maintenance checklist should finish with a clear decision: ready, repair before work, or monitor after the job. Anything vague gets forgotten. A short written record, a calm walk-around, and the courage to stop when something looks wrong will protect more time than they consume.
Build the checklist around the way the tractor is actually used. A machine that spends most mornings with a mower needs more attention to debris, guards, PTO shielding, and cooling airflow. A tractor that carries pallets or gravel needs more tire and ballast checks. A tractor used for road travel needs lights, mirrors, brakes, reflectors, and hitch security checked with more discipline. One printed form can serve the whole yard, but the operator should circle the systems that match the day?s job.
The cooling system is a good example of why context matters. A radiator screen that looks acceptable on a clean morning can plug quickly in seed fluff, chaff, dry grass, or dusty orchard work. Overheating shortens work time and can damage parts that cost far more than a careful cleaning. Check the screen before work, watch the temperature gauge during work, and clean again after the first dusty pass if the job throws material toward the front of the tractor.
Fuel and fluid checks should be calm, clean, and consistent. Wipe around caps before opening them, use the correct fluid type, and avoid mixing containers that are not labeled. Low fluid is not the only concern. Milky oil, a burnt smell, foam, metal dust, or a sudden drop from yesterday?s level can point to a larger issue. The checklist should give the operator a place to write what changed, not just a box to tick.
Records, First 50 Hours, and Seasonal Conditions
Grease points are easy to postpone because the tractor may still move without immediate complaint. Loader pins, steering components, three-point hitch points, PTO shaft crosses, and implement pivots all wear faster when they run dry. A good morning routine identifies which points need daily grease and which follow longer intervals. Keep the grease gun clean, wipe fittings before use, and replace broken zerks instead of pretending they are optional.
The electrical walk-around should include more than headlamps. Brake lights, turn signals, work lights, dashboard warnings, beacon lights where used, reverse alarms where fitted, and battery cable condition all affect safe operation. On farms where tractors move near workers, livestock, driveways, or public roads, poor lighting can turn a normal trip into a communication problem. The operator should know whether people can see the tractor before the work begins.
End with a shutdown note as well as a startup note. After work, lower implements, set the brake, idle and cool down as instructed, look for new leaks, clean packed crop material, and record anything that should be repaired before the next shift. The best daily checklist forms a loop: inspect, operate, observe, record, and prepare the tractor for the next operator.
Field Use Notes
Before adopting the routine across a farm, test it for one week with the operators who actually use the machine. Ask which checks were helpful, which were unclear, and which tools were missing from the service area. A checklist that improves after operator feedback is more likely to survive harvest pressure, rainy days, and staff changes. If the form shows the same fault repeatedly, treat that pattern as maintenance evidence rather than blaming the operator for writing too much.
For managers, the most useful record is not a perfect archive but a pattern that can be acted on. If the same tire loses pressure, the same coupler leaks, the same operator reports unstable handling, or the same implement is difficult to attach, the farm has found a training or maintenance priority. Review the notes weekly, keep the language plain, and turn repeated observations into repairs, storage changes, or operator reminders before the busy season makes every small fault harder to fix.
For readers building a more complete tractor ownership routine, pair this daily checklist with QiLu Machinery’s farm tractor product category, the tractor application solutions page, and the QL 904B tractor page. For outside reference, compare the routine with OSHA tractor operation guidance, Penn State Extension tractor safety material, and University of Missouri machinery maintenance guidance.
Practical FAQ
How often should a tractor checklist be used? Use a short walk-around before every work period and a more detailed inspection when the job changes, when an implement is attached, after transport, or after the tractor has been operated by someone else. The point is consistency, not paperwork volume.
Stop Conditions That Should Not Be Ignored
What should stop the job immediately? Stop for active fluid leaks, brake problems, steering problems, damaged guards, missing hitch retainers, warning lights, unstable loads, unusual vibration, overheated systems, damaged tires, or any condition that makes the operator unsure. A delayed repair is cheaper than a damaged tractor or injured worker.
Should the same checklist be used for every implement? Keep a common tractor checklist, then add a short implement-specific section. Loader work, PTO work, mowing, road travel, and tillage expose different risks. A few focused lines are more useful than one generic form that tries to cover every possible situation.
What is the most common reason a good checklist fails? The checklist fails when it is stored away from the machine, written in language operators do not use, or made too long for the morning routine. Keep it visible, practical, and connected to real stop conditions.
For more practical machinery topics, review the QiLu Machinery blog and the broader product application solutions pages. A farm tractor earns its keep when it is selected for real work, checked before real work, and operated with enough discipline to come home ready for tomorrow.