Welcome to Shandong Qilu Industrial Co., Ltd

 English
 Arabic
 Bulgarian
 Bengali
 Czech
 Danish
 German
 Greek
 Spanish
 Finnish
 French
 Hindi
 Croatian
 Hungarian
 Indonesian
 Italian
 Japanese
 Korean
 Lithuanian
 Dutch
 Norwegian
 Polish
 Portuguese
 Romanian
 Russian
 Slovak
 Slovenian
 Swedish
 Thai
 Turkish
 Ukrainian
 Vietnamese
 Tagalog
 Malay
 Estonian
 Catalan
 Latvian
 Urdu
 Serbian
 Persian
 Swahili
 Albanian
 Armenian
 Icelandic
 Bosnian
 Luxembourgish
 Afrikaans
English Arabic
Bulgarian
Bengali
Czech
Danish
German
Greek
Spanish
Finnish
French
Hindi
Croatian
Hungarian
Indonesian
Italian
Japanese
Korean
Lithuanian
Dutch
Norwegian
Polish
Portuguese
Romanian
Russian
Slovak
Slovenian
Swedish
Thai
Turkish
Ukrainian
Vietnamese
Tagalog
Malay
Estonian
Catalan
Latvian
Urdu
Serbian
Persian
Swahili
Albanian
Armenian
Icelandic
Bosnian
Luxembourgish
Afrikaans
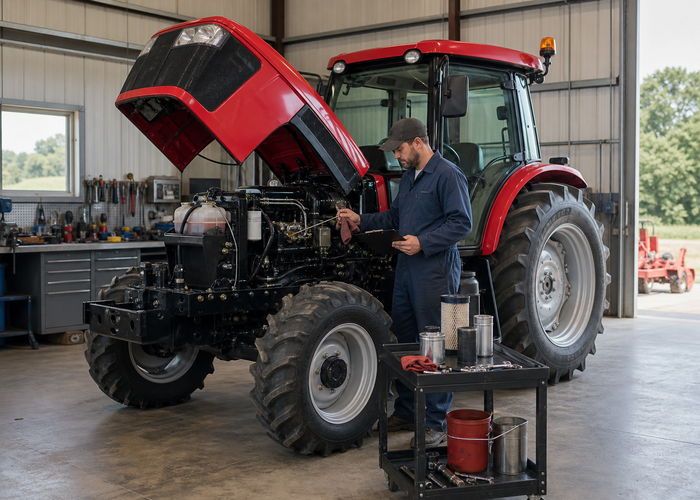
What to Inspect on a New Farm Tractor Before the First 50 Hours
A practical first 50 hours checklist for a new farm tractor, covering delivery checks, early operation, service records, operator training, and warning signs.
A new tractor first 50 hours checklist is where ownership habits become visible. The machine is new, but new does not mean ignore it. Early hours allow bolts to settle, hoses to find their natural route, filters to collect early particles, tires to show pressure changes, and operators to learn what normal sounds and control feel are like.
For buyers comparing machines in the QiLu Machinery tractor product category, the first 50 hours should be planned before delivery. A clear inspection routine protects the tractor, helps operators learn the machine, and gives the dealer or service team better information if something needs adjustment.
This guide is practical rather than dramatic. It combines pre-use checks, early service habits, and safety reminders from resources such as University of Missouri machinery maintenance guidance and OSHA agricultural tractor operation guidance.
Why the First 50 Hours Matter
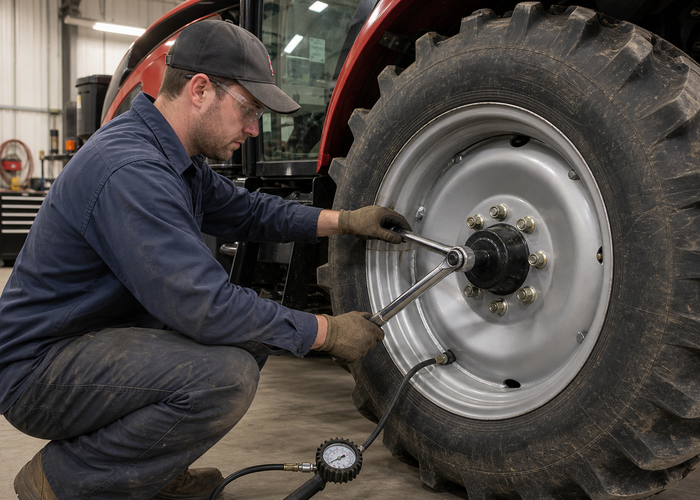
The first hours reveal how the tractor was set up, transported, delivered, and matched to its early jobs. A hose may rub only when the loader is fully raised. A wheel lug may need attention after the first loaded trips. A small seep may appear once the hydraulic system warms. These are not reasons to panic. They are reasons to inspect consistently.
The operator should learn the normal sound of the engine, transmission, hydraulics, brakes, and PTO at light load before the tractor is pushed hard. That makes later changes easier to notice. A new machine should not be treated as mysterious. It should become familiar through calm observation.
Delivery Day and Hour-Zero Checks
Before the tractor goes to work, record the model, serial number, delivery date, starting hours, tire size, ballast setup, fluid levels, attachment package, and any visible marks or shipping issues. Confirm that manuals, spare keys, warning labels, pins, guards, and basic tools are present. Photograph hose routing and attachment setup for later comparison.
Check tire pressure, wheel hardware, loader pins, hitch hardware, fluid levels, filters, battery terminals, lights, brakes, steering, and operator controls. If the tractor arrived with an implement attached, inspect that implement separately. Delivery excitement should not replace the first inspection.
The First 10 Hours: Light Work and Listening
Use the first hours for moderate jobs that let the operator learn the controls. Avoid jumping immediately into the heaviest loader work, steepest slopes, or longest road travel unless the manual and job truly require it. Early operation should confirm that steering, braking, lifting, shifting, cooling, and attachment control feel predictable.
After the first work period, park on level ground and inspect again. Look for leaks, loose clips, rubbing hoses, hot smells, abnormal tire marks, warning lights, and unusual noises. Write down what changed. A short note at hour 5 can save confusion at hour 45.
If the tractor will be used with multiple implements, compare those jobs against QiLu Machinery’s tractor application solutions and product application solutions pages. The first 50 hours are a good time to learn which attachments fit smoothly and which need a better setup routine.
The 10 to 50 Hour Inspection Routine
Between 10 and 50 hours, the checklist becomes more systematic. Inspect engine oil, coolant, air intake, radiator screen, fuel system, hydraulic oil level, transmission area, loader mounts, three-point hitch, PTO guard, drawbar, tire condition, wheel hardware, brake function, and lighting. Follow the exact manual for service intervals and approved fluids.
Do not assume every early service task means changing fluid. Some items are inspect, adjust, clean, grease, or retorque tasks. The tractor manual should decide the interval. The operator record should confirm the task was done, who did it, and what was found.
Grease points deserve attention during early ownership because dry or missed fittings show up quickly under loader and hitch work. Clean the fitting, grease until the manual condition is met, wipe excess, and note any fitting that will not accept grease. A blocked fitting is a repair item, not a reason to skip the point.
Safety references such as Penn State Extension tractor safety guidance and NIOSH farm injury prevention resources are helpful during early training because a new tractor can make inexperienced operators overconfident. New paint does not reduce rollover, PTO, hydraulic, or bystander risk.
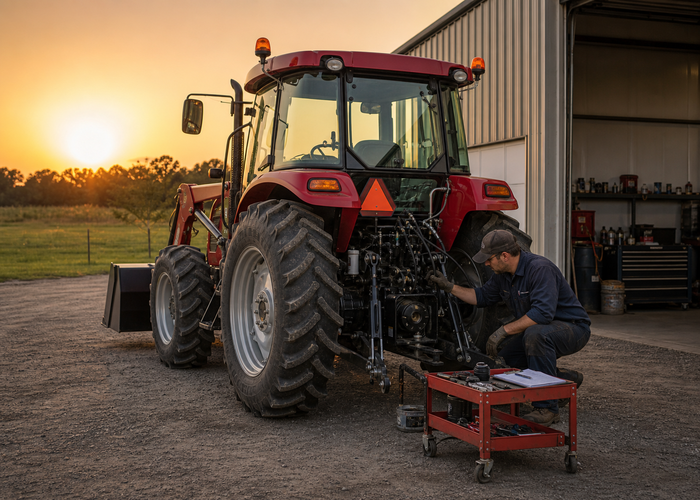
Operator Training During the Break-In Period
The first 50 hours should include operator training, not only mechanical inspection. Each operator should practice starting, stopping, parking, loader lowering, PTO shutdown, hitching, road travel signals, and emergency stop habits. If multiple people will use the tractor, keep one shared checklist so the machine is not treated differently every shift.
Train operators to report small changes without blame. A leak, noise, warning light, loose pin, or hot smell is not a personal failure. It is useful information. A farm that punishes reports will get silence; a farm that fixes reports will get better uptime.
Planning Resources and Link-Rich Field Notes
For internal planning, connect the first 50 hours checklist with the QL 60HP tractor, QL 904B tractor, and QiLu Machinery blog pages. These links help buyers move from a machine page to the practical routines that make ownership smoother.
For outside references, use the operator manual alongside University of Missouri machinery maintenance guidance, OSHA tractor operation guidance, and University of Minnesota tractor safety resources. The outside material reinforces inspection and safety thinking while the manual supplies the exact service details.
A Simple First 50 Hours Record
Record date, hour meter, operator, job, fluid observations, tire pressure, wheel hardware check, grease points, loader and hitch inspection, warning lights, unusual noise, service completed, and follow-up needed. Keep the record short enough to use and detailed enough to show patterns.
The first 50 hours set the tone for the next 500. A tractor that is inspected calmly, operated moderately, serviced by the manual, and documented clearly will teach the owner what normal looks like. That knowledge is worth more than any single checklist item.
Field Example: A Small Leak That Saves a Large Repair
During the first week, an operator may notice a faint oil film near a hydraulic fitting. The tractor still works, so the easy choice is to ignore it. The better choice is to clean the area, run the tractor briefly, and check whether the film returns. If the fitting needs adjustment, the repair is small. If ignored, the same leak may become a low-fluid problem, a contamination problem, or a hose failure during a busy workday.
The same principle applies to wheel hardware, battery terminals, loader pins, and hitch clips. Early ownership is full of small clues. The first 50 hours checklist gives those clues a place to land before they become expensive or unsafe.
Separating Normal Break-In From Trouble
Some early changes are normal. Paint may rub from hitch contact points, new hoses may settle into their route, and operators may need time to learn shift feel or hydraulic response. Other changes are not normal: repeated warning lights, fluid loss, strong burnt smells, metal flakes, abnormal vibration, brake pull, steering looseness, or a PTO guard that will not stay in position. The checklist should help operators separate learning from warning.
When in doubt, record the symptom and ask before continuing heavy work. A new tractor under warranty or dealer support is easier to protect when the owner can provide hour meter readings, job description, photos, and a clear timeline. Vague statements like it felt strange are less useful than notes about when, where, and under what load the symptom appeared.
What to Keep in the First 50 Hours Folder
Keep the delivery document, manual, service schedule, fluid specifications, attachment manuals, tire information, ballast notes, inspection sheets, photos, and service contacts together. Whether the folder is paper or digital matters less than whether operators can find it. A new tractor should not depend on one person remembering every detail.
Add a simple attachment setup sheet for each tool used during the first 50 hours. Include pin sizes, PTO or hydraulic requirements, hose route, ballast setup, tire pressure note, transport position, and known cautions. This turns early learning into a repeatable operating system.
Training Multiple Operators Without Confusion
If several people use the tractor, assign a consistent startup and shutdown routine. Different operators may have different habits, but the machine needs one standard for parking, lowering implements, cleaning screens, reporting faults, and storing keys. Consistency matters most when the tractor is new because everyone is still learning what normal looks like.
A short handover note helps between shifts. The departing operator can write hours, fuel, attachment used, anything cleaned, anything unusual, and the next task. This prevents the next person from discovering a low tire, missing pin, or warning light after the tractor is already at the field.
The First Service Conversation
When the first service interval arrives, bring the record rather than only the tractor. Ask about any repeated symptoms, confirm fluid and filter choices, review wheel hardware and loader mount checks, and discuss whether the early jobs match the tractor setup. The conversation is more productive when the service person can see the pattern of use.
After service, reset the routine. Record what was done, store receipts or notes, update the next service target, and tell every operator whether anything changed. The first 50 hours are not finished when the hour meter crosses a number. They are finished when the tractor has a stable inspection habit for the next season.
Management Notes for Daily Use
A practical article becomes more useful when it turns into a repeatable farm habit. Managers should decide who checks the machine, where notes are stored, when a concern is escalated, and which jobs require a second person. Without those simple rules, even a good checklist can become a private habit that disappears when the usual operator is away.
Keep the record short enough to use in the field. A useful note can include the date, tractor hours, attachment, ground condition, load, operator, and one sentence about anything unusual. Over time, these small notes show patterns: a recurring hose rub, a tire that loses pressure, an implement that is difficult to connect, or a field entrance that fails after every storm.
Review those notes before buying another attachment or changing the tractor setup. The best equipment decision is often hidden in ordinary records. If operators repeatedly mention slow cycles, rutting, heat, difficult hookup, or unstable handling, the farm has evidence for a better attachment match, different tire setup, route improvement, or additional operator training.
For a new tractor, management should also assign one person to own the first 50 hours record. That does not mean one person must operate the tractor every time. It means someone reviews the notes, checks whether follow-up items were closed, and confirms that early service tasks were completed. Clear ownership prevents small warnings from being lost between operators, shifts, and busy field days.
When the first 50 hours are complete, keep the same structure for the next service window. The farm already has a working record, trained operators, and a clearer sense of what the tractor sounds and feels like. That continuity is what turns a new machine into a dependable part of the operation.
This small discipline protects future uptime.
`nFor additional planning after the first service window, compare the tractor record with QiLu Machinery’s all machinery products, product application solutions, and tractor application solutions. For outside safety context, keep Penn State Extension tractor safety guidance and NIOSH agricultural safety resources close to the operator training notes.
Practical FAQ
How should an operator use this guide? Treat it as a field planning aid, not a substitute for the tractor or implement manual. The manual controls service intervals, safe limits, fluids, torque values, and attachment requirements for the exact machine.
What should stop the job? Stop when the tractor behaves differently than expected, when a guard or hose is damaged, when the ground condition changes, when a warning light appears, or when the operator cannot explain a noise, leak, vibration, or handling change.
Where should the guide be stored? Keep a printed copy or short version near the service bay, key storage, or implement shed. A checklist hidden in an office folder will not help the operator who is already at the gate.